
[SOLVED] Common Linux Boot Errors and How to Fix Them
Key Takeaways
- Most Linux boot failures originate from four areas: display initialization, GRUB corruption, kernel issues, and filesystem damage.
- GRUB problems are often recoverable with Boot Repair or manual reinstallation from a live environment.
- Kernel panics usually stem from incompatible drivers, faulty hardware, or damaged updates.
- Filesystem errors require immediate diagnostic action with tools like fsck and a backup before repairs.
- Not all systems use GRUB; alternatives such as systemd-boot, LILO, and EFI stub loaders may be present depending on firmware and distribution design choices.
From GRUB to Glory: Conquer Linux Boot Issues Like a Pro
Linux is a very reliable operating system no matter which flavor you go for. It’s not uncommon for a Linux server to have years of uptime, but like any technology, Linux is not infallible. It does break, and here are some of the most common issues I have experienced over the last 20 years in the IT Industry.
Do you have a specific Boot Error issue? Write in the comments and I will do my best to answer. Include the Linux Version and as many details as possible about the issue.
How Does the Linux Boot Process Work?
What happens first when a Linux system powers on?
The sequence begins with firmware initialization, where hardware is validated and the boot device is selected. This early phase ensures the system is ready to load its bootloader.

Step 1 – BIOS/UEFI Initialization:
- Power on your computer, and the Basic Input/Output System (BIOS) or its modern successor, Unified Extensible Firmware Interface (UEFI), takes over. This firmware is stored on a chip on your motherboard.
- A Power-On Self Test validates CPU, RAM, and storage.
- The firmware identifies available boot devices based on configured priority.
- UEFI systems typically use GPT partition tables and can chainload boot managers directly.
Step 2 – Boot Loader (GRUB 2):
GRUB 2 acts as the central handoff mechanism between the firmware and the Linux kernel. It loads the kernel, displays boot menus, and provides diagnostic options.
- Locates and loads the kernel (vmlinuz)
- Loads the initrd or initramfs image
- Optionally displays a menu for kernel and OS selection
- Passes kernel parameters and hands off control
Step 3 – Kernel Initialization:
Once loaded, the kernel configures hardware, loads critical drivers, and transitions from the temporary root filesystem to the primary one.
- Self-decompresses into memory
- Detects and initializes system hardware
- Mounts the initrd as a temporary environment
- Switches to the permanent root filesystem
Step 4 – Init System (systemd):
systemd orchestrates the entire operating environment, starting services, managing units, and preparing the system for user interaction.
- Launches as PID 1
- Manages dependencies and parallel startup
- Activates devices, mount points, services, and targets
- Starts display managers or terminal login sessions
Lets now take a deep dive into for of the most common boot issues experienced with Linux.
What Are the Most Common Linux Boot Errors and How Do You Fix Them?
Below are four high-frequency failure scenarios encountered across desktops, servers, and virtual machines.
#1: The Dreaded Blank Screen: When darkness descends upon your monitor
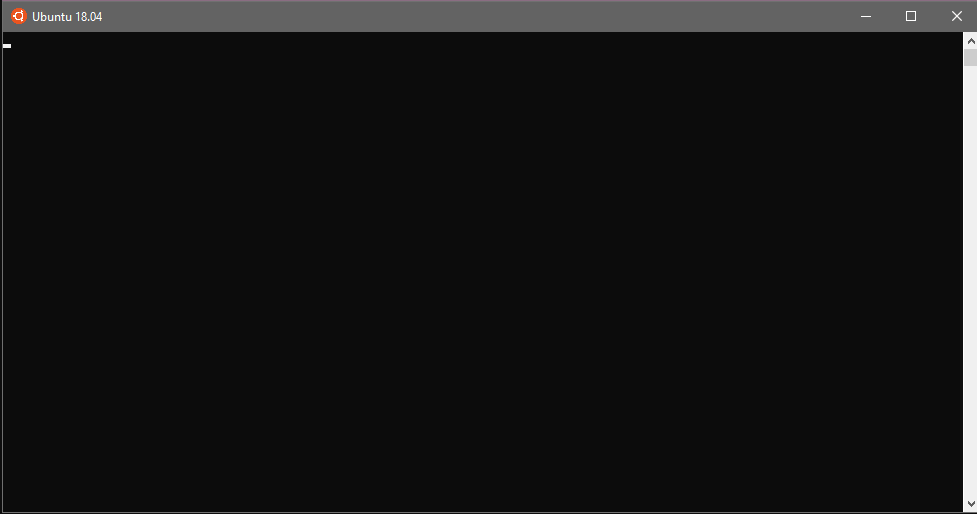
Short Answer:
Blank screens typically result from GPU initialization issues, firmware misconfiguration, or display connection faults.
Symptoms
- System powers on, fans spin, but no video appears.
- No GRUB menu or error messages.
How to Fix It
Check Basic Display Connectivity
Confirm HDMI/DP cables, monitor inputs, and power status.
Access BIOS/UEFI
If the display initializes for firmware only, inspect:
- Primary GPU settings
- Boot mode (UEFI vs. Legacy)
- CSM settings
- Secure Boot configurations
Use Recovery Mode
Most distributions provide a recovery kernel accessible via GRUB. This mode bypasses GPU acceleration and may help diagnose driver failures.
Validate Graphics Hardware
Try:
- Switching to integrated graphics
- Reseating the GPU
- Booting with the
nomodesetkernel parameter - Updating or reinstalling video drivers
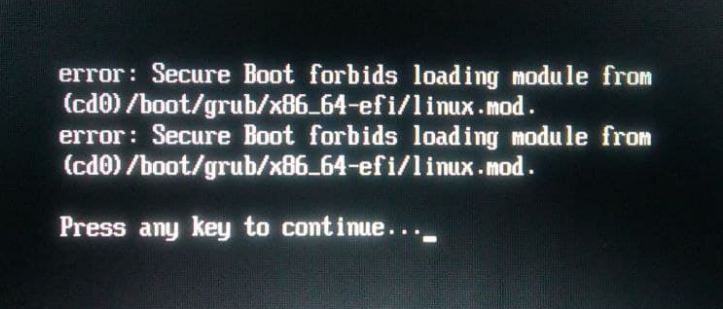
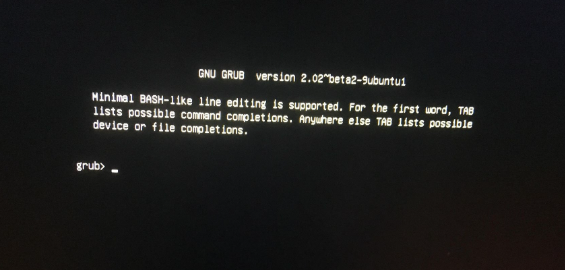
#2: The GRUB Mystery: Where did the boot menu go?
Short Answer:
GRUB corruption, overwritten boot sectors, and incorrect firmware settings are the usual culprits.
Symptoms
- Black screen with a blinking cursor
- “GRUB rescue>” prompt
- No boot menu appears
How to Fix It
Use Boot Repair (Most Common Solution)
Boot from a live USB and run Boot Repair to automatically repair:
- GRUB configuration
- Boot sector issues
- EFI partition inconsistencies
Manually Reinstall GRUB
Advanced users may:
- Boot into a live Linux environment
- Mount the root and EFI partitions
- Use
grub-installandupdate-grub
Check Firmware Boot Order
UEFI systems may default to Windows Boot Manager or another disk after updates or BIOS resets.
#3: The Kernel Panic Predicament: Linux’s Blue Screen of death
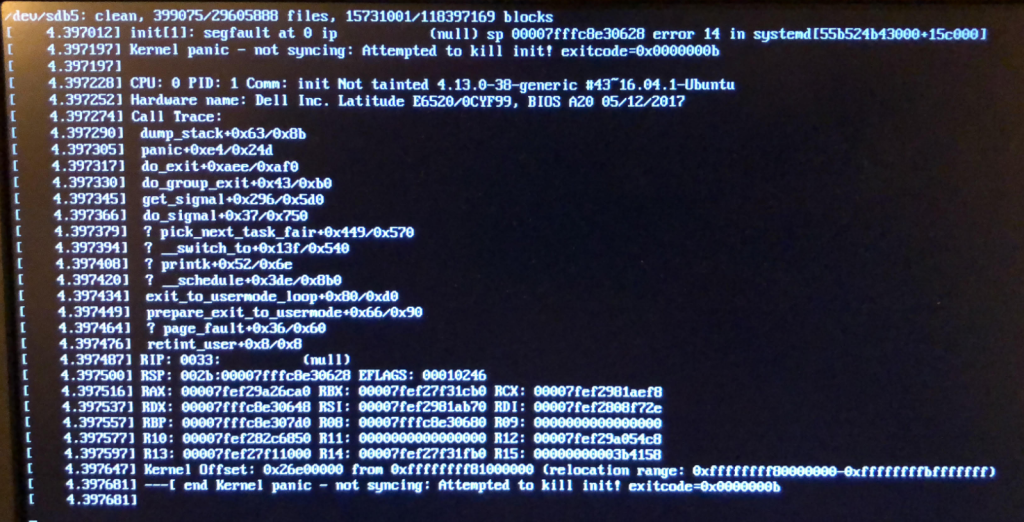
Short Answer:
A kernel panic occurs when the kernel encounters an unrecoverable fault, often caused by hardware, drivers, or incompatible kernel updates.
Symptoms
- Screen filled with stack traces
- Red text or freeze messages
- System unresponsive
How to Fix It
Review the On-Screen Panic Message
Look for references to modules, filesystems, or hardware drivers.
Boot with a Previous Kernel
GRUB typically stores multiple kernel versions. Select an older one known to be stable.
Investigate Hardware Compatibility
Common triggers include:
- Faulty RAM
- Unsupported RAID controllers
- Incorrect GPU drivers
- Corrupt initramfs
Rebuild or Update Drivers
Using a live USB, rebuild the initramfs or reinstall drivers such as NVIDIA, AMDGPU, or proprietary storage modules.
#4: The File System Fiasco: Data corruption and the boot blues
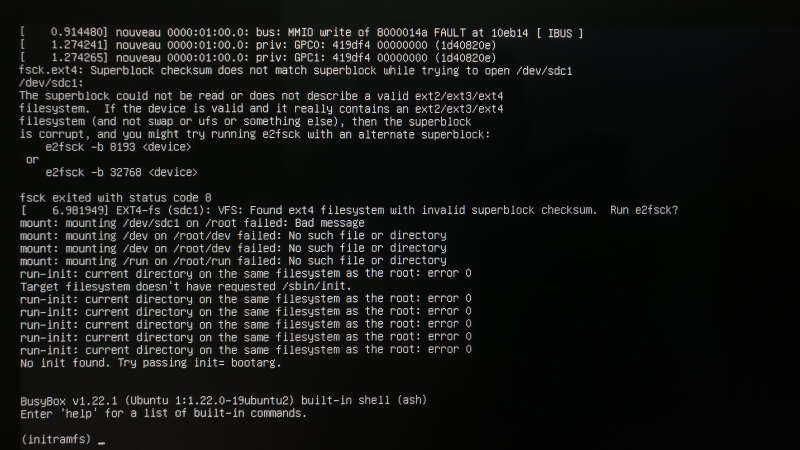
Short Answer:
Filesystem corruption frequently results from improper shutdowns, storage failures, or aging disks.
Symptoms
- Boot halts with “cannot mount root filesystem”
- Messages about journal corruption or missing superblocks
How to Fix It
Enter Recovery Mode
Use the recovery kernel to run fsck on affected partitions.
Use a Live Environment When Recovery Fails
Boot from USB and diagnose with:
fsckfor ext filesystemsxfs_repairfor XFSgpartedfor visual inspection
Back Up Before Repairing
If the system remains partially readable, back up immediately to avoid data loss during repair.
Remember, Your System Might Not Use GRUB
While GRUB is incredibly common and the default bootloader for many popular Linux distributions, it’s not universal. Here’s why:
- Alternatives Exist:
Other bootloaders are available and used in certain situations:
- LILO (Linux Loader):
An older bootloader, less flexible than GRUB, but still found in some systems. - systemd-boot:
A simpler bootloader integrated with the systemd init system, often favored in embedded systems or minimalist setups. - EFI stub loader:
Used on systems with UEFI firmware that can directly load the kernel without a separate bootloader.
- LILO (Linux Loader):
- Distribution Choices:
Some distributions might opt for a different bootloader due to:
- Specific Needs:
Embedded systems or specialized distributions may prefer a lightweight bootloader like systemd-boot. - Philosophy:
Distributions focused on simplicity or a particular init system might choose a corresponding bootloader.
- Specific Needs:
- User Preference:
Technically savvy users can always install and configure their preferred bootloader, even if it’s not the distribution’s default.
In Summary:
GRUB is very prevalent in the Linux world, especially for desktop distributions like Ubuntu, Fedora, and Debian.
However, it’s not the only player. The choice of bootloader can depend on the specific distribution, its design goals, the user’s preferences, and the system’s hardware environment.


Hi,
I have a problem with boot of a machine. – Asus A8N-Sli mobo / Opteron 144 CPU / 2GB RAM (4 x 512MB DDR-400).
It has 12 HDDs by 320GB each – 8 x SATA + 4 x PATA in RAID-5.
Running Debian-10 (Buster) amd64 (64-bit)
Initially (5+ years ago) I used it with LILO.
2 years ago I switched to GRUB due to known problems of LILO with many HDDs (diskmap) – 99 99 99 99 …
The problem with the machine appeared when I replaced one of the HDDs due ti HDD-fail.
Now the POSTs and hangs before stage-1 of GRUB!
– When I boot it from LAN (DHCP + TFTP + NFS), it boots the NFS-rooted Linux w/o problems.
– I reinstalled GRUB (grub-install /dev/sd[a,b,c,…]) on ALL the HDDs, but no change in behaviour!
– When I choose another HDD as a boot device (either in BIOS or via F8 /on-the-fly choice) – same unsuccess.
I suspect the BIOS (flash) problem and intend to re-flash the BIOS of the machine.
Another test might be to disconnect all the HDDs and to boot from different HDD.
Do you have an idea what the problem might be?
Best Regards,
Lazar
The hang after POST but before GRUB Stage 1 strongly indicates the BIOS is failing to hand off execution to the bootloader on the hard drive’s Master Boot Record (MBR).
I would check the following:
*1) Test Disk Isolation
Test to confirm the system can boot with a minimal disk configuration
*Power down server
*Disconnect the data cables from all 12 hard drives.
*Connect only one drive—ideally the first disk of your RAID array (/dev/sda).
*Power on the machine and attempt to boot.
If it boots successfully: This confirms the issue is related to the number of drives connected. The BIOS cannot handle all 12 at once in their current state. You can then proceed to add drives back one by one (powering down each time) to see at what point the boot process fails. This might reveal a secondary faulty drive or a hard limit in the BIOS (e.g., it hangs after 8 drives are connected).
If it still fails to boot: The problem could be with that specific drive, its cable, or the controller port. Power down and try again with a different single drive from the array. If it still fails with any single drive, the problem is more severe, and you should move on to the next step.
*2). Reset and Check BIOS Settings
If the isolation test is inconclusive, a BIOS configuration issue could be the cause.
*Enter the BIOS setup utility.
*Load Optimized Defaults to reset all settings to a known-good state. Save and exit to see if it boots (with only one drive connected).
If it still fails, re-enter the BIOS and carefully check settings related to the storage controllers. Ensure the PATA/SATA controllers are enabled and configured correctly (e.g., as “IDE” or “AHCI”, though for a RAID setup, it might have a specific “RAID” mode).
Disable any “Fast Boot” or “Quick Boot” options. This forces the BIOS to perform a more thorough hardware scan, which might provide more information on the screen where it hangs.
*3. Re-flash the BIOS (Higher Risk)
This should be your last resort, as a failed BIOS flash can permanently brick the motherboard.