
TL;DR
- Self-signed certificates encrypt traffic end-to-end — same crypto, different trust model.
- Generate with OpenSSL:
openssl req -x509 -newkey rsa:4096 -nodes -keyout key.pem -out cert.pem -days 365. - Install: drop into nginx / Apache config, restart the service.
- Browsers will warn — that’s expected. For internal tools, add the cert to the OS trust store; never bypass the warning on production.
What is creating a self-signed SSL certificate on Ubuntu?
An SSL/TLS certificate proves a server is who it says it is, and provides the keys for encrypting the traffic between client and server. A self-signed certificate is one you signed yourself — instead of a public CA (Let’s Encrypt, DigiCert) signing for you. The encryption is identical; the difference is purely about trust.
Use self-signed for: internal tools where you control the clients, local development, testing pipelines, network appliances on a private LAN. Don’t use them for: anything a public browser hits without help. The browser warning isn’t being mean — it’s correctly telling end users it can’t verify the identity. Production-facing services should always use Let’s Encrypt or another public CA.
Prerequisites
- Ubuntu (any LTS — commands identical on 22.04, 24.04, 26.04).
opensslinstalled (it is, by default).- A web server you want to enable TLS on — nginx or Apache covered below.
How to use this guide
The sections below walk through the practical commands and options. After the main content you’ll find a Verification block (sanity-check it actually worked), a Troubleshooting block (common error messages and what to do), and Related reading for follow-on topics.
Encrypting traffic is no longer optional for modern web development. Even for internal tools or testing environments, using HTTPS ensures that data moving between a browser and a server stays private. While public websites require certificates from a trusted Certificate Authority (CA) to avoid browser warnings, self-signed certificates provide the same technical encryption for local projects without the cost or setup of a third-party issuer.
Based on current 2026 security standards, this guide walks through building a reliable SSL setup using a 4096-bit RSA key on Ubuntu 24.04 LTS. We focus on a lean, manual configuration that gives you full control over your server’s security headers and redirection logic. This process is ideal for developers who need to mirror production security settings in a sandbox environment.
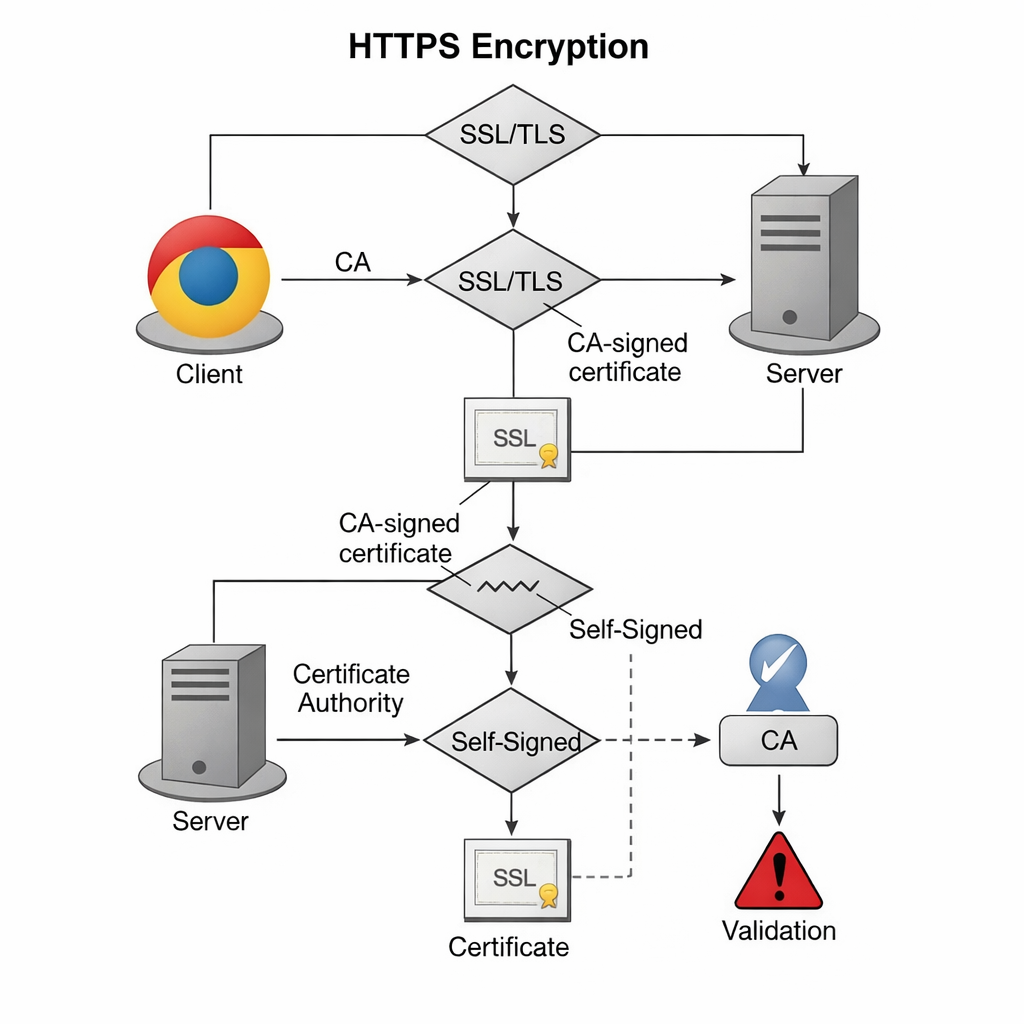
The Role of SSL/TLS
SSL (Secure Sockets Layer) and its successor, TLS (Transport Layer Security), create a secure tunnel for data. A certificate acts as a digital ID card.
| Feature | Self-Signed Certificate | CA-Signed Certificate |
| Encryption Level | Identical (e.g., AES-256) | Identical |
| Browser Trust | None (shows warning) | Full (shows padlock) |
| Cost | Free | Free (Let’s Encrypt) or Paid |
| Ideal Use Case | Local Dev / Internal Lab | Public Production Sites |
Step-by-Step Setup
1. Prepare the Environment
Ensure your system is updated and the necessary tools are installed. OpenSSL is the engine that handles the math behind your keys.
sudo apt update && sudo apt install apache2 openssl -y2. Generate the Certificate and Key
We use a single command to create a 4096-bit key. This is more durable than the older 2048-bit standard.
sudo openssl req -x509 -nodes -newkey rsa:4096 \
-keyout /etc/ssl/private/apache-selfsigned.key \
-out /etc/ssl/certs/apache-selfsigned.crt -days 365Key Parameters Explained:
-x509: Tells OpenSSL to create a self-signed certificate rather than a request.-nodes: Skips the password prompt. This allows Apache to start automatically after a reboot.rsa:4096: Sets the encryption strength.-days 365: The certificate expires in one year.
During this step, you will see a prompt for data. The Common Name is the most important field—enter your server’s IP address or local domain name.
3. Secure the Private Key
Permissions must be strict. If a third party gains access to your .key file, they can decrypt your traffic.
sudo chmod 600 /etc/ssl/private/apache-selfsigned.key4. Configure Apache for HTTPS
Edit the default SSL configuration file:
sudo nano /etc/apache2/sites-available/default-ssl.confUpdate these lines to point to your new files:
SSLEngine on
SSLCertificateFile /etc/ssl/certs/apache-selfsigned.crt
SSLCertificateKeyFile /etc/ssl/private/apache-selfsigned.key
5. Force HTTP to HTTPS Redirect
To make sure users don’t accidentally use the unencrypted site, edit 000-default.conf:
sudo nano /etc/apache2/sites-available/000-default.confAdd this line inside the <VirtualHost *:80> block:
Redirect permanent "/" "https://your_domain_or_ip/"6. Activate and Restart
Enable the modules and apply the changes:
sudo a2enmod ssl headers
sudo a2ensite default-ssl
sudo apache2ctl configtest
sudo systemctl restart apache2Advanced Configuration & Edge Cases
Performance: Key Size vs. Speed
While 4096-bit keys are more secure, they require more CPU power for the initial handshake than 2048-bit keys. In a high-traffic internal environment, monitor your CPU load.
Failure Mode: Certificate Expiry
If the certificate expires, your internal apps will stop connecting.
Fix: Set a calendar reminder 30 days before the 365-day mark to regenerate the files using the same steps.
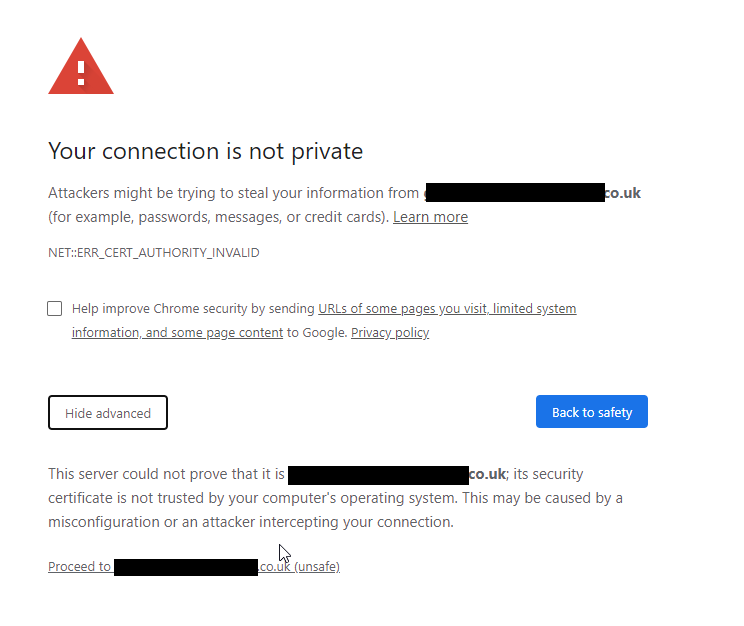
Browser Bypass
When you visit the site, you will see a “Your connection is not private” error.
Fix: Click Advanced > Proceed. To stop this on a team level, you must manually import the .crt file into your OS or browser’s “Trusted Root Certification Authorities” store.
Measurement & Benchmarks
To verify your setup is working correctly, check these KPIs:
- Handshake Time: Should be under 100ms on a local network.
- Protocol Version: Use TLS 1.3 for the best speed and security.
- Cipher Strength: Aim for AES-256-GCM.
| Tool | Purpose | Success Metric |
curl -Iv | Check headers via terminal | HTTP/1.1 301 Moved Permanently |
openssl s_client | Test handshake details | Verification: self signed certificate |
| Browser DevTools | Check Security tab | Connection - secure |
Integration & Workflow
Development Stack Integration
If you use Docker or a CI/CD pipeline, you can automate this setup. However, ensure your Dockerfiles do not bake the private key into a public image. Use environment variables or secret volumes to inject the .key file at runtime.
Accessibility and Governance
- Alt-text: When documenting this for your team, ensure all screenshots of terminal outputs have descriptive alt-text.
- Policy: Maintain a central log of where self-signed certificates are deployed. This prevents “shadow IT” where old, weak certificates live on forgotten servers.
FAQs
Can I use a self-signed certificate for an e-commerce site?
No. Payment processors and users require a certificate from a trusted CA (like Let’s Encrypt or DigiCert) to ensure the transaction is safe.
How do I renew the certificate?
Simply run the OpenSSL command again to overwrite the old files and restart Apache. The encryption remains the same, but the expiration date updates.
Does a self-signed certificate protect against man-in-the-middle (MITM) attacks?
Your certificate and private key are now ready.
Want to learn more, check out our Tech Quickys section of the site.
Verification
Sanity-check the change actually worked:
openssl x509 -in cert.pem -text -noout— confirms the certificate parses and shows Subject + validity dates.curl -k https://localhost/— connects to the TLS endpoint, ignoring trust (expected for self-signed).openssl s_client -connect localhost:443 -servername localhost— verifies the server presents the correct certificate.
Troubleshooting
Browser shows NET::ERR_CERT_INVALID — Modern browsers reject certs with no Subject Alternative Name. Re-generate with -addext "subjectAltName=DNS:hostname".
nginx fails to start: SSL_CTX_load_verify_locations — Path or permissions wrong. cert.pem and key.pem must be readable by the nginx user; check with ls -l.
TLS handshake fails with old clients — Old OpenSSL on the client may not negotiate modern cipher suites. Either upgrade the client or relax server cipher list in nginx config.
Authoritative sources
References: OpenSSL req(1) manual, RFC 5280 — X.509 PKIX, Let’s Encrypt if you want a publicly-trusted alternative.
Leave a Reply