
Migrating Production workloads to Azure is a big task. One that requires careful planning and consideration. If you are taking on an Azure Migrate task as part of your business, be aware that this should be project managed with clear guidelines and goal objectives.
Key Takeaways
- Centralized Hub: Azure Migrate acts as a single point of control for assessment and migration.
- Discovery First: Successful migration starts with deploying a discovery appliance to collect metadata.
- Agentless Preferred: Utilize agentless migration for VMware to reduce overhead and simplify deployment.
- Pre-Migration Assessment: Always run an assessment to determine Azure readiness and estimated costs.
- Security by Default: Eligible VMs are migrated as “Trusted Launch” instances for enhanced security.
How do you start a VMware to Azure migration?
To start a VMware to Azure migration, you must first create an Azure Migrate project within the Azure Portal. This project serves as the container for your discovery metadata, assessment reports, and replication tracking.
Navigate to the Azure Migrate blade in the portal, select Servers, databases and web apps, and click Create project. You will need to specify your subscription, resource group, and preferred geography. Ensure you add both the Discovery and Assessment tool and the Migration and modernization tool during the setup phase to enable the full end-to-end workflow.
What is the Azure Migrate appliance and why is it needed?
The Azure Migrate appliance is a lightweight VMware VM (deployed via an OVA template) that performs the discovery of your on-premises environment. It collects VM metadata, performance data, and software inventory without requiring agents on every guest OS.
Once the appliance is deployed in your vCenter estate, it communicates with Azure to provide “Readiness” data. This data tells you which VMs are ready for the cloud, which need resizing, and what the projected monthly cost will be. To set it up, download the OVA from the Azure Migrate project, import it into vCenter, and register it using the project key generated in the portal.
How do you perform the actual migration of VMware VMs?
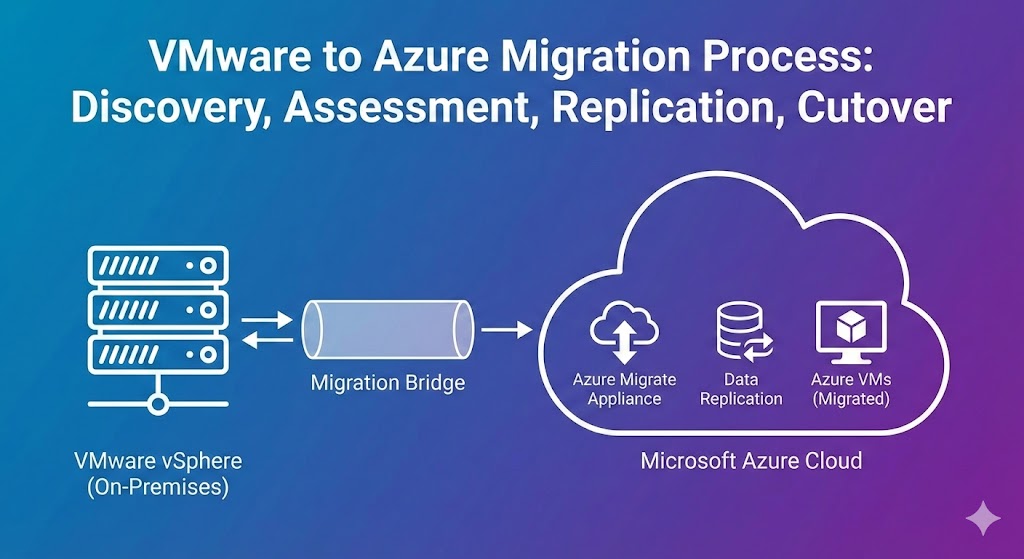
Migrating VMware VMs involves three main phases: Replication, Testing, and Cutover. Replication copies the data from your on-premises disks to Azure managed disks in the background, allowing your production environment to remain online.
After replication reaches a healthy state, you must perform a Test Migration. This creates a copy of the VM in an isolated Azure VNet to ensure it boots correctly and the application functions as expected. Once verified, the final Cutover shuts down the on-premises VM, performs a final sync, and brings the VM online in the production Azure environment.
Should you use Agentless or Agent-based migration?
For VMware environments, you should almost always choose the agentless migration method. It eliminates the need to install software on every individual VM, reducing management complexity and performance impact.
Agentless migration utilizes VMware snapshots and Change Block Tracking (CBT) to replicate data. Agent-based migration is typically reserved for physical servers or VMs where you lack access to the hypervisor level. Agentless is the Microsoft-recommended path for vSphere environments due to its scalability and ease of use.
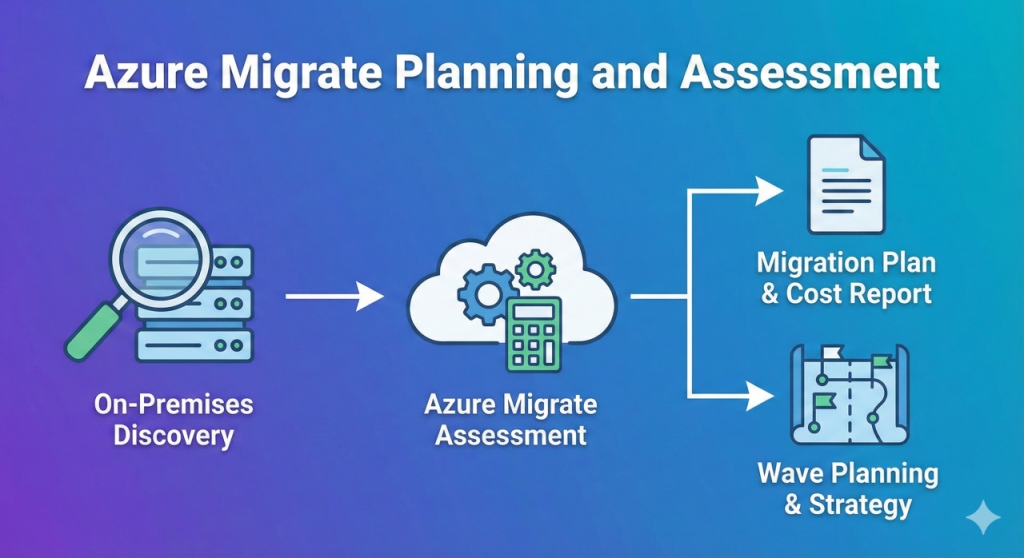
Azure Migrate Planning and Assessment
Azure migrate is the product used to migrate HyperV, VMware, Physical, and Other Cloud servers into Azure. Each migration must have a project; you can either have one big project with everything in it or, as I prefer, have multiple projects broken down into VMware, Hyper, and Physical
Step 1 – Create an Azure Migrate Project
The first thing you need to do is:
Create is an Azure migration project
Set up your migration tools.
- Open the Azure Portal and search for the Azure Migrate blade.
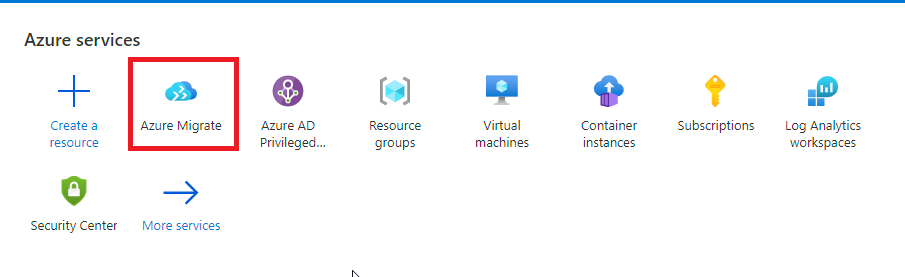
- Find the Servers button underneath the Migration Goals menu on the Azure Migrate blade.
IMPORTANT: The servers area should be blank if you haven’t dabbled with Azure Migrate before. If you have stuff in there, press the change button at the top right next to migrate the project.

- On the next menu, Settings, locate the click here button to create a new project.
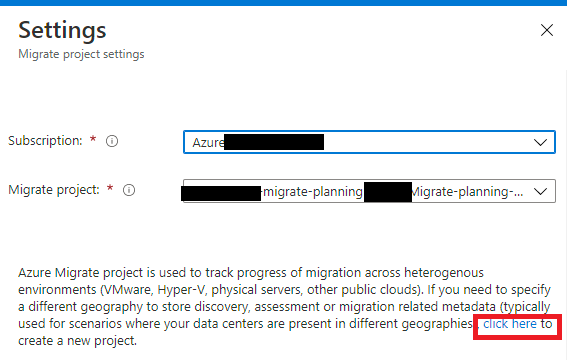
On the next page:
- Select Your Subscription
- Select or Create a New Resource Group
- Give your project a name
- Set the Geography
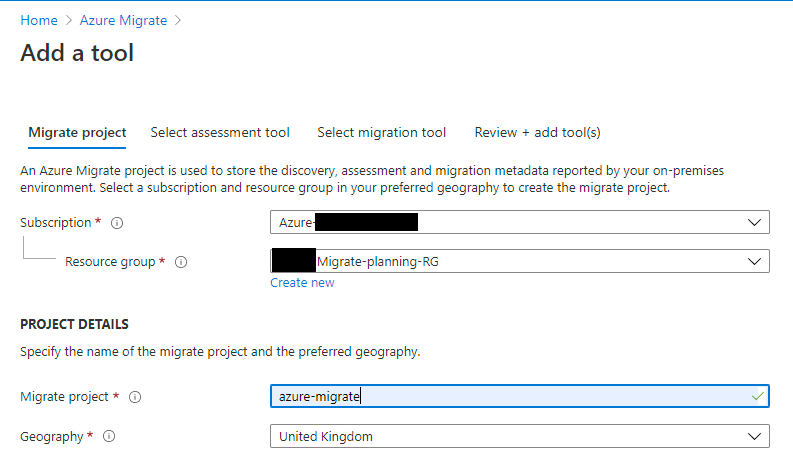
- On the select assessment tool tab – choose your assessment product; in this article, I will be using Azure Migrate: Server Assessment.
- On the select migration tool tab – choose your migration product; in this article, I will be using Azure Migrate: Server Migration.
- On the review tab click the Add Tools button to deploy your config to Azure Migrate
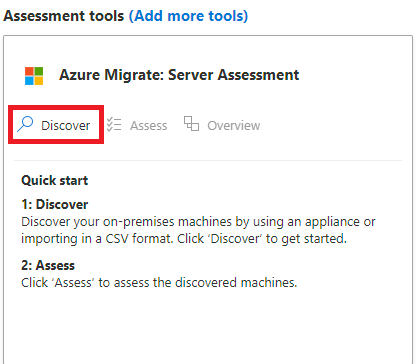
Step 2 – Server Assessment discovery process
The discovery tool will log all the metadata about your VMware installation. It can also provide cost and readiness data and assess your infrastructure dependencies.
- Click the discover button on Azure Migrate: Server Assessment.
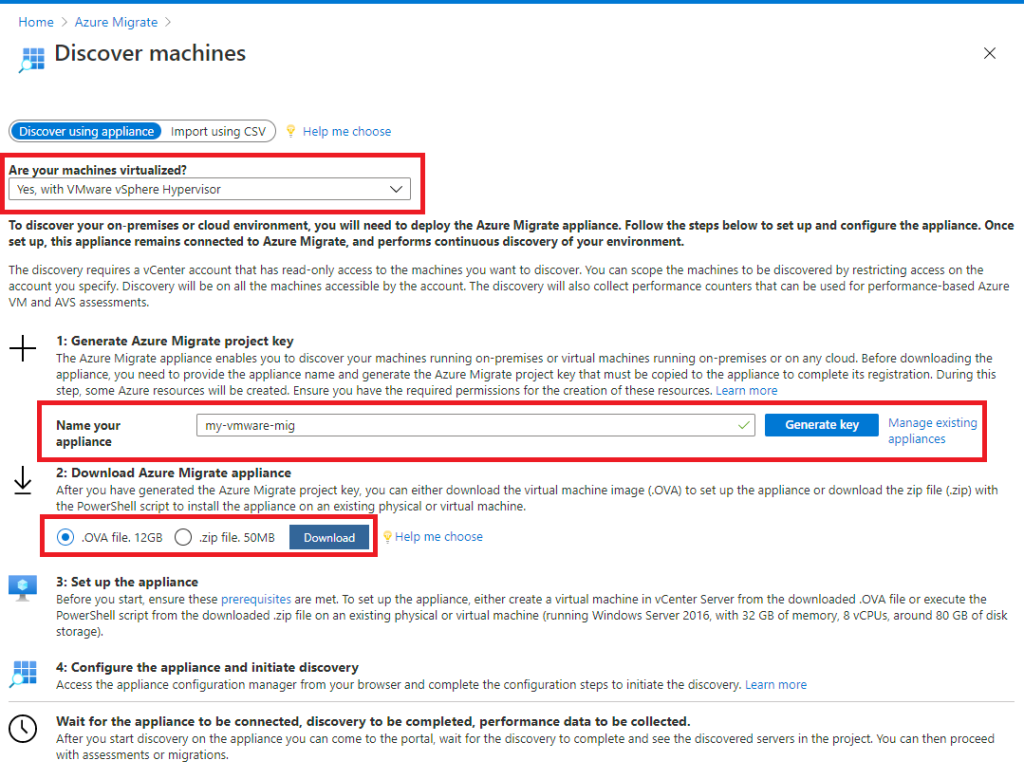
On the Discover Machine menu
- Set Are your machines virtualized to Yes, with VMware vSphere Hypervisor
- Give your appliance a name on Name your Appliance.
- Generate a Key
- Download the OVA package.
- Install the OVA on your VMWare vCenter estate (I will assume you already know how to do this)
Step 3 – Configure the Azure Migrate Assessment Appliance
- Boot the VMware Appliance you have installed via the OVF
- Log into the remote console
- Set the server’s local Administrator password
- Give the server and IP Address, Subnet and Gateway
- Launch the Appliance Configuration Manager; it should launch automatically; if not, there is a shortcut on the desktop
- The appliance will run through some initial checks.
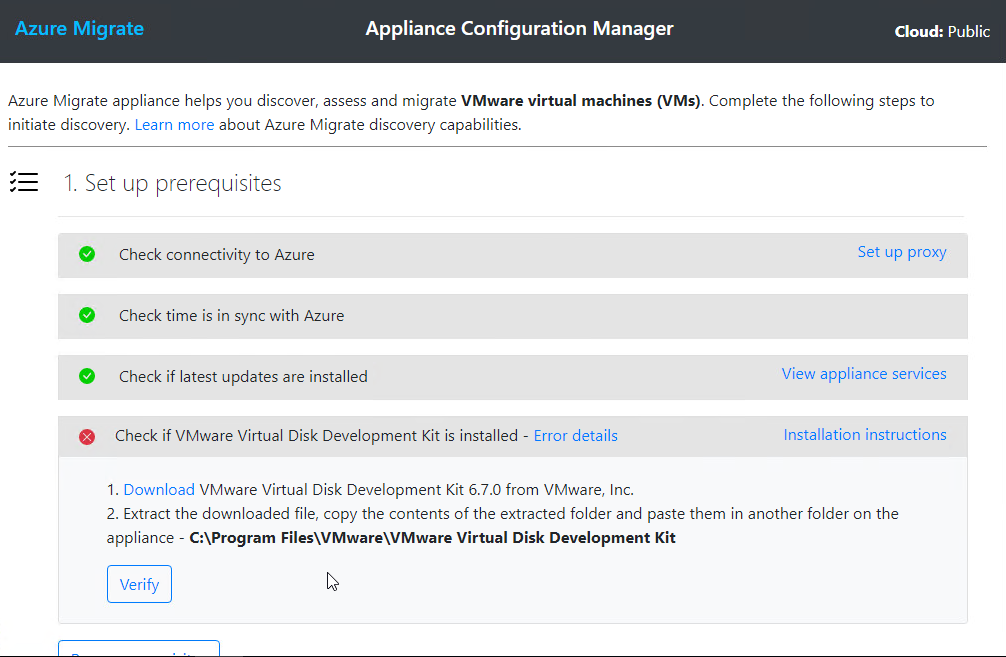
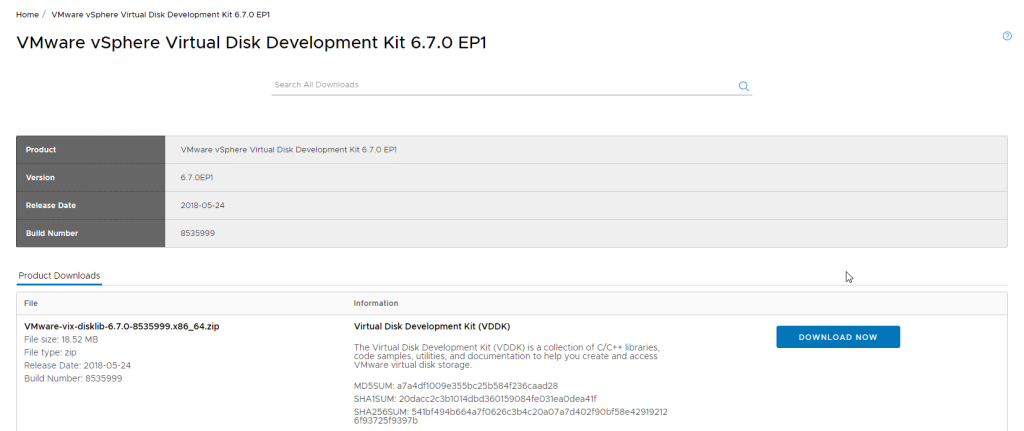
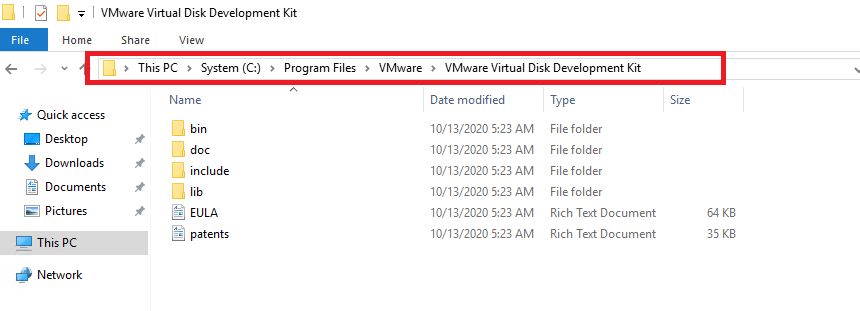
- As per the picture above, I needed to install the VMware Virtual Disk Dev kit. Simply click the download link, log in to VMware.com, download, and copy the files into C:\Program Files\VMWare\VMware Virtual Disk Development Kit\
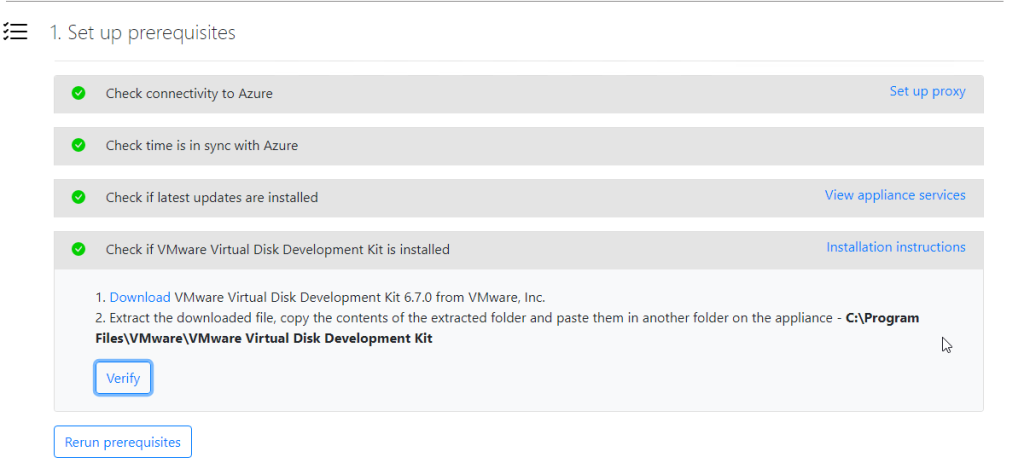
- Once completed, click the verify button.

- Next, copy the Project Key that was created in Step 2 and click LOGIN
- You will be prompted for your Azure Credentials and password to link to PowerShell CLI on the appliance.

Note: You MUST have an account that has permission to create an Azure AD App

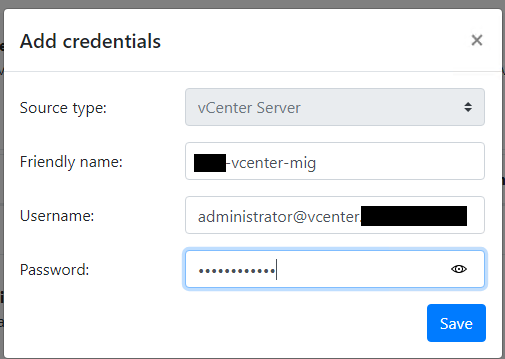
- When the Appliance Registration process has finished, the Add Credentials button will become active.

Set the following
- Set Source Type as vCenter Server
- Set a friendly name as anything you want
- Set the Username and Password
Note: The account must have root access to vCenter. I will be using the default Administrator account.
Note: You may need to refresh the webpage to get the change to pick up

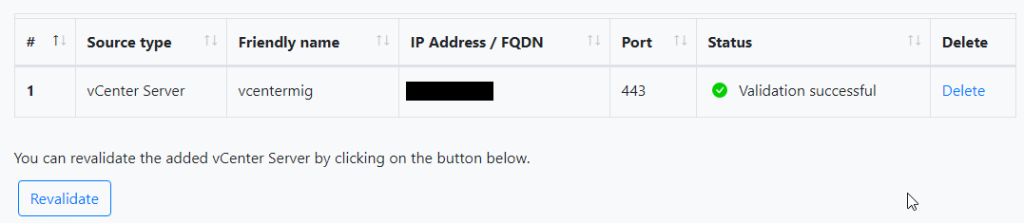
- Next, click the Add Discovery Source – enter your details (this is your vCenter Server Appliance IP Address)

- Next, click the Add Credentials button. I will add my Linux sudo root account for ansible; this is because it is already configured on the estate

- Next, Click the Start Discovery button.
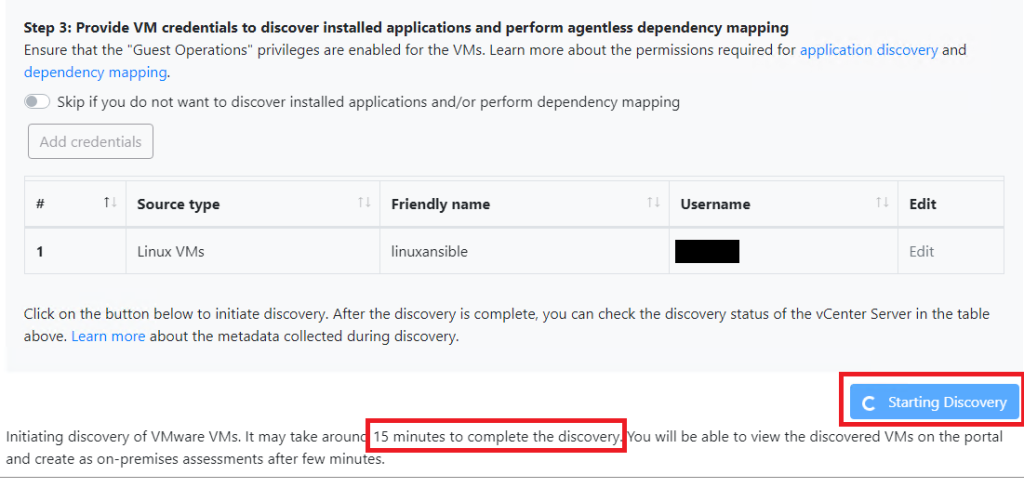
- Upon completion, you will see this message.

That’s it, go to your DISCOVERED ITEMS in Azure migrate, and your data will be available
Azure Migrate Further Information
A professional VMware to Azure migration follows a four-stage lifecycle:
Current State Analysis, Design State, Technical Migration, and Cloudify (Optimization).
Success begins with a deep-dive analysis of your on-premises utilization (CPU, Disk, Memory) to establish a performance baseline. This moves into the Design State, where you rationalize workloads using the “5 Rs” (Rehost, Refactor, Re-architect, Replatform, or Retire).
The Technical Migration involves replicating data using the Azure Migrate appliance, followed by the Cloudify phase—a post-migration period focused on rightsizing resources and implementing auto-scaling to prevent “sticker shock” on your first Azure bill.
Why is planning more important than the technical “lift and shift”?
Planning is critical because a raw “lift and shift” often results in extortionate costs and inherited technical debt. Without a strategy, you risk moving over-provisioned local servers into expensive cloud tiers that you don’t actually need.
Modern 2025 migration planning now includes Wave Planning, which groups applications by business criticality and technical dependencies. By mapping these dependencies early, you ensure that interconnected services (like a web front-end and its SQL back-end) move together, preventing latency issues and broken application links during the cutover.
How does the Microsoft Cloud Adoption Framework (CAF) structure a migration?
The Microsoft Cloud Adoption Framework (CAF) provides a standardized, 6-stage methodology: Strategy, Planning, Readiness, Adoption, Governance, and Management. This framework moves beyond just “moving VMs” to ensure your organization is ready for the cloud. The Readiness phase is particularly vital; it involves building an Azure Landing Zone—a pre-configured environment with established networking, identity (Entra ID), and security policies. By following CAF, you ensure that when servers land in Azure, they are immediately compliant and manageable by your operations team.
How do you ensure high E-E-A-T during an Azure assessment?
To demonstrate high expertise and trust, your assessment must utilize Performance-Based Sizing rather than “As-On-Premises” metadata. In my experience, local VMware environments are frequently over-allocated by 30-50%.
By running the Azure Migrate appliance for at least 7–30 days, you capture “peak” utilization trends. This allows you to select Azure VM SKUs that match actual usage, significantly reducing your Total Cost of Ownership (TCO).
Ensure you are utilizing the 2025 Azure Migrate RBAC roles (like “Decide & Plan Expert”) to maintain the principle of least privilege during the discovery phase.
Executing a Phased “Wave” Migration
In 2025, the industry standard has shifted from “big bang” cutovers to Wave Planning. To implement this, first use the Azure Migrate dependency mapping tool to identify “application groups.”
- Wave 0 (Pilot): Move low-risk, standalone dev/test servers to validate your Landing Zone.
- Wave 1 (Business Support): Move non-critical internal apps (e.g., HR portals).
- Wave 2+ (Production): Move core business applications once the network and security baselines are proven. This phased approach allows your team to “learn by doing” without risking production uptime.
Azure Arc for “Agentless” Discovery
A major update in 2025 is the integration of Azure Arc-based discovery. Traditionally, you needed a dedicated OVA appliance to scan VMware vCenter. Now, if your servers are already registered with Azure Arc, you can generate a Business Case and Assessment within an hour using existing data.
This “agentless-first” approach is ideal for distributed environments where deploying multiple appliances is geographically difficult. It also bridges the gap for Trusted Launch migrations, as Arc can verify if the guest OS supports vTPM and Secure Boot before you even initiate replication.
The Microsoft Migration Plan

- Strategy – define what success looks like including both business and technical goals
- Planning – map out what needs to be migrated and how the strategy will be achieved
- Preparation – prepare both the source and the destination for the migration
- Migration – replicate servers from the source to the destination, perform a cutover
- Handover – handover the final solution to the operations team for ongoing maintenance
Useful Reading
Leave a Reply