
Mastering Azure Infrastructure with Terraform
What is Terraform?
Terraform is an infrastructure tool for Building, changing, and Versioning infrastructure. Often referred to as Infrastructure as Code for . It is released by the HashiCorp organization.
It works with two coding data languages:
- HashiCorp Config Language (HCL)
- JSON
Why Use Terraform?
- Automation: Terraform automates infrastructure creation, reducing manual errors and saving time.
- Version Control: Your infrastructure code can be versioned, tracked, and easily rolled back if needed.
- Cloud Agnostic: Works with major cloud providers like AWS, Azure, Google Cloud, and more.
- Collaboration: Teams can collaborate on infrastructure code just like any other software project.
What is Terraform used for?
In its simplest form, Terraform can be used to create server infrastructure on several different platforms automatically. It can also be integrated into Continuous Integration and Continuous Delivery (CI/CD).
Terraform is a cloud-agnostic platform and is popular for the following cloud platforms :
- The Google Cloud Platform (GCP)
- Amazon Web Services (AWS)
- Microsoft Azure
- VMware
- Red Hat OpenStack
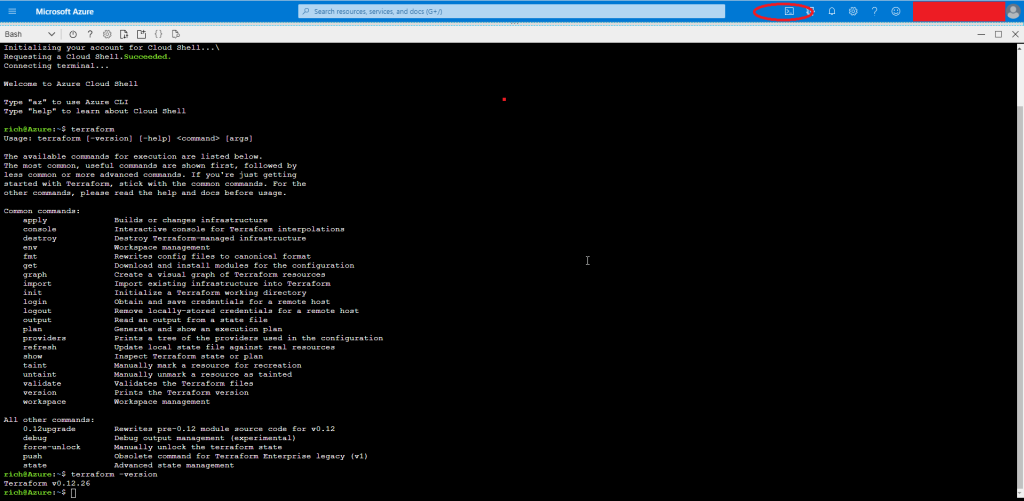
The Terraform Azure CLI
Terraform is baked into the Azure CLI. You can run it straight from the console or from Azure DevOps. There is no need to install Terraform; it is already there for you to use.
The state file controls Everything Terraform does. Regardless of what you want to do, get the Terraform state up and running in a cloud bucket.
To access the program, simply open a BASH or POWERSHELL cloud shell. I will be using BASH throughout this example.
How to configure a Terraform Remote State
Remote state storage is essential for teams and reliable deployments. Azure Blob Storage is a secure and convenient option. To ensure this works, you need to make sure you have the correct permissions.
Prerequisites:
- An Azure account with a Resource Group.
- Basic knowledge of the Azure CLI.
Create a new main.tf config file
vim main.tfCopy this code into your main.tf file, ensuring you save and quit. This code will:
- Set Azure as the main provider
- Create your new terraform storage blob (please ensure you have a resource group created previously)
- Create a container inside the blob storage
- Create terraform.tfstate file
Make sure you update relevant to your settings
provider "azurerm" {
version = "2.0.0"
features {}
}
resource "azurerm_storage_account" "dev" {
  name                     = "YOUR BLOB NAME"
  resource_group_name      = "YOUR RESOURCE GROUP NAME"
  location                 = "UK South"
  account_tier            = "Standard"
  account_replication_type = "RAGRS"

   tags = {
    environment = "Terraform Storage"
    CreatedBy = "Rich Bailey"
}
resource "azurerm_storage_container" "dev" {
  name                  = "statefile"
  storage_account_name  = "YOUR BLOB NAME"
  container_access_type = "private"
}
}
terraform {
  backend "azurerm" {
    resource_group_name = "YOUR RESOURCE GROUP NAME"
    storage_account_name = "YOUR BLOB NAME"
    container_name = "statefile"
    key = "terraform.tfstate"
}
}
Now type:
terraform initIf everything is successful, you will see

Next type
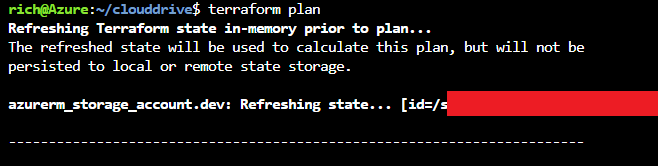
terraform planthis will check your code to make sure it’s accurate.
Now type
terraform apply
Check your Azure Blob storage to ensure that the Terraform state file has been uploaded. You can now share this bucket and the main.tf file with your colleague; this way, you will all be working from the same state file.

Further Reading :
Important Considerations:
- State File Security: In production, use Azure Blob Storage with:
- Encryption at rest (automatic with Azure)
- Regular snapshots
- Delete locks on the storage account
- Role-based access control (RBAC)
- Network restrictions if applicable
- Collaboration: With remote state, use a version control system (e.g., Git) for your Terraform code.
Further Learning:
- HashiCorp Terraform Documentation: https://developer.hashicorp.com/terraform
- Terraform Tutorials: https://developer.hashicorp.com/terraform/tutorials
- Community Resources: Explore online forums and blogs for tips and examples.
Local State Storage:
- Only one person making state file changes
- Simpler file location to remember
- Reasonably secure (workstation access only)
Cons: - State files are not easily shared with other admins
- Workstations are more prone to being compromised due to hardware issues or loss of personnel
- Others may have elevated access to a workstation that may not be Azure admins. (Domain admins, desktop support personnel, etc.)
- Workstations are not commonly backed up
Remote State Storage
- One source/repository for state files. (Ensures the team is using the same source files for operations)
- Greater security options (encryption, (IAM) role access, restricted network access)
- More options for backups/redundancy
- Less susceptible to hardware or personnel loss
- Allows more users access to Terraform files and allows for version control
Cons: - Adds complexity to configurations and file access (creation of service principal or managed for access)
- Version control becomes more important/problematic
- Access to remote state files is subject to service outages.
When working in a production environment, it is recommended that you use Azure remote blob storage for Terraform. A major benefit is that the blob is automatically encrypted.
State File Security
- Once remote state file storage is in place, you have several options to protect your state file data:
- Encryption at rest – All Azure blob storage is AES256 encrypted.
- Snapshots of state file data – Routine snapshotting of the state file protects against accidental file deletion.
- Apply a Delete Lock to the storage account – Only accounts with “Owner” role access will be able to remove the lock and delete
- the state file blob. If you ensure that you never perform Terraform activity with an “Owner” account, you’ll prevent accidental
- deletion.
- Role Access (IAM) restrictions – If a Service Principle or Managed Service Identity is being used for Terraform activity, you can
- restrict storage account access to only those accounts. As mentioned above, make sure not to set those accounts with “Owner”
- access.
- Selected Network Access to the Storage Account – If using Terraform from a specific VM or VMs, you can restrict access to only
- those VNETs and Subnets that contain those VMs. Additionally, you can “whitelist” specific IP addresses both inside and outside
- your on-premise networks.

Recent Comments