
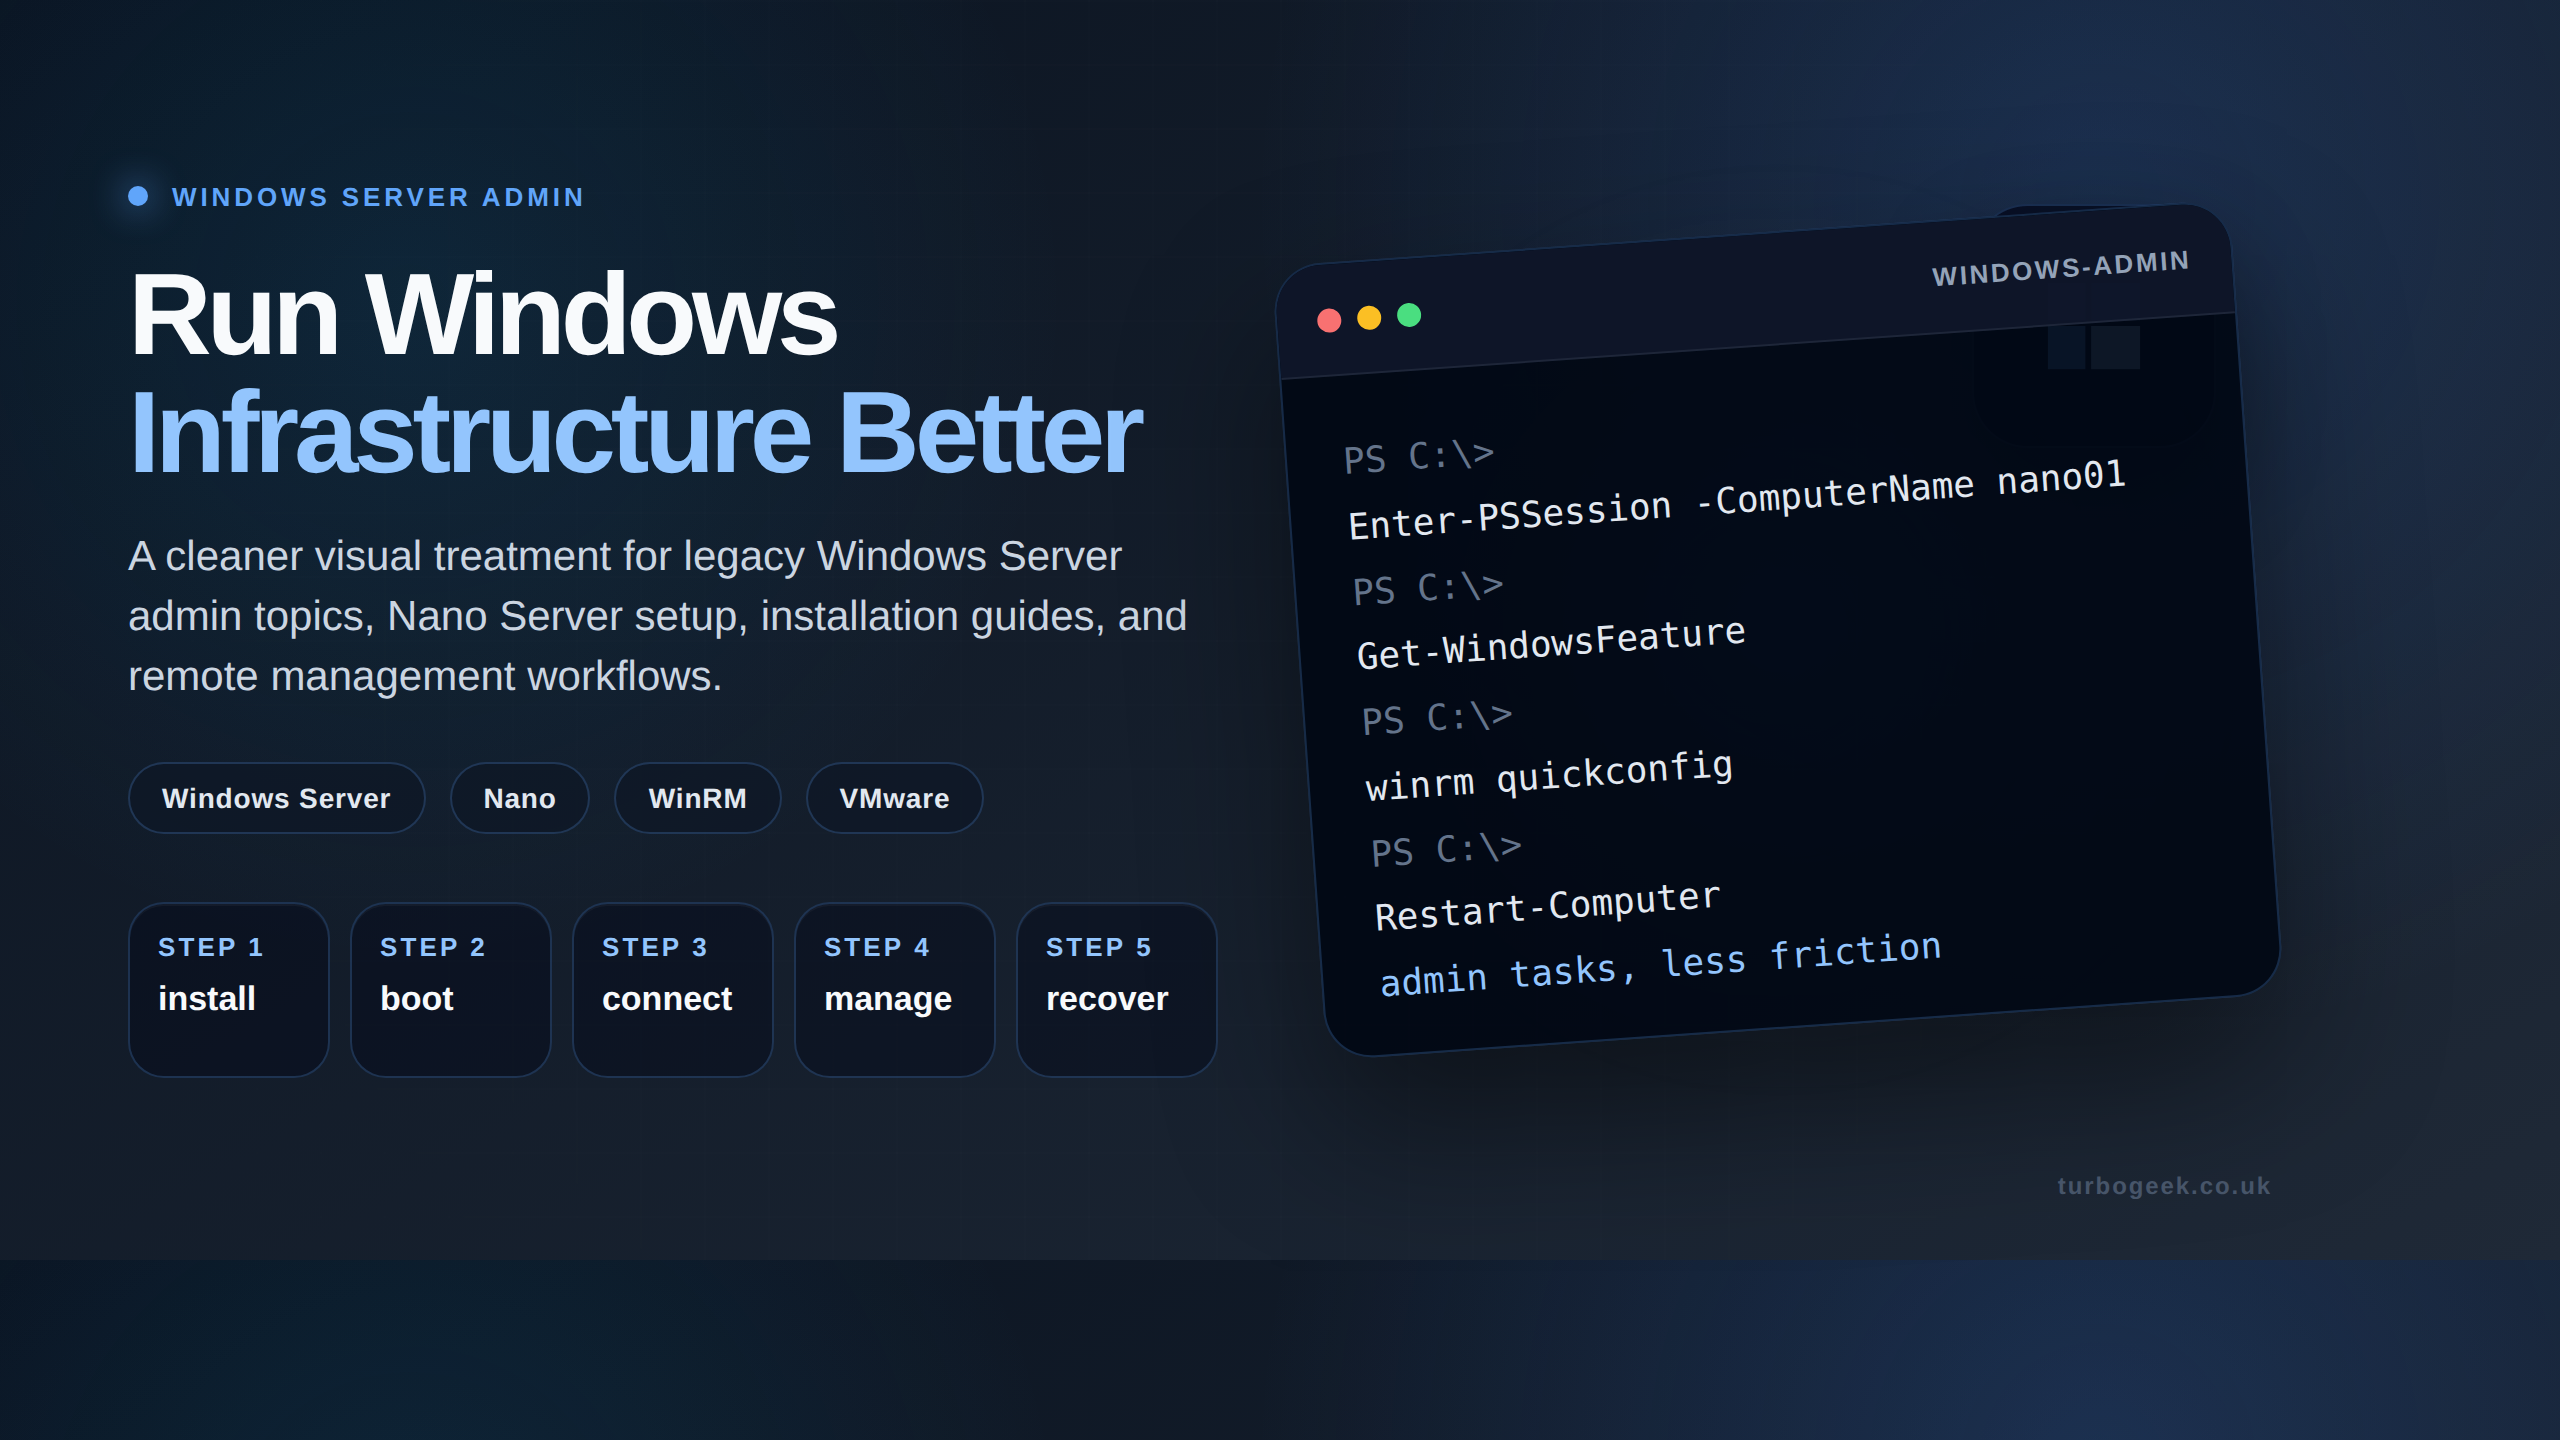
What is Windows Server Nano
Windows Nano Server (Server Nano) is a stripped-down version of Windows Server 2016 that runs as a Shell. It has no GUI, and you must install it off the Server 2016 media using PowerShell. It is impossible to configure a Nano server locally in any other way.
Nano is extremely popular on cloud services such as Amazon Web Services and Microsoft Azure due to the limited resources required to run it. Out of the box, PowerShell is needed to write the Nano image in VDHX files compatible with Hyper V.
To use in VMware, you have to take additional steps to convert the image to a VMware-compatible image (VMX).

How does Windows Nano Server differ from Windows Server Core?
Honestly, I find the Microsoft marketing over Server Nano / Server Core confusing. Server Core has no GUI and is a headless deployment option. You could run HyperV, Containers, and pretty much all built-in Windows Server features such as Server Manager.
Server Nano is officially the replacement for Server Core. Nano is a much more stripped-back version of Windows Server Core; it focuses on container deployments and Web Application services and is great at handling .NET applications on a secure platform.
Important Update (09.09.24)
- Nano Server No Longer in Active Development:
Nano Server is no longer in active development. Microsoft officially ended development a while back, and it’s not a feature of the newer Windows Server versions (like 2022).
Even though Nano Server is no longer being developed, you can still technically use it with older versions of Windows Server. However, it’s generally not recommended for new deployments.
If you’re looking for lightweight and efficient Windows Server deployments, here are some current alternatives to consider:
- Windows Server Core: This is still a solid option for a minimal GUI-less installation of Windows Server. It offers more features than the Nano Server while still being relatively lightweight.
- Azure Stack HCI: This hyper-converged infrastructure solution is designed for modern data centers and edge deployments, offering efficiency and scalability.
- Containers: Container platforms like Docker with Windows containers provide a highly efficient and portable way to deploy applications.
How to install Windows Nano Server
All steps are demonstrated below in detail.
Where can I get Windows Nano Server media?
You will need one of the following:
- Windows Server 2016 installation media (ISO)
- Windows Server 2019 installation media (ISO)
- Windows ADK (Assessment Deployment Kit)
- The Official Windows Nano Docker Image
My Lab setup
I have used the following Lab Setup to demonstrate Windows Nano Server setup and configuration.
- VMware Workstation
- Windows Server 2016 ISO image
- PowerShell (with administrator rights)
- Starwind VMware convertor or equivalent
Installation guide
NB – Where possible, always use the “Run as Administrator” option from your workstation
Step 1 – Mount Windows Server Media
- Mount the Windows Server 2016 media to your computer. (usually by double-clicking on the ISO)
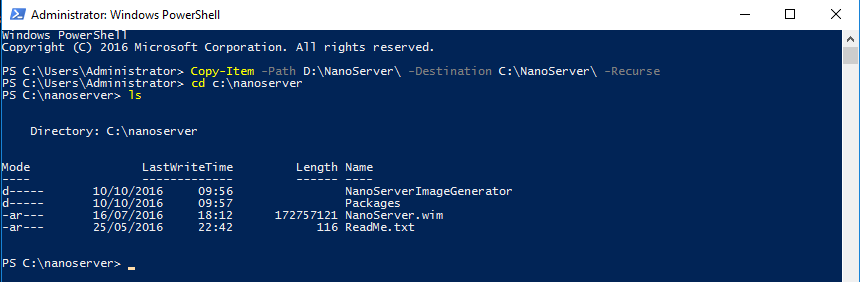
Step 2 – Copy Nano Server files locally
- Navigate to the NANO Server Folder > NanoServerImageGenerator and copy the 3 files below to your computer. In this example, I will copy to C:\Temp\
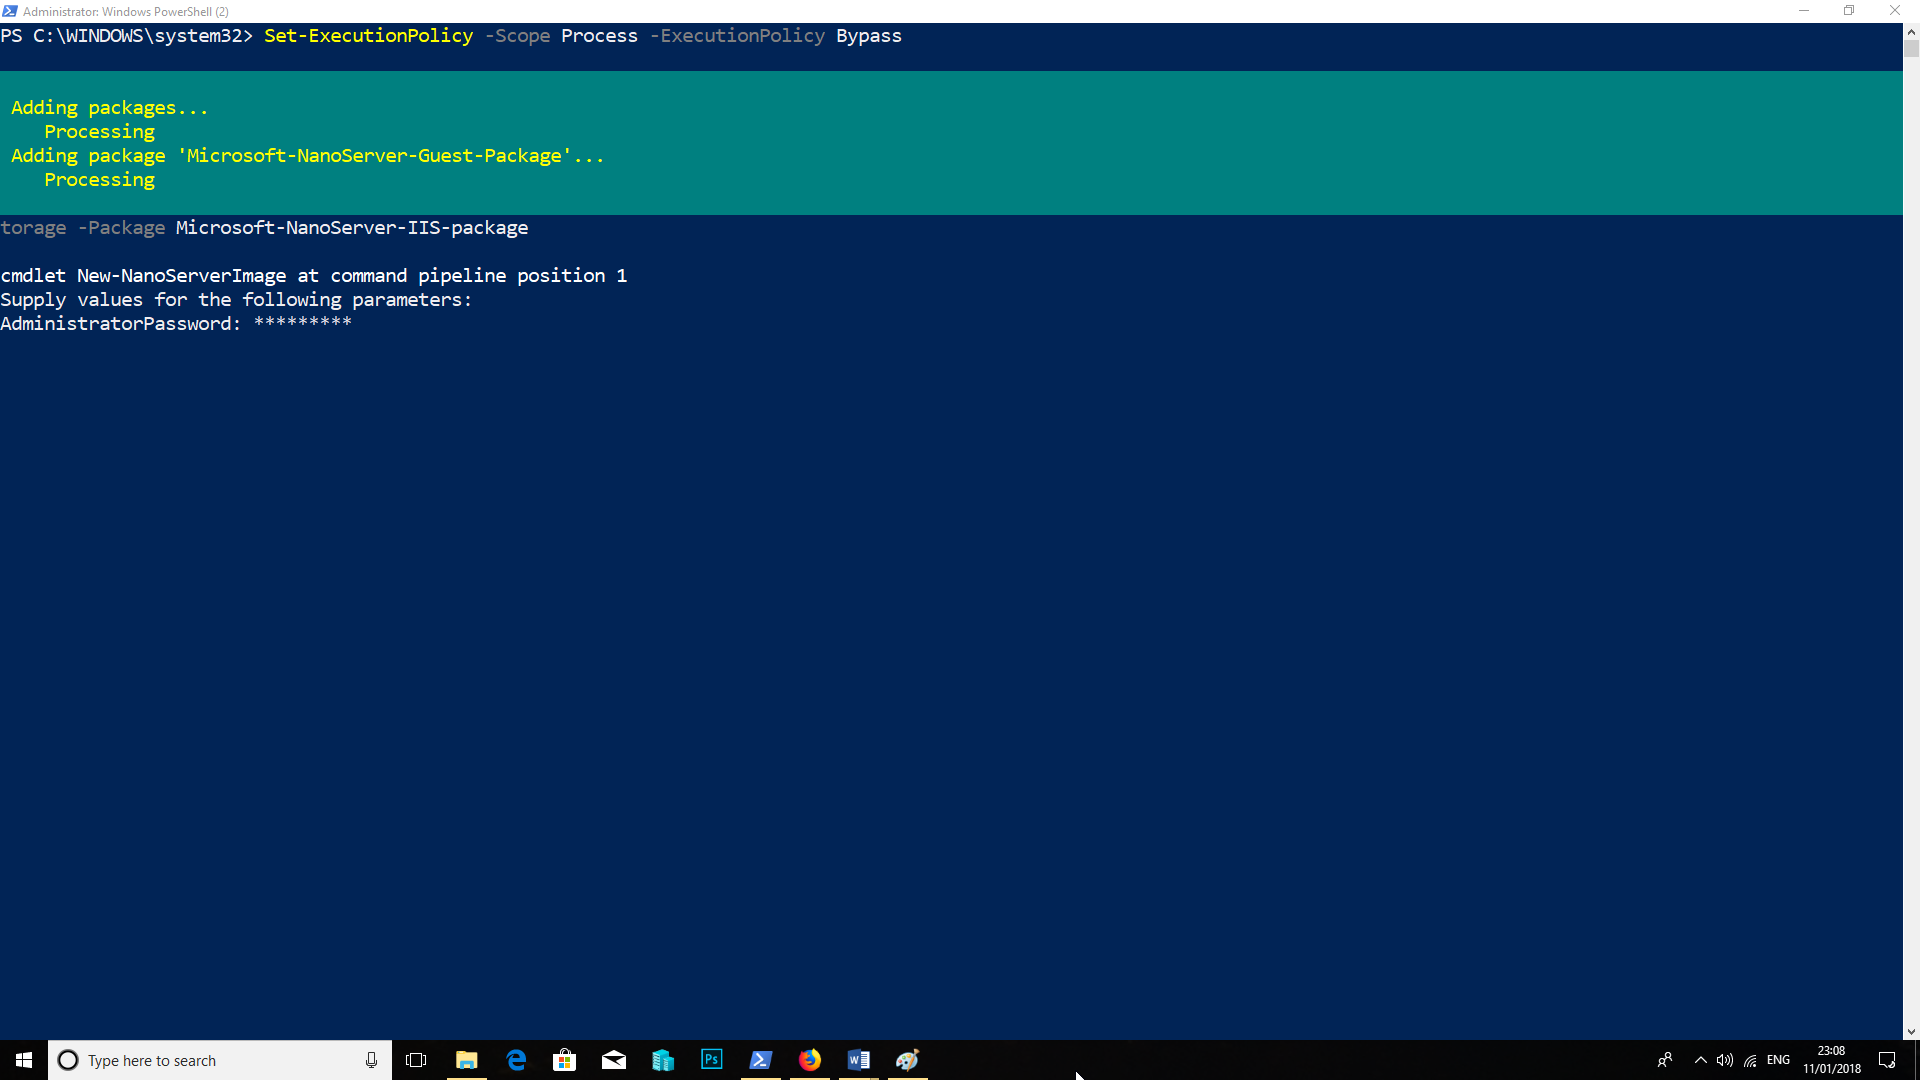
Step 3 – Open Powershell and Set Execution Policy
- Open PowerShell (run as administrator)
- Type the following in the Administrator PowerShell session:
Set-ExecutionPolicy -Scope Process -ExecutionPolicy BypassSelect YES to allow This will allow your computer to run the Nano scripts
Step 4 – Import Nano Server Powershell Module
- Navigate to where you copied the Nano Scripts. For Example cd C:\Temp\
- Type the following in the Administrator PowerShell session:
Import-module C:\Temp\NanoServerImageGenerator.psd1 
Step 5 – Create a Nano Server Image
- Type the following in the Administrator PowerShell session:
New-NanoServerImage -Edition Standard -DeploymentType Host -MediaPath 'C:\Path\To\WindowsServer2019' -BasePath 'C:\Path\To\Base' -TargetPath 'C:\Path\To\NanoServer.wim' -ComputerName 'NanoServer' -Package Microsoft-NanoServer-Compute-Package -MaxSize 10GB -IsOEM
This will create your image in the standard edition.
It will create a server called Nano01 in C:\Temp
You will be prompted to create your ADMINISTRATOR password for the server.
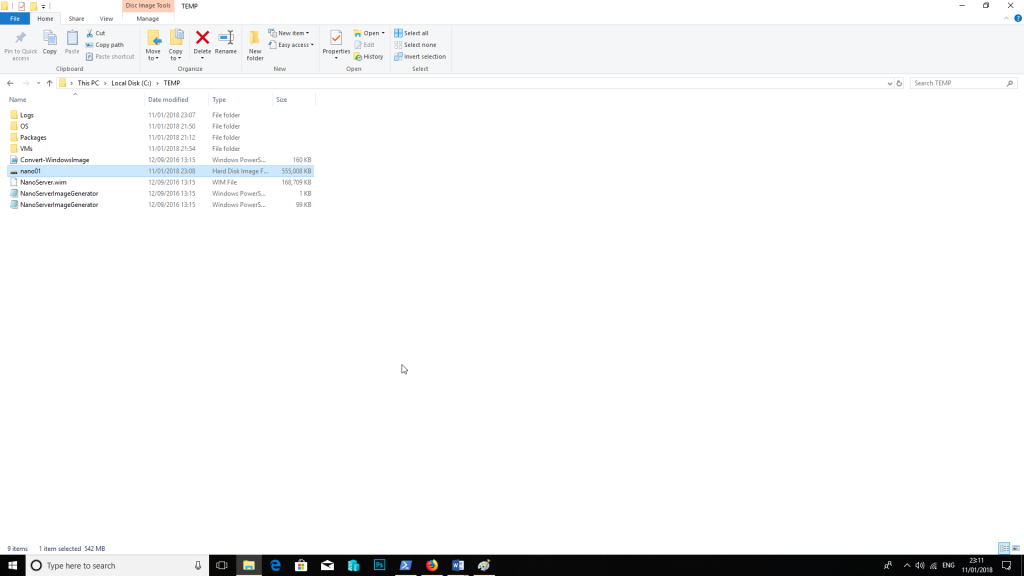
- Next, the server will build the NANO Image. This might take some time to complete
- Once complete, you will receive this message
- “Done. The log is at: C:\Temp\Logs\2018-01-11_21-12-56-61”
- This will create the image on your local computer called Nano01

Step 6 – Convert Image to VMWare Compatible Image
Next, you need to convert the image to work in VMware Workstation
The easiest way is to use a 3rd party tool to convert it.
Download and install the application
Step 7 – Install the Converter
- Run the Installer as Administrator:
- Right-click on the installer executable and choose “Run as Administrator” to ensure proper permissions.
- Right-click on the installer executable and choose “Run as Administrator” to ensure proper permissions.
- Accept License Agreement:
- Click the “Next” button to proceed and accept the license agreement terms.
- Click the “Next” button to proceed and accept the license agreement terms.
- Navigate Through License Agreement:
- Continue by clicking “Next” on the license agreement screen to advance through the terms.
- Shortcuts Configuration:
- Click “Next” when prompted for shortcuts, allowing the installer to configure default settings.
- Desktop Shortcut Option:
- Decide whether you want a desktop shortcut for convenient access. Choose accordingly during the installation process.
- Finalize Installation:
- Allow the installer to complete the process. Sit back and relax while it takes care of the necessary configurations.


Step 8 – Convert the image
- Once installed open the application (Run as administrator)
- Chose Source image location as LOCAL FILE
- Browse to the Nano01.vdhx file we created earlier (C:\Temp\ in this example)
- Click next and then chose “VMWARE GROWABLE IMAGE” VMDK. This is compatible with VMware Workstation and VMware ESX
- Choose next and select IDE Drive
- Click NEXT to convert the Virtual machine
- Once complete you will see a NANO01.VMDK file in C:\ Temp


Step 9 – Create The Virtual Machine using the VMDK file
- Open VMware Workstation:
- Launch the VMware Workstation application on your computer.
- Create a New Virtual Machine:
- Navigate to the “File” menu.
- Select “New” and then choose “New Virtual Machine.”
- In the wizard, opt for “Custom (advanced)” and click “NEXT.”
- Hardware Compatibility:
- Click “Next” on the Hardware compatibility screen.
- Operating System Configuration:
- Choose the option “I will install the operating system later.”
- Specify the operating system as Microsoft Windows and select the version as Server 2016.
- Server Configuration:
- Provide a name for the server (e.g., NANO01).
- Choose a location for the server; note that this can be changed later.
- Firmware and Disk Configuration:
- Set the Firmware type as BIOS.
- Choose the SCSI disk controller.
- CPU and Memory Settings:
- Set the required CPU and Memory specifications based on your system requirements.
- Network Configuration:
- Set the network type to Bridged.
- Storage Configuration:
- Choose the Logical SAS Controller.
- Remove the existing Hard Disk.
- Disk Selection:
- Important: Select “USE AN EXISTING DISK.”
- Click “Browse” and navigate to the VMDK File converted earlier (e.g., C:\Temp\Nano01.vmdk).
- Finish Configuration:
- Click “Finish.”
- If prompted about using a newer version of VMware Workstation, and if it will change the format (Hardware version), click “CONVERT.”
- Verify Settings:
- On the virtual machine settings page, ensure that the disk file is pointing to the recently converted VMDK.


Step 10 – Configure Server Nano to start
Now you have your Nano server ready. You can start the server in a VMware workstation, but you still need to configure access to be able to use the server.
CLICK HERE TO SEE HOW TO DO IT
Thanks for taking the time to read this article. if you have any questions or feedback, please write in the comment section below.
Leave a Reply