

Windows PowerShell is a vast subject; the aim of this guide is to provide system administrators with a simple, usable guide to the fundamentals of PowerShell. We will also demonstrate scripts and commands that can be used in typical day-to-day tasks. This guide will give you the basic steps to get started, and it will teach you the core skills needed to open the door to PowerShell and object-orientated scripting.
What is Powershell?
Windows PowerShell is a command line shell, a scripting language, and an automated task framework from Microsoft. It is based on the .NET framework and is great at automating batch jobs and system tasks. PowerShell is available on both Windows and Linux platforms and has been integrated into Microsoft operating systems since Windows Server 2003 R2.
Today, PowerShell is installed by default on all Microsoft Server releases and all professional versions of their modern desktop operating systems. Additionally, you can download it directly from the Microsoft website if required.
Powershell is not a compiler programming language like Python or C; it is an interpreted scripting language. It comes with a number of set commands (cmdlets), which can be executed by the user against a whole range of different variables. This is great for interrogating and executing commands against an entire data center of servers at once.
PowerShell is also a command line executable, you can type almost any Windows command into Powershell, and it will act just like the Command Prompt would.
How to get PowerShell?
Before we start, it is recommended that you are on at latest version of PowerShell (5.0 or above). With every release, new functions and cmdlets are released, and as PowerShell is an evolving scripting language, new features are being added, allowing better integration and services.
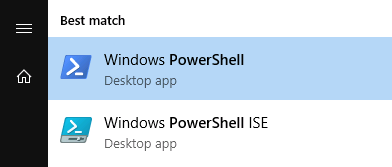
Windows PowerShell includes the Core-Shell and PowerShell ISE (Integrated scripting environment) applications. These can be found from your start button by typing “PowerShell“. It is always recommended to run Powershell as an administrator.
If you need to upgrade your version, follow the first part of this article (Only sections 1 to 10 apply).
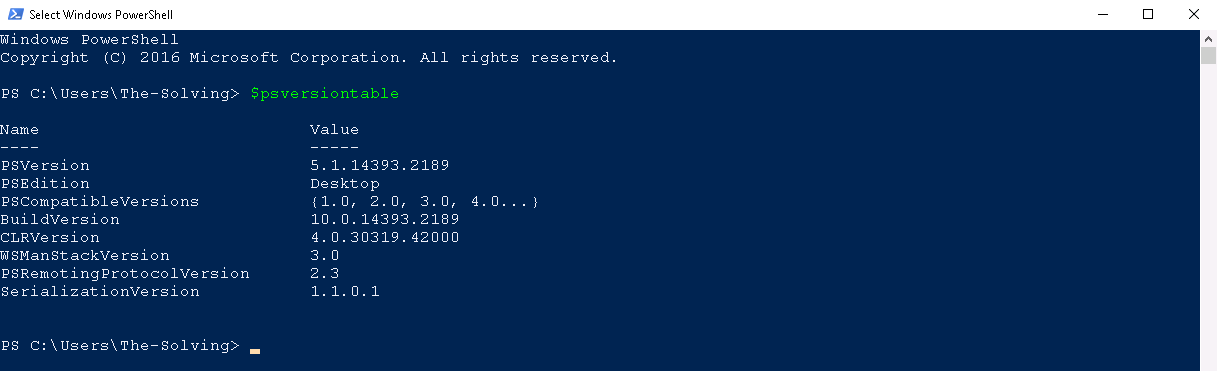
You can check which version of PowerShell you are running by opening the Shell and typing $psversiontable – look for the property PSVersion
PowerShell Basics and Get-Help
One of the first concepts to understand is the PowerShell help system. PowerShell has been designed from the ground up to be as simple to use as possible. Each Cmdlets contains a detailed help file explaining how to use the cmdlet.
The help file includes instruction on the command description, what syntax to use and even example of how to use the command.
The PowerShell community has also embraced this self-documenting approach and the vast majority of online scripts have detailed help files. It is important to get into the habit of always checking the help files, even if you are not stuck. You will find out so much about a cmdlet and ways in which you can use it from the help files.
- First you should update your help files from Microsoft by typing update-help – this will instruct powershell to connect to the internet and download all the latest helpfiles. This process can take several minutes but only needs to be run once.
- Next type Get-Command – this will list you every single command available in your version of Powershell. (PowerShell Tip – Command grammar is always singular: Log not Logs; Service not Services)
- Nearly every help file show examples – If you use the command get-help get-service -examples you will be able to see examples of the command in use. This is a perfect way for users to learn the commands and grasp how to construct cmdlets.
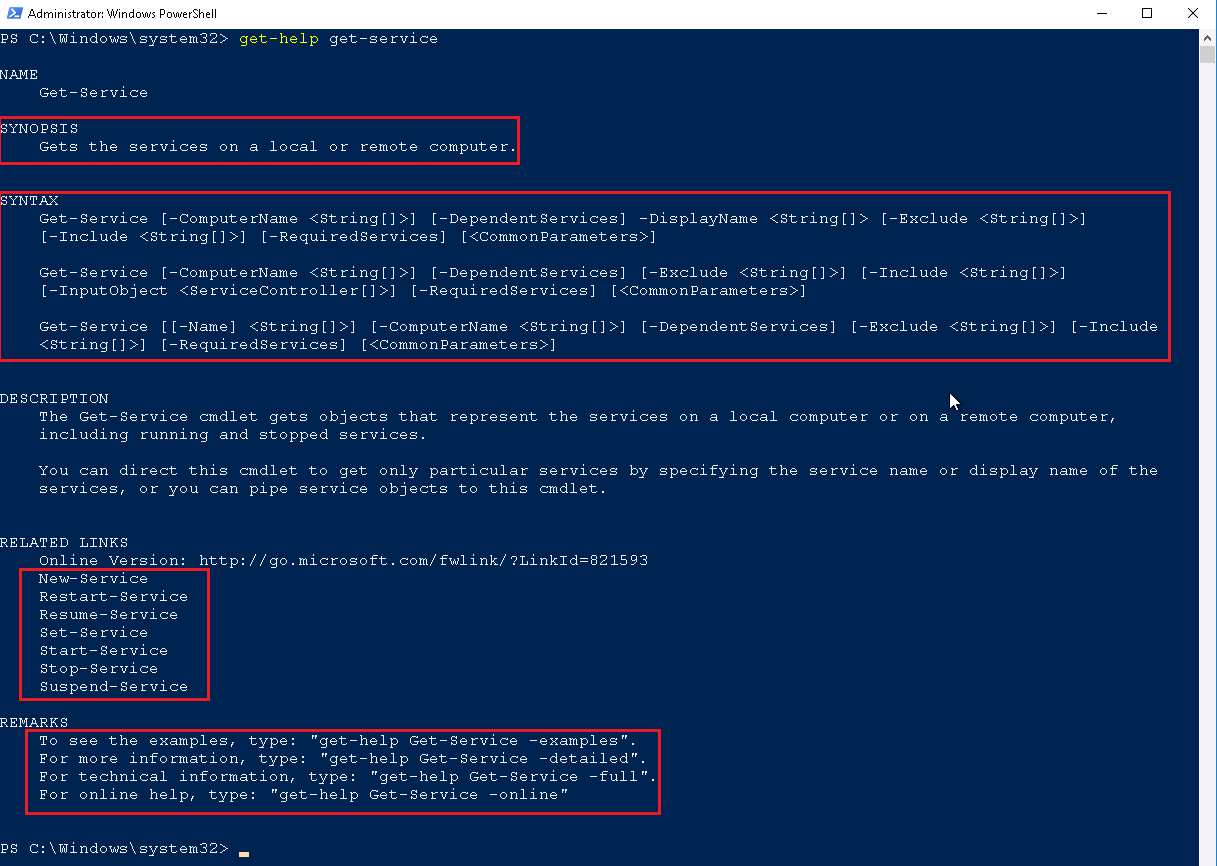
- Above, you can see the help file for get-service, four key areas have been highlighted
- SYNOPSIS – This tells you what the command does
- SYNTAX – This tells you how you use the command and construct cmdlets
- RELATED LINKS – This tells you other similar commands or related commands, in this example, this is commands that get-service can interact with in the pipeline.
- REMARKS – This tells you how you can get more information about the command.
Set-ExecutionPolicy
The Execution policy is a security element of Windows PowerShell which determines if the user can execute commands and load configuration files. Essentially if you have this set incorrectly you will not be able to execute all scripts in your version of PowerShell. This becomes more apparent when using scripts downloaded from the internet and the policy is inplace to protect your system.
There are several ways you can change this policy, the most common way is to just allow scripts to be executed, or if prefered, you can simply turn of the security policy. The second approach may not be best practice, but it is extremely useful in training and test labs.
- To enable the running remote scripts type set-executionpolicy remotesigned
- To switch off the policy type Set-ExecutionPolicy -Scope Process -ExecutionPolicy Bypass
Use option 2 with caution and never in a production enviroment.
What is the Pipeline?
The pipeline is used to import, export and convert data in a Windows Powershell command. It is important to always think “What is in the pipeline?” when execuiting commands. If you are experienced in Linux, this concept may be easier to grasp. Each time you execute a PowerShell command, the results (or data) is passed down the pipeline. The resulting data can then be used to execute more commands, and so on and so on.
Note – Commands are split using the pipe | symbol.
 The easiest way to explain is to take a simple command, for example get-process | stop process
The result of Command A (get-process) is passed down the pipeline to Command B (stop-process) which is then passed to Output. You can therefore manipulate Command A to pass down specific results. You can also pipe as many of your results as you want to create very granular cmdlets.
Powershell Fundamentals
Windows PowerShell is an object orientated shell, each cmdlet is a collection of objects, each object has its own properties. This can be demostrated by using the get-member command. You can pipe each command to get-member eg. get-service | get-member.
To explain this further, type get-service into the shell
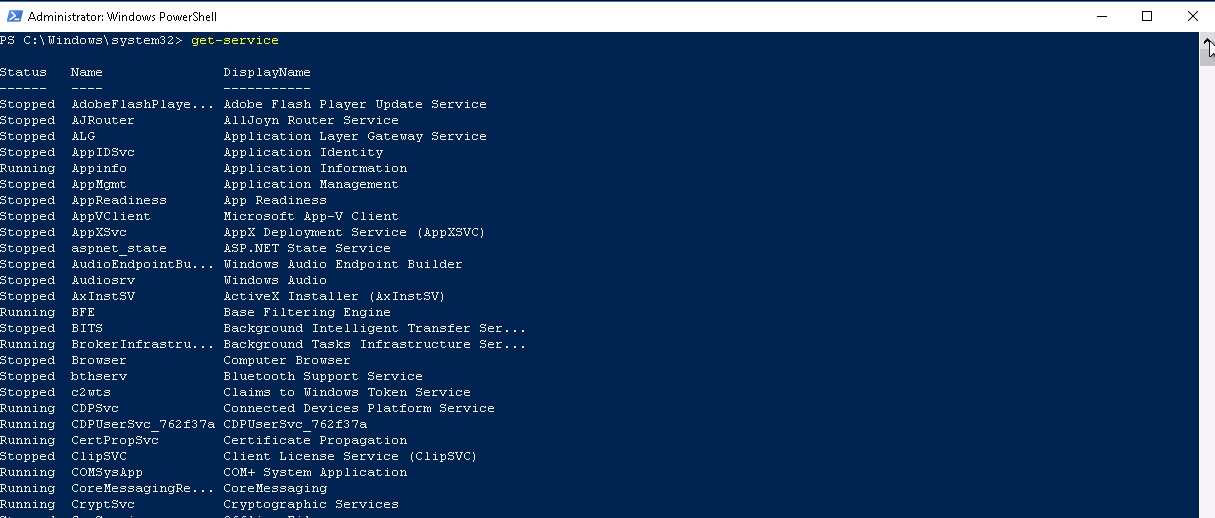
You will see information on each service on your system including status, name and displayname. But, there are many more properties for the object get-service than you are seeing here.
Now type get-service | get-member
This will output the objects applicable to the Get-Service dataset including Alias, Methods and property.
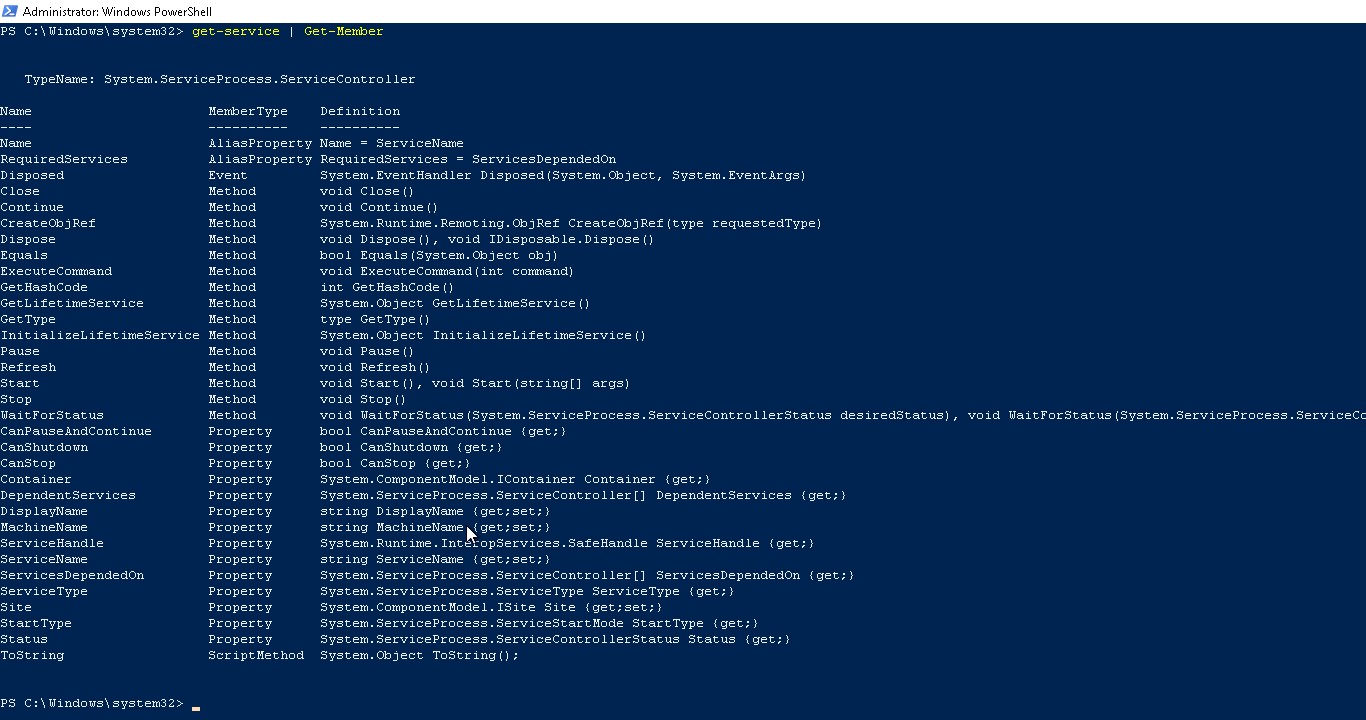
You can now use the information from Get-Member to build out your commands.
Now type get-service | Select-object Name, startype, status
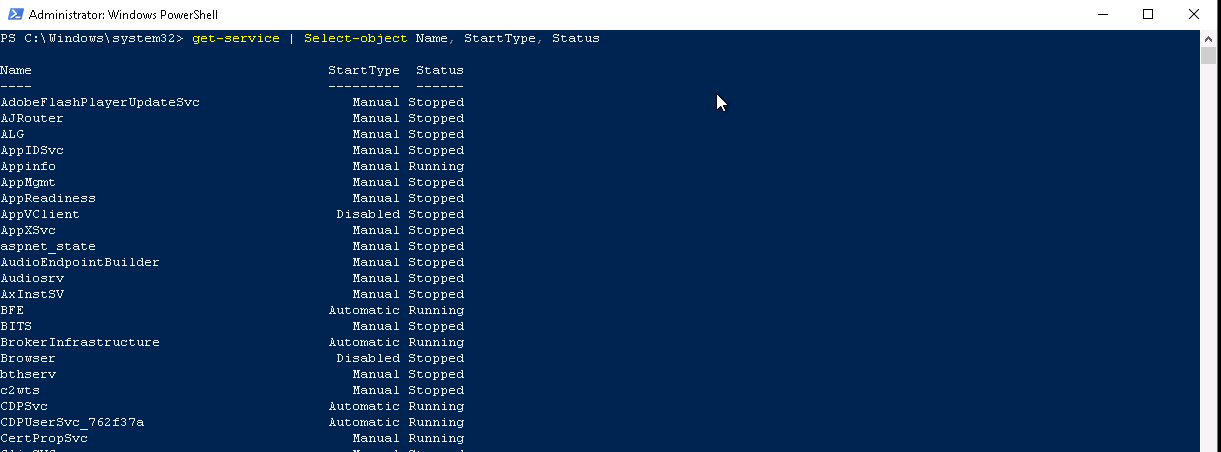
You will see information about your system services, this time displaying Name, Starttype and Status.
This can be taken further by introducing sorting, grouping and measuring.
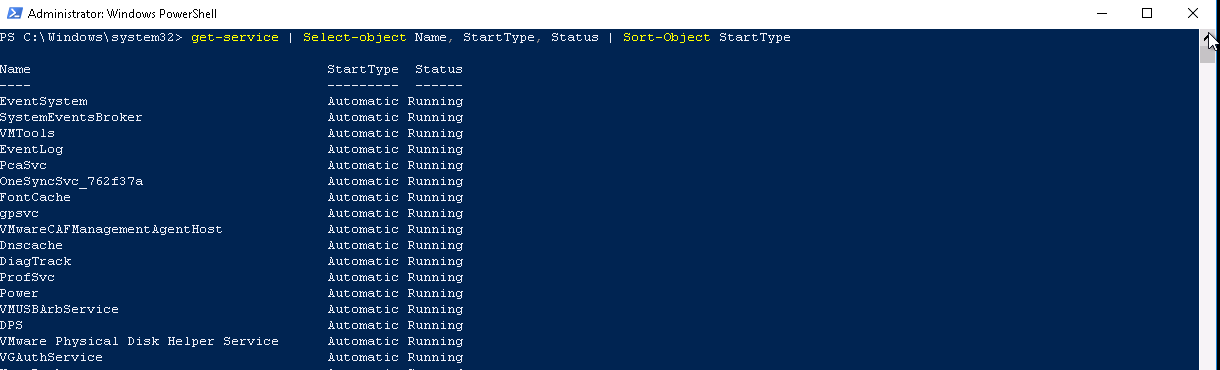
Now type get-service | Select-Object Name, Starttype, status | sort-object StartType
This will sort your results by Starttype. (Default is alphanumerically)
Now type get-service | Select-object Name, StartType, Status | Group-Object -property Status
This will group the output and show you how many services are Running, Stopped or if applicable disabled. It will automatically Count them for you as well. The data in the parentheses {} indicates more than one object has the value.

Finally, now type Get-service | Where-object status -eq “Running” | Measure-object
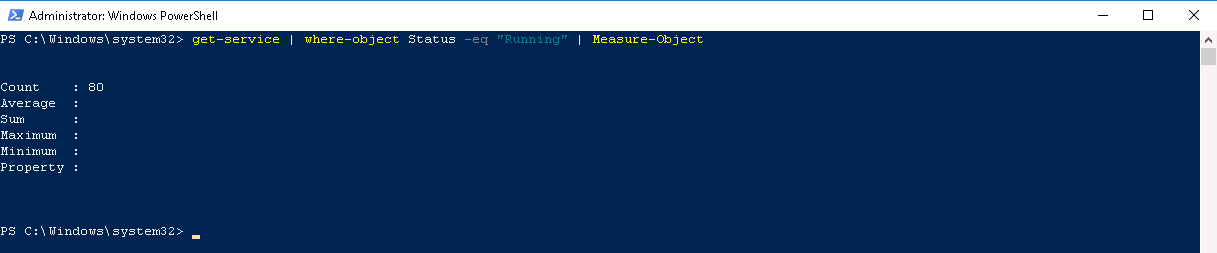
This command will only look for Running services and counts them. Here we have 80 running services.
Importing Data into PowerShell
PowerShell supports a large number of data formats which can be imported into PowerShell. This gives adminstrators the ability to execute tasks or commands against the data input. There are 2 key commands to grasp, Get-Content and Import-csv. The Get-Content cmdlet will get the content of an item at a defined location, this is usually text or a string. Import-Csv creates a table-like custom object using the data and headings from a csv file. Remember you can read more by typing get-help get-content -full and get-help import-csv -full
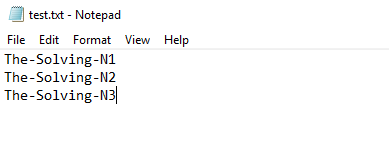
To demonstrate this I will be using Server_Name 2012 R2 Lab. I have created a text file with the server hostnames and saved it to C:\Temp\Test.txt
Type Get-Content C:\TEMP\Test.txt – Powershell will import that content.

Now we have the data in the Shell we can start making use of it
type Get-Content C:\Temp\test.txt | ForEach-Object {Get-WMIObject -class win32_processor} | FT – Autosize

This command outputs the CPU details of the Servers in my test.txt. The command introduces several key concepts which are key to understanding importing data into PowerShell
- The Get-WMIObject -class win32_processor is the command which gathers the CPU information.
- The ForEach-Object cmdlet will apply the Get-WMIObject command to each hostname listed in the test.txt.
- The parenthesis { } wrap the command {Get-WMIObject -class win32_processor} tells powershell to run Get-WMIObject -class win32_processor against every object (or line) of text in C:\Temp\test.txt.
- The final part of the command | FT -Autosize introduces outputting data from PowerShell, FT is an alias of Format-Table, the -autosize makes the shell display all the details in a readable format on my screen.
As always, this can be taken further. The output above might not list everything you need to know about the Processor.
Type Get-content C:\TEMP\test.txt | ForEach-Object {Get-WmiObject -class win32_processor} | Get-member
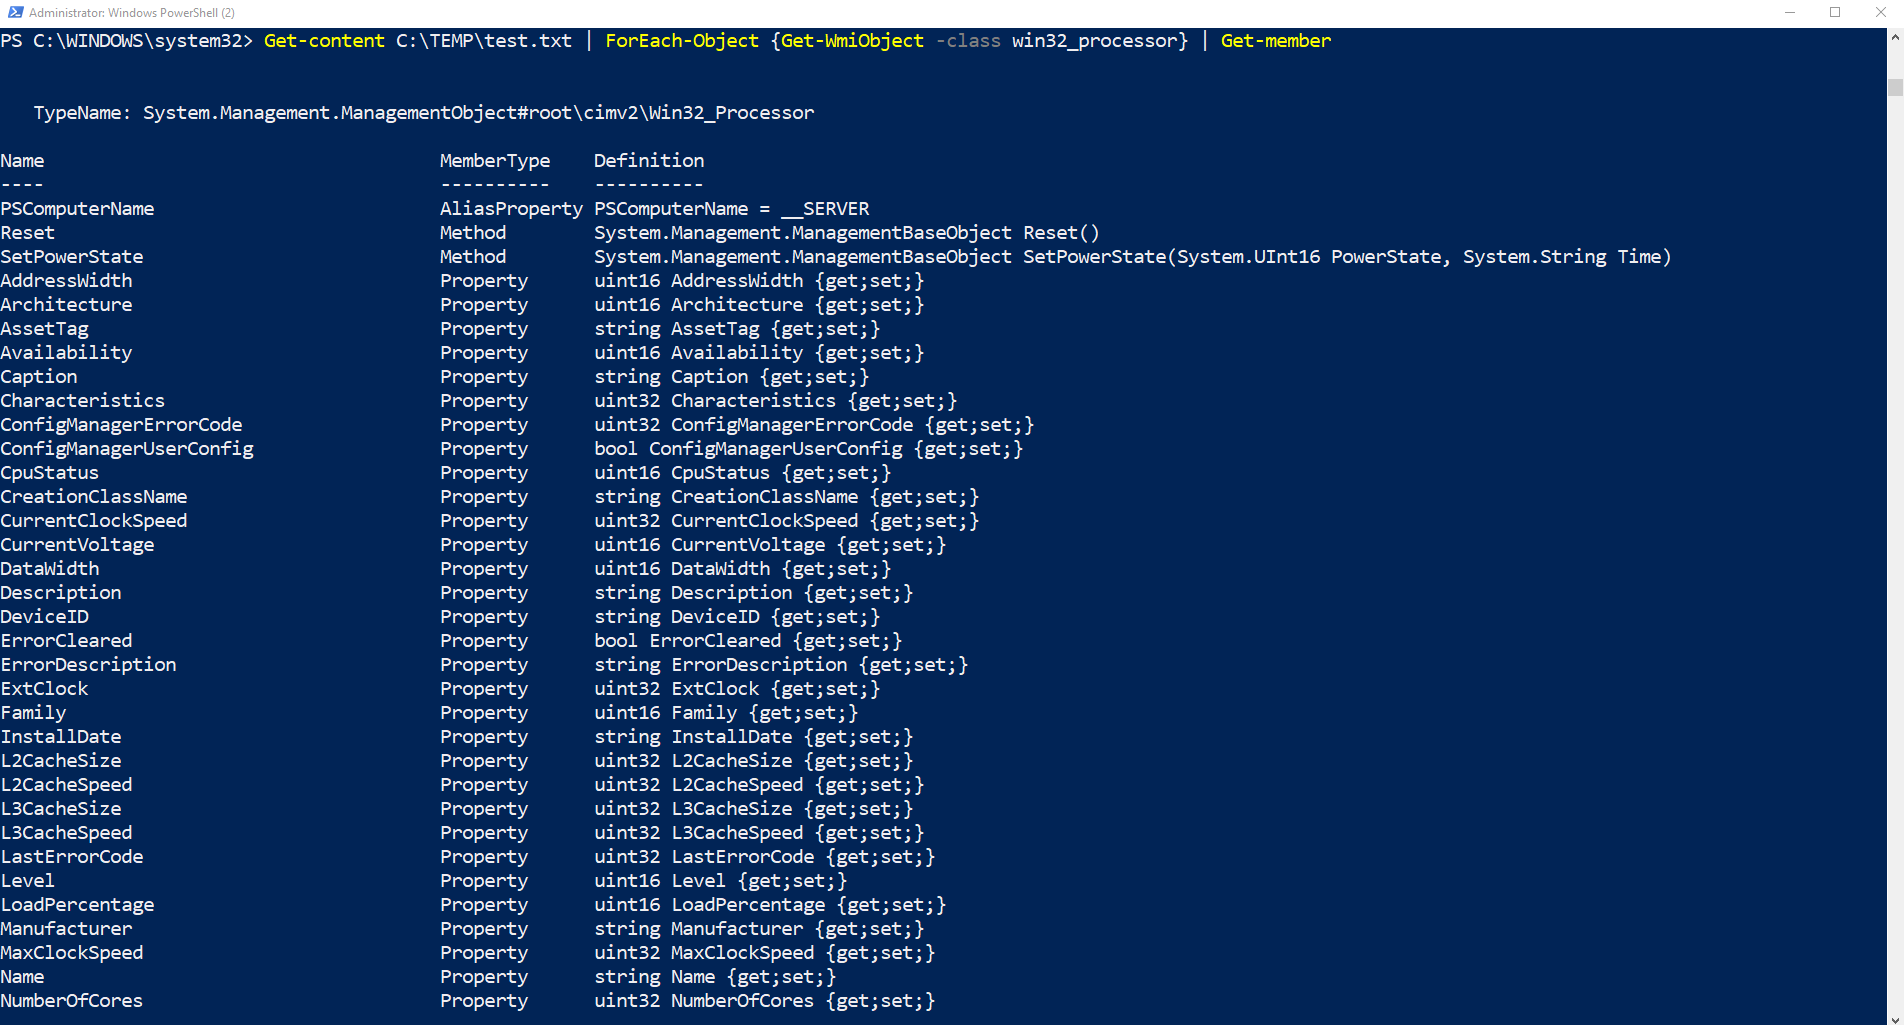
You can now edit the original command to search for specific properties you require.
Now type Get-content C:\TEMP\test.txt | ForEach-Object {Get-WmiObject -class win32_processor} | Select-Object Name, socketdesignation, numberofcores, number
oflogicalprocessors, L2cachesize, l3cachesize | Format-table -AutoSize

Outputting Data from PowerShell
We have already briefly mentioned output data from PowerShell with the Format-Table cmdlet. There are many formats which can be used. Some of the most popular are:
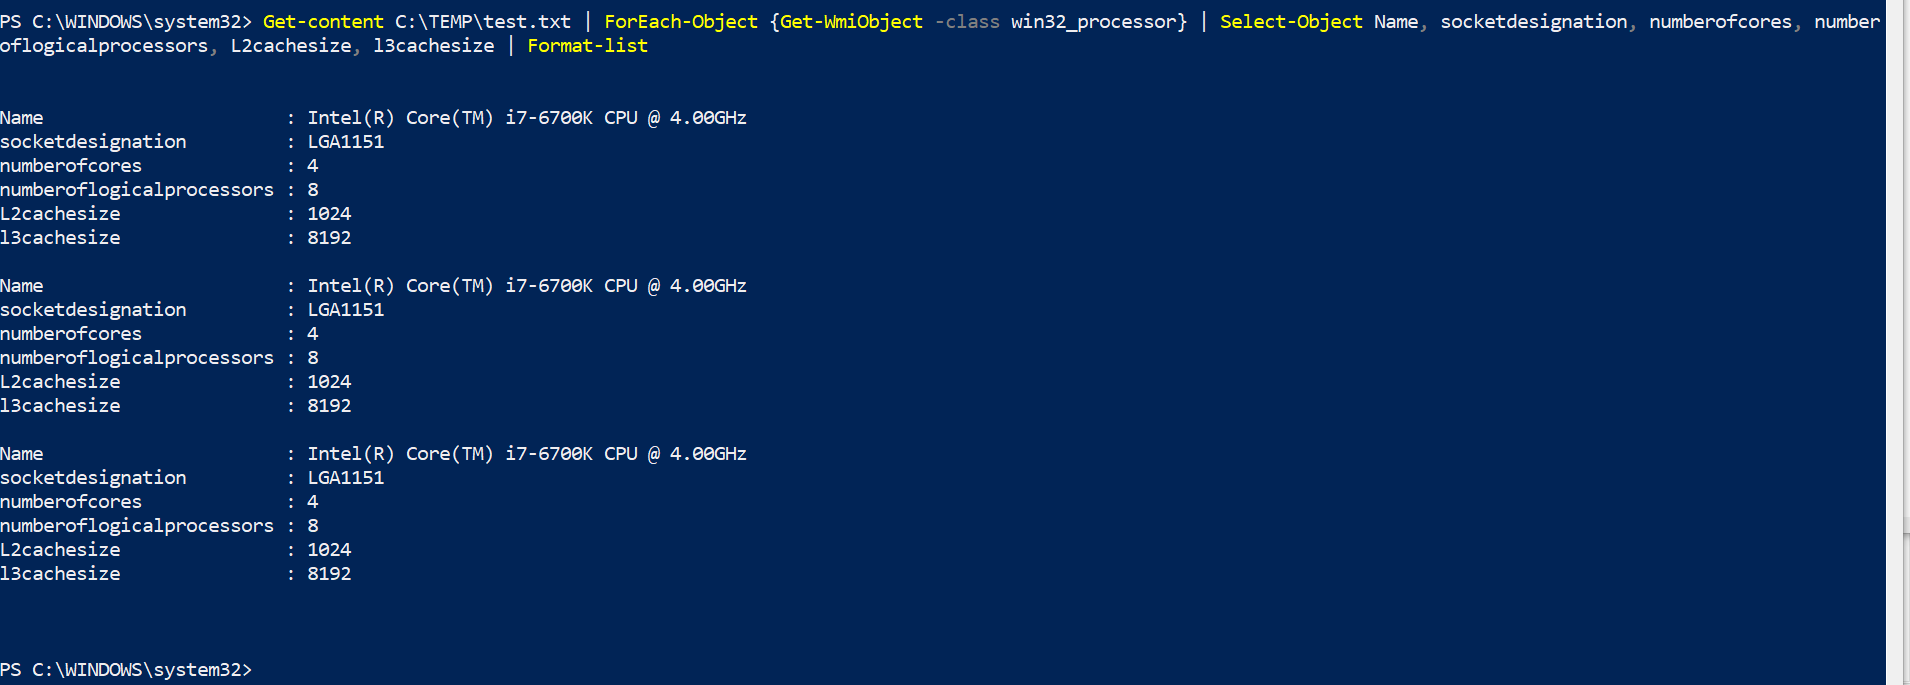
- Format-List – This is the default way PowerShell outputs data from the pipeline. Here is an example:
Type Get-content C:\TEMP\test.txt | ForEach-Object {Get-WmiObject -class win32_processor} | Select-Object Name, socketdesignation, numberofcores, number
oflogicalprocessors, L2cachesize, l3cachesize | Format-list
- Export-CSV – PowerShell can output directly to Command Separated Values (CSV) – this is a great way to get data for report.
Type Get-content C:\TEMP\test.txt | ForEach-Object {Get-WmiObject -class win32_processor} | Select-Object Name, socketdesignation, numberofcores, number
oflogicalprocessors, L2cachesize, l3cachesize | Export-CSV C:\TEMP\Test.csv
Then Open the CSV file located in C:\TEMP\Test.csv

- Convertto-HTML – Powershell can output data directly to HTML, you can also import CSS styles to create professionally designed reports.
Type Get-content C:\TEMP\test.txt | ForEach-Object {Get-WmiObject -class win32_processor} | Select-Object Name, socketdesignation, numberofcores, number
oflogicalprocessors, L2cachesize, l3cachesize | ConvertTo-Html > C:\Temp\test.html

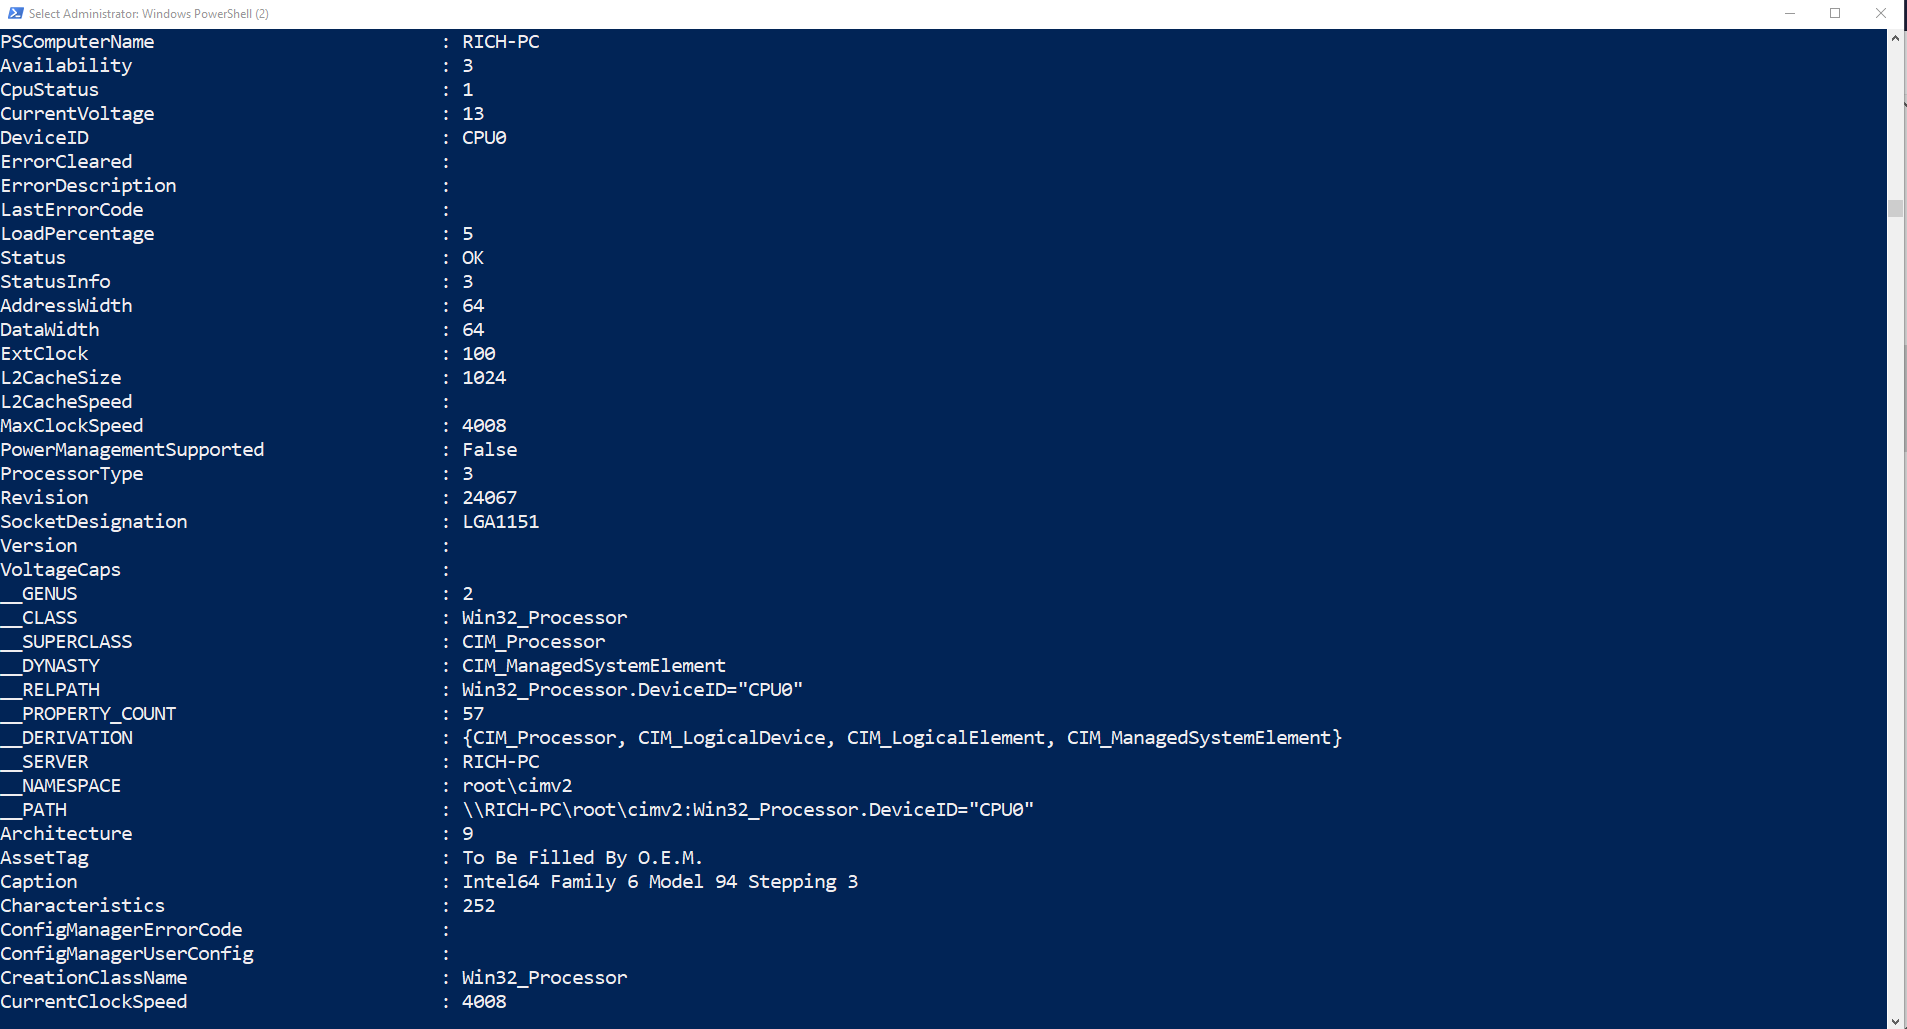
- Output Everything! – You can even tell powershell to output everything is has in the pipeline. Simply add -property * to your command
Type Get-content C:\TEMP\test.txt | ForEach-Object {Get-WmiObject -class win32_processor} | Format-List-Property *
This part of the guide will introduce several new concepts. Take your time and work through each part individually.
What software is installed on my system?
Type Get-ItemProperty HKLM:\Software\Wow6432Node\Microsoft\Windows\CurrentVersion\Uninstall\* | Select-Object DisplayName, DisplayVersion, Publisher, InstallDate | Format-Table –AutoSize

The command above will display the installed programs on your system. If you deconstruct the command you will see it does this in quite a complex way.
- Get-ItemProperty HKLM:\Software\Wow6432Node\Microsoft\Windows\CurrentVersion\Uninstall\* – This part of the command tells PowerShell to look in HKLM and browse to \Software\Wow6432Node\Microsoft\Windows\CurrentVersion\Uninstall and get all properties inside. HKLM is the PowerShell filesystem for the Registry!
- The rest of the command simply grabs specific data (DisplayName, DisplayVersion, Publisher, InstallDate) and outputs it to a Table
Additionally, you can browse the registry direct from the Shell by typing cd HKLM:\ you can then navigate the HKLM just as if you were using Command Prompt or Windows Explorer.
What Windows patches are installed on my system?
Finding information about hotfixs and KB articles was extremely complex in PowerShell. Microsoft has recently release the cmdlet Get-Hotfix. This is a great tool for interrogating your infrastructure to see what Windows Update patches are installed, or to see if a particular hotfix is installed. I found this knowledge was extremely useful when the WannaCry Ransomware exploit was release in 2017. PowerShell allowed me to search nearly every single Windows Server I manage to see which server was patched, and which was still outstanding and vulnerable. Once the script was written, it took minutes to produce a list of each vulnerable server (from several thousand servers)
Type Get-Hotfix | Format-table -autosize
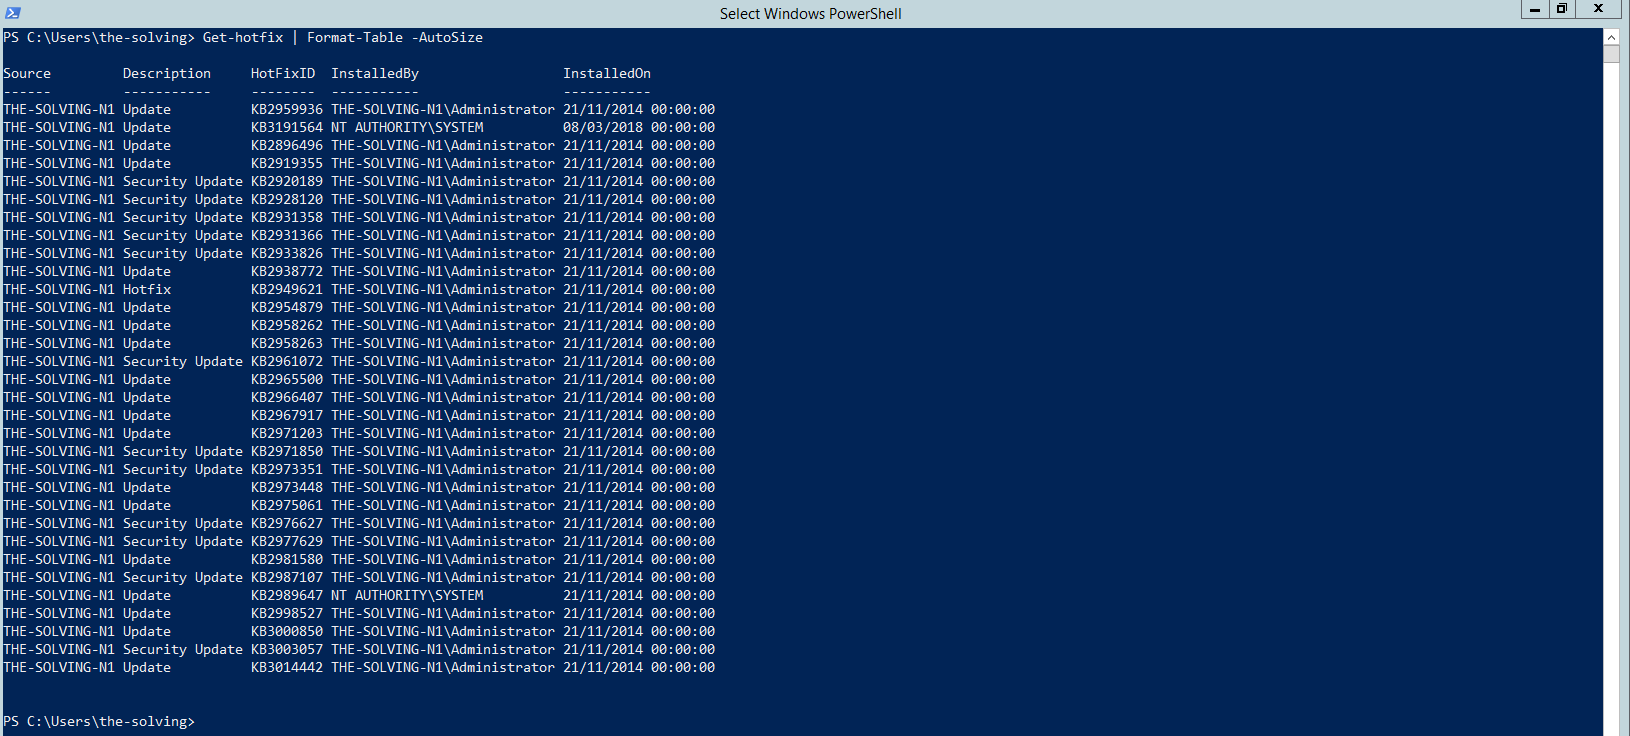
This will produce a list of what KB are installed on your local system.
Now we can use the power of the shell to interrogate multple computers. To do this we will introduce PowerShell ISE (integrated scripting environment).
Open PowerShell ISE and type the following into the script pane. Then press the green play button ![]() to run the script. You will need the text file of your servers that we created in part 2 of the guide. As a reminder, here is the content I created earlier:
to run the script. You will need the text file of your servers that we created in part 2 of the guide. As a reminder, here is the content I created earlier:

Now type into PowerShell ISE
$servers = get-content c:\temp\test.txt
foreach ($server in $servers)
{Get-HotFix -ComputerName $server | Select-Object PSComputername, HOTFIXiD, Installedon | Sort-Object -Property InstalledOn -Descending}

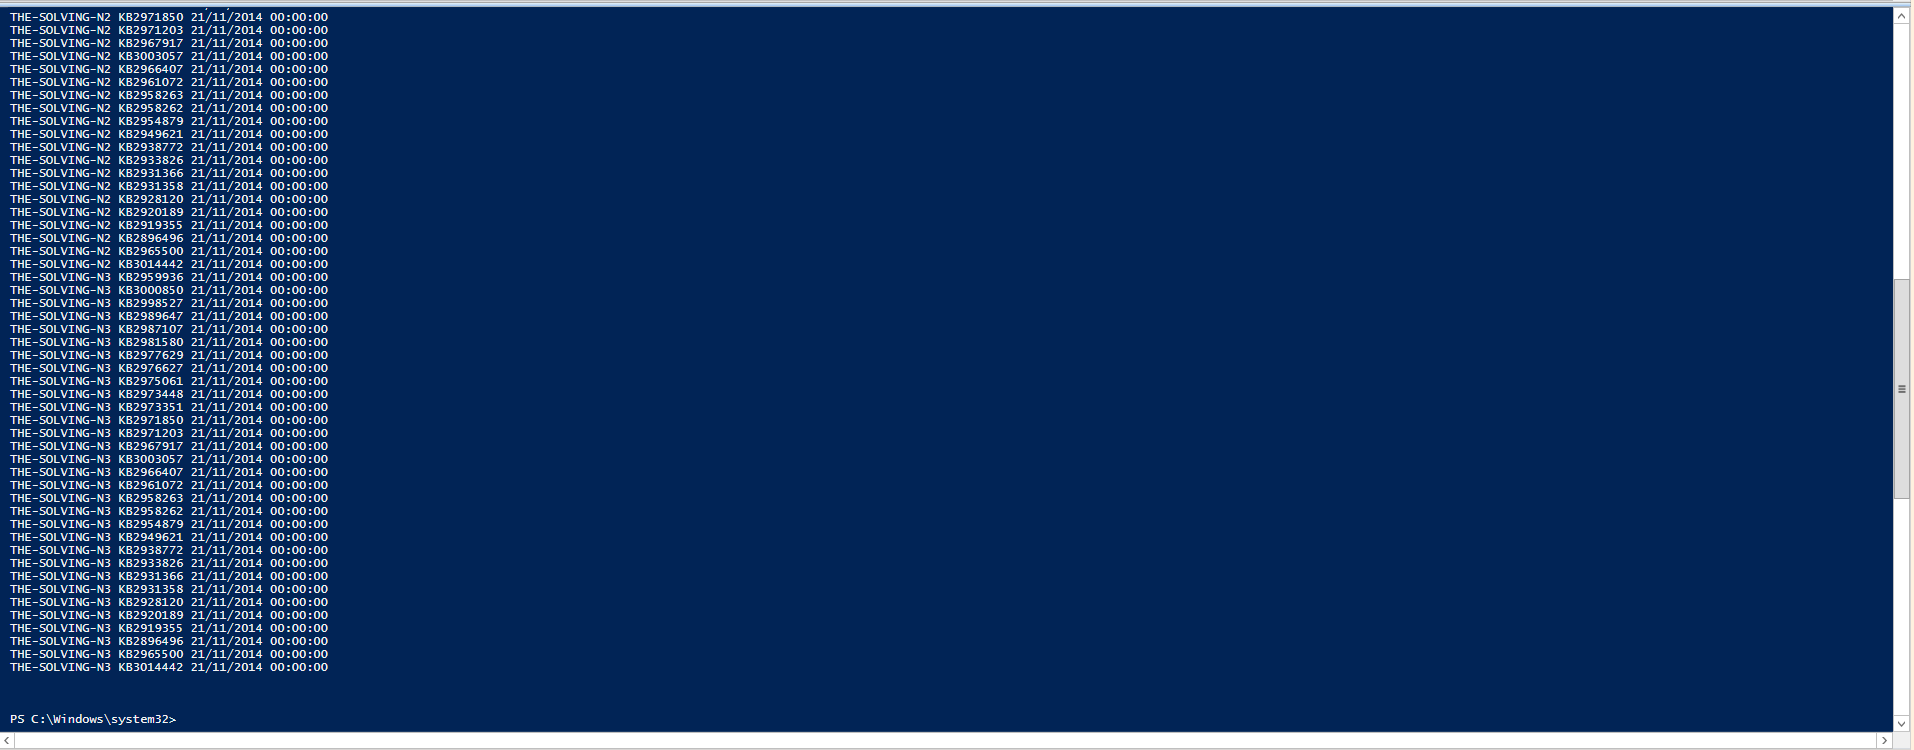
This will output all the installed KB on my demo servers Server_Name-N1,Server_Name-N2 and Server_Name-N3
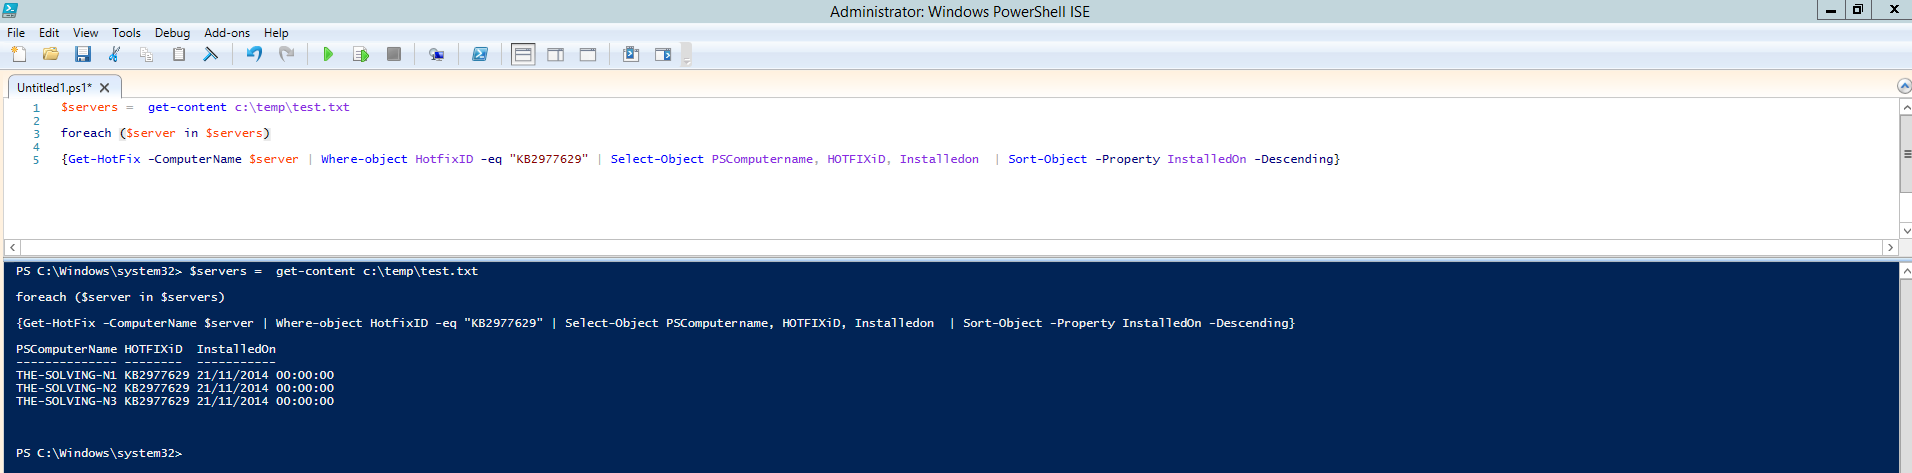
If you want to search for a specific KB, for example KB2977629, you need to add the cmdlet Where-object HotfixID -eq “KB2977629” into the script.
type
$servers = get-content c:\temp\test.txt
foreach ($server in $servers)
{Get-HotFix -ComputerName $server | Where-object HotfixID -eq “KB2977629” | Select-Object PSComputername, HOTFIXiD, Installedon | Sort-Object -Property InstalledOn -Descending}
How do I search the Event log for Errors?
The eventlog is a vital tool for looking at system issues. PowerShell can greatly improve the time and effort needed in seaching the event log.
type Get-Eventlog system -Newest 30 | Where-Object {$_.entryType -Match “Error”} | format-table -AutoSize

The above command will search the “SYSTEM” event log and display the newest errors in the last 30 alerts. You can change the Event log to search for the Application or Security Logs.
PowerShell and Active Directory
PowerShell can interact with every system toolset of Windows. It is very useful when interrogating Active Directory. Here are a selection of scripts I find useful when querying AD. Before we do anything we must have the Active Directory module enabled in the shell. The simpliest way to do this is to run these commands on your domain controller, however, this is not always possible so please note that you can also add this role directly onto your system (providing it is a member of the domain you wish to query).
Type Add-WindowsFeature RSAT-AD-PowerShell


Once installed you can now use the Shell to query and edit Active Directory. Please proceed with caution if working on a production environment.
Active Directory in PowerShell is another large subject to understand. Rather than go through every command step by step, here I have listed my favourite commands, the one’s that I use frequently when managing and maintaining Active Directory. You can use the get-help command to read in detail about these Active Directory cmdlets.
Querying Users
Querying user accounts is very simple in PowerShell. The commands in the table below will explain how to search for users, look for users with non-compliant password policies, users who are locked out, disabled accounts etc.
|
PowerShell Command |
What is does |
Category |
|---|---|---|
|
Get-ADUser -Filter * -Properties * | where { $_.whenCreated -ge $week } | select Name,whenCreated | Sort Name |
Get Users created in the last Week, sorted by Name. |
USERS |
|
Get-ADUser -Filter * -Properties PasswordNeverExpires | where { $_.PasswordNeverExpires -eq $true } | select Name | sort Name |
Get Users with passwords set to “Never Expire”, sorted by Name |
USERS |
|
Get-ADUser -Filter “Enabled -eq ‘$false’” | Select Name, UserPrincipalName | Sort name |
Get Users with INACTIVE accounts, Display Name and FQN, Sort by Name |
USERS |
|
Search-ADAccount -AccountDisabled -UsersOnly | FT Name,ObjectClass -A |
Get Users with DISABLED accounts, Display Name and FQN, Sort by Name |
USERS |
|
Search-ADAccount -LockedOut | Format-Table name,lastlogondate, lockedout, objectclass, passwordexpired, passwordneverexpires |
Find Users with locked Accounts |
USERS |
|
Search-ADAccount -AccountInactive -TimeSpan 90.00:00:00 -UsersOnly |Sort-Object | FT Name,ObjectClass -A |
Find User Accounts not used for last 90 days |
USERS |
|
Get-ADuser -Filter {name -like “*”} -properties *|select @{N=”Account”;E={$_.name}},@{N=”Name”;E={$_.givenname}},@{N=”LastName”;E={$_.surname}},@{N=”Mail”;E={$_.mail}},@{N=”AccountEnabled”;E={$_.enabled}},@{N=”MemberOf”;E={(Get-ADPrincipalGroupMembership $_).name -join (“`r`n”,”,,,,,”)}} | Sort-Object “Account” | FT -AutoSize |
Get all users group membership. Sorts data and formats as a table. Use Export-CSV to output to CSV file. |
USERS |
|
Get-ADUser -Filter * -Properties LastLogonDate | ? { $_.LastLogonDate -eq $null } | Select name,samaccountname
|
Find users who have Never Logged on |
USERS |
Querying Groups
Group membership in Active directory will tell you which users are members of which group. This can be extremely useful when you need to see who all the Domain Admins are, or ensure the security and compliance of your domain.
|
Command |
What it does |
Category |
|---|---|---|
|
get-adgroup -filter * -Properties GroupCategory | Select name, groupcategory | FT -A |
List all your Groups in active directory |
GROUPS |
|
Get-ADGroupMember -identity “Administrators” -recursive | select name |
List all members of the Administrators Group (Edit Group name accordingly) |
GROUPS |
|
Get-ADPrincipalGroupMembership -identity Turbogeek | Sort-object | FT -property name, samaccountname -AutoSize |
Find which groups a user is a member of. (Edit username accordingly) |
GROUPS |
|
Get-ADGroupMember -Identity Domain Admins” -Recursive | %{Get-ADUser -Identity $_.distinguishedName -Properties Enabled | ?{$_.Enabled -eq $false}} | Select DistinguishedName,Enabled |
Find Disabled Users in the Domain admins group (Edit Group name accordingly) |
GROUPS |
Querying Active Directory Infrastructure
These commands will give you environmental information about your estate.
|
Command |
What it does |
Category |
|---|---|---|
|
Get-ADDomainController -Filter * | Format-table name,domain, forest,site, ipv4address, operatingsystem |
Find the Domain controllers on your estate |
DC |
|
Get-ADDomainController -Filter {IsGlobalCatalog -eq $true} | Select-Object Name,ipv4address,isglobalcatalog, operatingsystem | FT -A |
Find Global Catalog Servers in Domain, useful if you have more than one domain controller. |
DC |
|
Get-ADDomainController -Filter {IsReadOnly -eq $true} |
Find Readonly domain controllers if applicable to your infrastructure. (Branch Servers) |
DC |
| Get-ADComputer -Filter ‘Name -like “Server_Name-N1*”‘ -Properties canonicalName, CN, created, IPv4Address, objectclass, OperatingSystem, OperatingSystemServicePack | FT -A | Find Domain computers like “Server_Name-n1“, displays useful info in table |
DC |
|
Get-ADForest | Select-Object -ExpandProperty ForestMode |
Get AD Forest level |
DC |
|
Get-ADDomain | Select-Object -ExpandProperty domainmode |
Get AD Domain level |
DC |
|
Get-ADReplicationConnection -Filter {AutoGenerated -eq $true} |
Get replication details on domain. This will only return data is you have more than one domain controller. |
DC |
|
$datecutoff = (Get-Date) |
Run this script from PowerShell ISE. Set the $datecutoff and this will tell you last time a computer logged in |
DC |
Editing Active Directory
You can also use PowerShell to edit Active Directory. Use this with caution especially if you are learning PowerShell.
|
Command |
What it does |
Category |
|---|---|---|
| Disable-ADaccount -identity Server_Name | Disable account Server_Name |
USERS |
| Enable-ADaccount -identity Server_Name | Enable account Server_Name |
USERS |
| Set-ADAccountExpiriation -Identity Server_Name -datetime “07/01/2019” | Set Account Server_Name to expire on 7th Jan 2019 |
USERS |
| Clear-ADAccountExpiration -identity Server_Name |
Clear account expiry date |
USERS |
| Set-ADAccountPassword -identity Server_Name -reset -newpassword (Convertto-Securestring -asplaintext “Passw0rd123!” -Force) |
This will change users password securely and encyrpt password transmissions – essential |
USERS |
| Unlock-ADAccount -identity Server_Name | Unlocks Server_Name Account |
USERS |
|
New-AdGroup -Name “Test Users” -SamAccountName TestUser -GroupCategory Security -GroupScope Global -displayname ‘Test Users’ -Path “OU=Groups, OU=Resources, DC=TEST, DC=UK -Description “All Test Users” |
This will create a Security Group called Test Users in the OU Groups > Resources (Edit as approrpriate) |
GROUPS |
|
Set-ADGroup -Identity ‘Test Users’ -groupcategory Distribution -groupscope Universal -Managedby ‘TurboGeek’ |
This will edit the Group Test Users and make it a Universal, distribution group managed by me. (Edit as appropriate) |
GROUPS |
|
search-adaccount -lockedout | unlock-adaccount -passthru -confirm |
This command will search active directory and unlock all locked user accounts in AD. This is a crude but effective was of doing bulk unlock of accounts |
USERS |
|
|
|
That completes ‘A Guide to PowerShell’, this has been a whistlestop tour and introduction to PowerShell. I hope that it has given you a taster of what PowerShell can do. We have literally just scratched the surface with what you can do in PowerShell. I have been learning PowerShell for 3 years and every single day I use it I am learning new techniques, tips and tricks. It is a wonderful tool for system administrators, and it can make the system administrators task much easier.
That’s it, thanks for taking the time to read this article. if you have any questions or feedback please write in the comment section below.
Leave a Reply