
Portainer: How to Build a Docker Home Lab Setup
Update: Tested and Validated 30th December 2025
Key Takeaways
- Portainer is a lightweight, open-source GUI that simplifies Docker and Kubernetes management.
- Debian is the recommended OS for a stable, “rock-solid” Portainer host.
- Prerequisites include a Linux environment (or VM) with Docker Engine installed.
- Installation is performed via a single Docker command after creating a persistent data volume.
- Accessibility: Once deployed, manage your entire container ecosystem via port
9000.
What is Portainer and Why Use it for a Home Lab?
Portainer is a powerful, open-source management interface that allows you to build and manage Docker, Docker Swarm, and Kubernetes environments through a clean web UI.
In my years of managing home labs, I’ve found that while the CLI is essential, Portainer provides a “single pane of glass” view that is invaluable for monitoring container health, managing volumes, and quickly deploying stacks via Docker Compose. It bridges the gap between complex container orchestration and user-friendly management.
How Do You Prepare Your Hardware for a Portainer Home Lab?
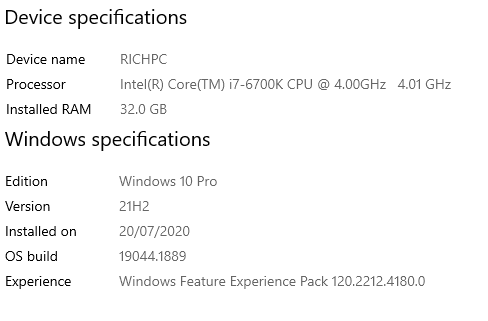
To run Portainer effectively, you need a host. I personally use a repurposed gaming PC running headless (no monitor). While containers are lightweight, I recommend at least 4GB of RAM and a multi-core CPU to ensure your containers have room to breathe as your lab grows.
Step 1 – Preparing the Local Computer for Portainer
Note: Skip to Step 2 if you are already running Debian or another Linux flavour.
As I am running Windows 10, I have opted to use a HyperV virtual machine. How you spec the server depends on how you want to use it. Docker containers are very lightweight so start low and expand later if you need to.
Windows 10 Steps
- Open Windows Features. Simply search from the start bar

- Enable HyperV Service here as they are not enabled by default on Windows 10 or 11. Note: On Windows 10, it’s called HyperV; on Windows 11, it’s called Windows Hypervisor Service.
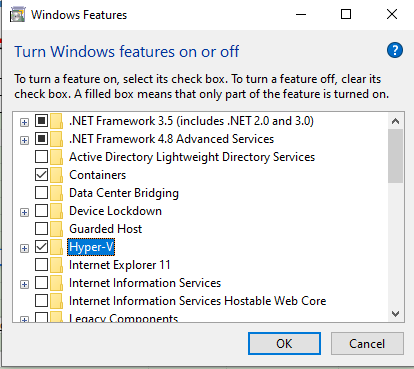
- Once Installed, reboot your computer to apply the changes.
Step 2 – Prepare Virtual Machine for Portainer
This step will show how to create the VM needed for Debian and Portainer
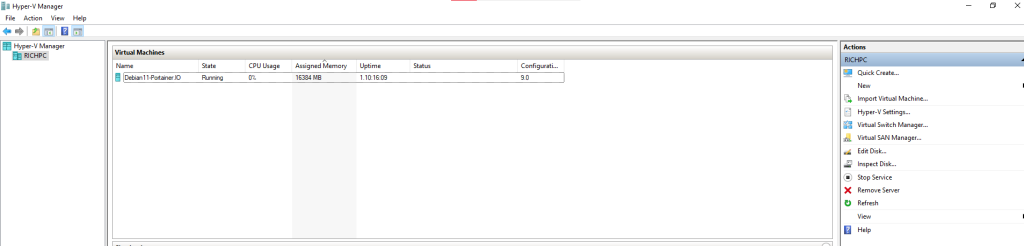
- Start HyperV
- Right-click on HyperV Server (typically your PC hostname) and select New > Virtual Machine.
- Give the VM a Name and set the storage location to your preference.
- Select Generation 1
- Give it at least 4096MB of Memory
- Set the VM the required CPU allocation and assign it to your network preferences.
- When setting disk size, consider what you are using portainer for. For example, do you need a lot of local disk space, or will you be running everything from NAS? I set mine to about 250GB.
- On Install Options, select Install Operating System from bootable CD/DVD. Then click the ISO Radio button.
- Point the browser to your Debian ISO image – you can download it here.
- For Instructions on how to install Debian – see installation instructions here.
After you have installed Debian. Install portainer – this is how you do it.
SSH to your new Debian server
Step 3 – Update Debian
apt-get update && apt-get install ca-certificates curl gnupg -yStep 4 – Install Docker CE
Before installing Portainer, Docker CE must be installed on your server. You can install Docker CE by following the below steps. If you encounter any issues, check out the official documentation – it’s likely they’ve changed something.
- Install the required dependencies:
install -m 0755 -d /etc/apt/keyrings
curl -fsSL https://download.docker.com/linux/debian/gpg | gpg --dearmor -o /etc/apt/keyrings/docker.gpg
chmod a+r /etc/apt/keyrings/docker.gpg- Next, update the repository and install Docker CE with the following command:
echo "deb [arch=$(dpkg --print-architecture) signed-by=/etc/apt/keyrings/docker.gpg] https://download.docker.com/linux/debian $(. /etc/os-release && echo "$VERSION_CODENAME") stable" | tee /etc/apt/sources.list.d/docker.list > /dev/null
apt-get update- Now Install Docker
apt-get install docker-ce docker-ce-cli containerd.io -y- Once Docker is installed, verify the Docker installation using the following command:
docker versionStep 5 – Install Docker Compose (optional)
You may also need to install Docker Compose on your system. This is optional, but I highly recommend it.
- First, download the latest version of Docker Compose binary using the following command:
- You will find the latest versions here: https://github.com/docker/compose/releases
wget https://github.com/docker/compose/releases/download/v2.28.1/docker-compose-linux-x86_64- Next, copy the downloaded binary to the system path:
cp docker-compose-linux-x86_64 /usr/local/bin/docker-compose- Next, set executable permissions to the Docker Compose binary:
chmod +x /usr/local/bin/docker-compose- Next, verify the Docker Compose installation using the following command:
docker-compose --versionStep 6 – Install Portainer UI
First, create a volume to store Portainer data using the following command:
docker volume create portainer_dataNext, run the following command to download the Portainer image from the Docker Hub registry, create a container, and expose the container on port 9000:
docker run -d -p 8000:8000 -p 9000:9000 --name=portainer --restart=always -v /var/run/docker.sock:/var/run/docker.sock -v portainer_data:/data portainer/portainer
You can verify the running container using the following command:
docker psStep 7 – Access Portainer UI
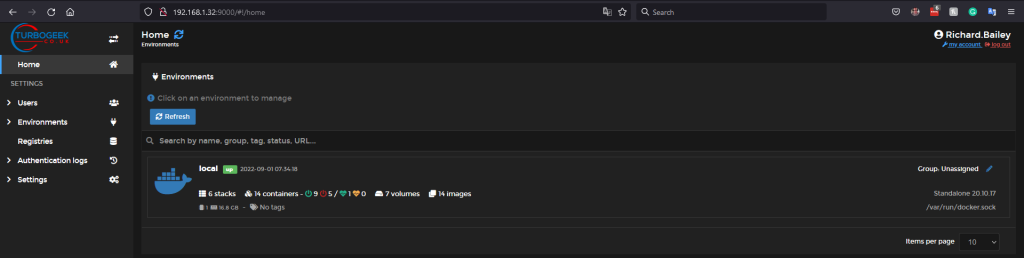
Now, open your web browser and access the Portainer UI ip address. Use the URL http://your-server-ip:9000. You should see the following page:

Set your admin user and password and click on the Create user button. You will be asked to select the Docker environment that you want to manage:
Select the local environment and click on the Connect button. You should see the Portainer UI on the following page:
Deploying Your First “Stack” with Docker Compose
One of the best features of Portainer is “Stacks,” which utilizes Docker Compose files. To deploy a service like a Pi-hole or a Plex server:
- Navigate to Stacks in the Portainer sidebar.
- Click Add Stack.
- Paste your YAML configuration into the web editor.
- Click Deploy. This method is far superior to manual
docker runcommands because it keeps your configurations organized and version-controlled.
Managing Remote Docker Hosts via Portainer Agents
As your home lab expands, you might add a Raspberry Pi or a secondary server. You don’t need a separate Portainer instance for each. By installing the Portainer Agent on your secondary nodes, you can manage them all from your primary Debian dashboard. This uses a secure tunnel (Port 9001) to link environments, allowing for a centralized multi-node management strategy that mimics professional enterprise setups.
Example Stacks
AdGuard Home: Portainer Stack Template
Copy and paste the following code into the Portainer > Stacks > Web editor:
version: "3"
services:
  adguardhome:
    image: adguard/adguardhome
    container_name: adguardhome
    restart: always
    # Persistent storage for configuration and data
    volumes:
      - ./adguard_work:/opt/adguardhome/work
      - ./adguard_conf:/opt/adguardhome/conf
    # Port mappings
    ports:
      - "53:53/tcp"
      - "53:53/udp"
      - "80:80/tcp"
      - "443:443/tcp"
      - "443:443/udp"
      - "3000:3000/tcp" # Initial setup port
      - "853:853/tcp"
      - "784:784/udp"
      - "8853:8853/udp"
      - "5443:5443/tcp"
- "5443:5443/udp"Configuration Breakdown
- Persistent Volumes: The
- ./adguard_work:/opt/adguardhome/worklines ensure that your filter lists and settings aren’t lost if you restart the container. - Port 53: This is the standard DNS port. Ensure no other service (like
systemd-resolved) is using this port on your Debian host. - Port 3000: This is used for the initial configuration wizard. Once you finish the setup, you will typically access the dashboard via port 80 or 443.
How to Deploy via Portainer
- In Portainer, go to Stacks > Add stack.
- Name it
adguard-home. - Paste the YAML code above into the editor.
- Click Deploy the stack.
- Access the setup wizard at
http://<your-server-ip>:3000.
Portainer Q&A
Q1: What are the advantages of using Portainer over the command line interface (CLI) for Docker and Kubernetes management?
A1: Portainer offers a user-friendly web-based graphical user interface (GUI) that simplifies container management, making it more accessible for beginners and those who prefer a visual approach. It provides an intuitive dashboard for monitoring and managing containers, images, networks, and volumes, streamlining tasks that might be more complex via the CLI. Portainer also offers features like role-based access control (RBAC) in its business edition, enhancing security and control over container environments.
Q2: Can I use Portainer to manage Docker containers running on a remote server, or is it limited to the local machine?
A2: Yes, Portainer can manage Docker containers running on both local and remote servers. During the initial setup, you choose the environment to manage, allowing you to connect to remote Docker hosts by providing their endpoint details (IP address and port). This enables centralized management of containers across multiple servers or environments.
Q3: How does Portainer handle updates? Is there an automatic update mechanism, or do I need to manually update the Portainer container?
A3: Portainer does not have an automatic update mechanism within the application itself. You need to manually update the Portainer container to the latest version. This typically involves pulling the latest image from Docker Hub and recreating the Portainer container. However, Portainer provides notifications about new versions, making it easy to stay informed about updates.
Q4: What is the difference between Portainer Community Edition and Business Edition?
A4: Portainer Community Edition (CE) is a free and open-source version that provides essential features for managing Docker and Kubernetes environments. Business Edition (BE) builds upon CE with advanced features like:
- Advanced Role-Based Access Control (RBAC): Granular control over user permissions and access to resources.
- Support for multiple Kubernetes distributions: Manage various Kubernetes flavors from a single interface.
- Registry management: Securely manage and control access to private container registries.
- Dedicated support: Access to professional support from the Portainer team.
Q5: Can Portainer be used with Docker Compose, and if so, how does it integrate with Compose files?
A5: Yes, Portainer has excellent integration with Docker Compose. You can use Portainer to:
- Deploy stacks defined in Docker Compose YAML files directly through the interface.
- Manage existing stacks deployed via Compose, including scaling services, viewing logs, and restarting containers.
- Edit Compose files within Portainer.
Q6: Does Portainer support managing containers on different operating systems or architectures, such as Windows containers or ARM-based devices?
A6: Yes, Portainer supports managing containers across different operating systems and architectures. It can manage Docker containers running on Linux, Windows, and ARM-based devices like Raspberry Pis. This versatility makes Portainer a suitable choice for diverse container environments.
Q7: Is it possible to use Portainer to back up and restore my container configurations and data?
A7: While Portainer doesn’t have built-in features for comprehensive backups and restores, you can use it in conjunction with other tools to achieve this. For instance, you can use Portainer to manage volumes and then use external tools or scripts to back up those volumes, ensuring data persistence and recovery.
Q8: How secure is Portainer, and what measures are in place to protect my container environment?
A8: Portainer prioritizes security and offers several features to protect container environments:
- Authentication and authorization: Secure access to the Portainer interface with username/password authentication and, in the Business Edition, granular RBAC.
- TLS encryption: Secure communication between the Portainer server and clients using HTTPS.
- Regular security updates: Portainer releases updates to address potential vulnerabilities and security issues.
Q9: Are there any limitations to the number of containers or nodes that Portainer can manage?
A9: Portainer, particularly the Community Edition, is designed to be lightweight and can comfortably manage a substantial number of containers and nodes. However, for very large-scale deployments with thousands of containers or nodes, performance might be a consideration. In such cases, the Business Edition with its optimized architecture and support might be more suitable.
Q10: Where can I find more information and documentation about Portainer, including advanced usage and troubleshooting?
A10: The official Portainer website (www.portainer.io) is an excellent resource for comprehensive documentation, tutorials, and a community forum for support. You can also find detailed information and examples on the Portainer GitHub repository (github.com/portainer/portainer).
That’s it, you now have the latest version of Portainer running on Debian. We welcome all feedback, comments, and suggestions in the comments section below.
Recent Comments