
Amazon Workspaces is essentially a jump box that sits inside AWS and has access to all your AWS resources. It can be a Linux or Windows Desktop. (Simply look for workspaces windows)
Amazon has created a great video that shows you exactly what a Workspace does:
https://www.youtube.com/watch?v=jsqI7KU3S8I&feature=youtu.be
Quick Answer
- Open AWS WorkSpaces in the Management Console
- Create a directory using AWS Directory Service (Simple AD or Managed Microsoft AD)
- Register the directory with WorkSpaces
- Launch a WorkSpace: choose a bundle (hardware/OS), assign a user and directory
- The user receives an invitation email with the WorkSpaces client download and login details
How do you build an Amazon Workspaces client in the AWS Console?
This is a quick guide to building a workspace in the AWS Console. In this example, I am using an environment that is integrated with Active Directory.
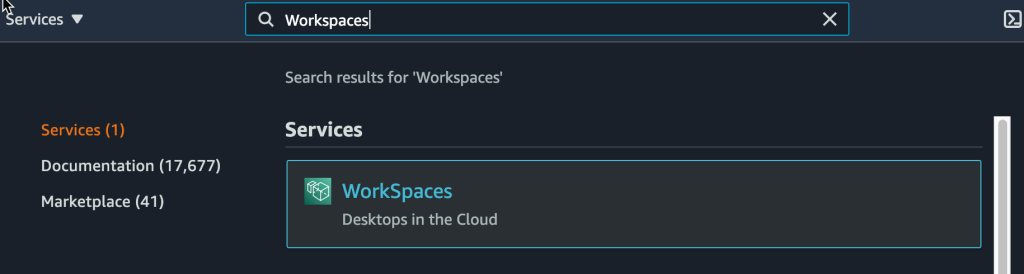
Step 1 – Log into AWS and Open Workspaces
- Log into the AWS Console
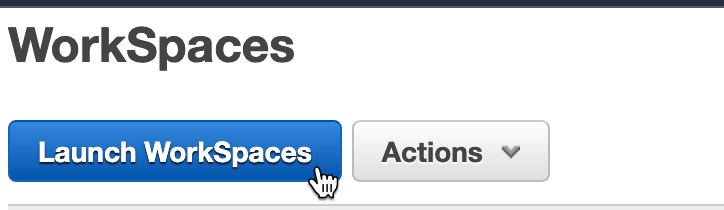
- Search for Workspaces and open the Workspaces view.
- From the Workspace page, click Launch Workspace
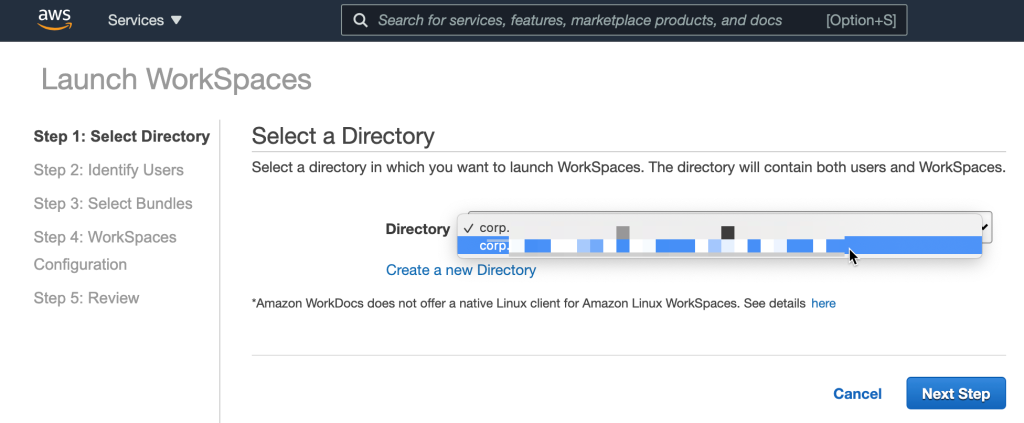
Step 2 – Select Your Existing Directory Service
This can be integrated with either an existing Azure AD or AWS Directory Service. In this example, I am connecting to a privately managed AD cluster hosted on EC2
- Select your Directory Services (Note: your account must have the DS permission in iAM)
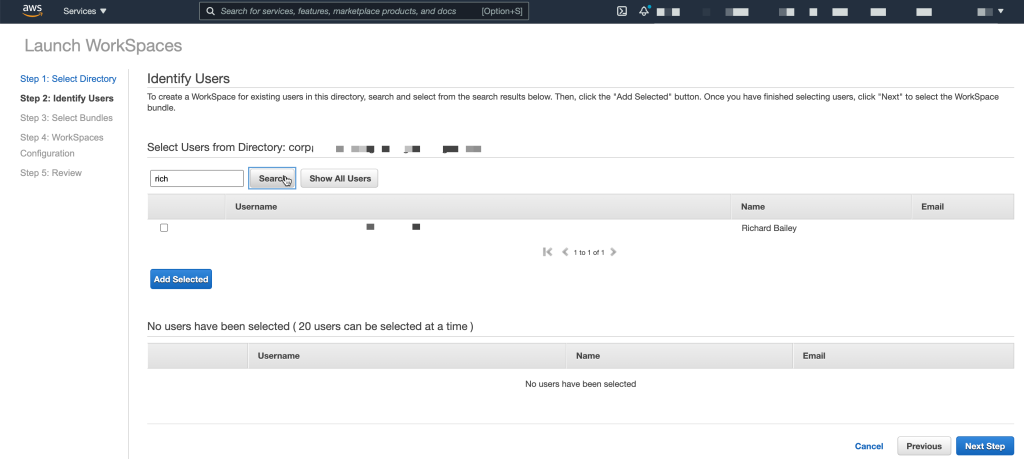
- From the Identify Users section, press Show All Users, search for your directory services name, tick the checkbox, and then ADD SELECTED. Finally, click next step.
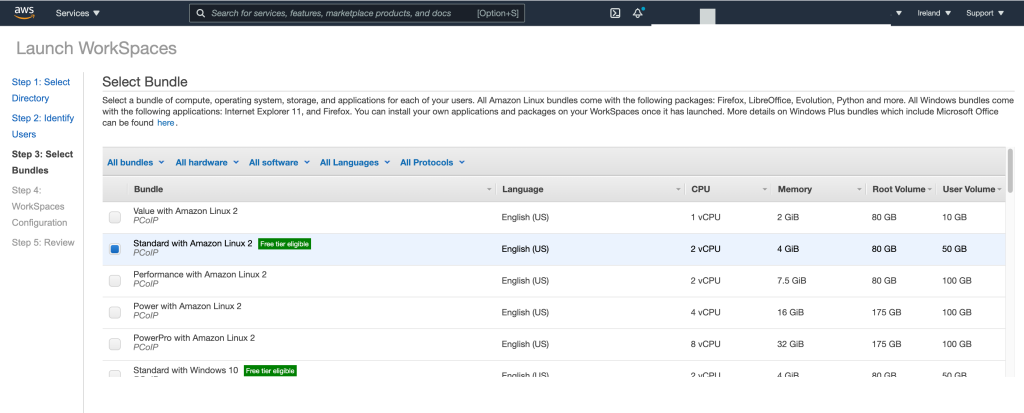
On the next page, choose your image. In this example, I have used the standard with Amazon Linux 2
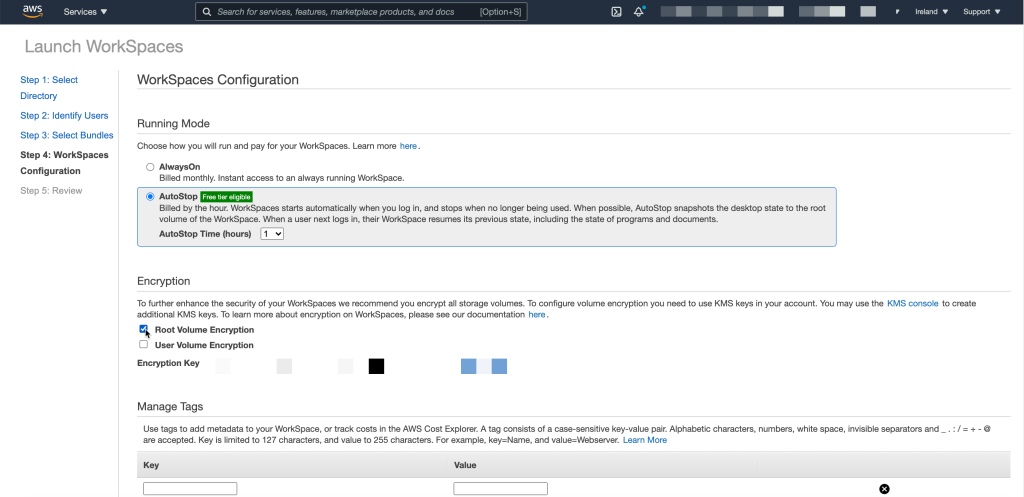
On the workspace configuration page, leave the AutoStop rule as default, and I recommend you choose “Root Volume Encryption”. Add a tag if you want to, and then click Review and Build.
The build process will take up to 20 minutes to complete, I don’t know why it takes so long, but it does. You can monitor the progress throughout. Upon completion, select the dropdown menu next to your workspace to expand the details. Locate the Registration Code; you will need this later.
Step 3 – Download the Amazon Workspaces Client Application
Download the Amazon Client Application
Visit the link above and download the client for your Operating System. Install the client, open it and input the registration code when prompted.
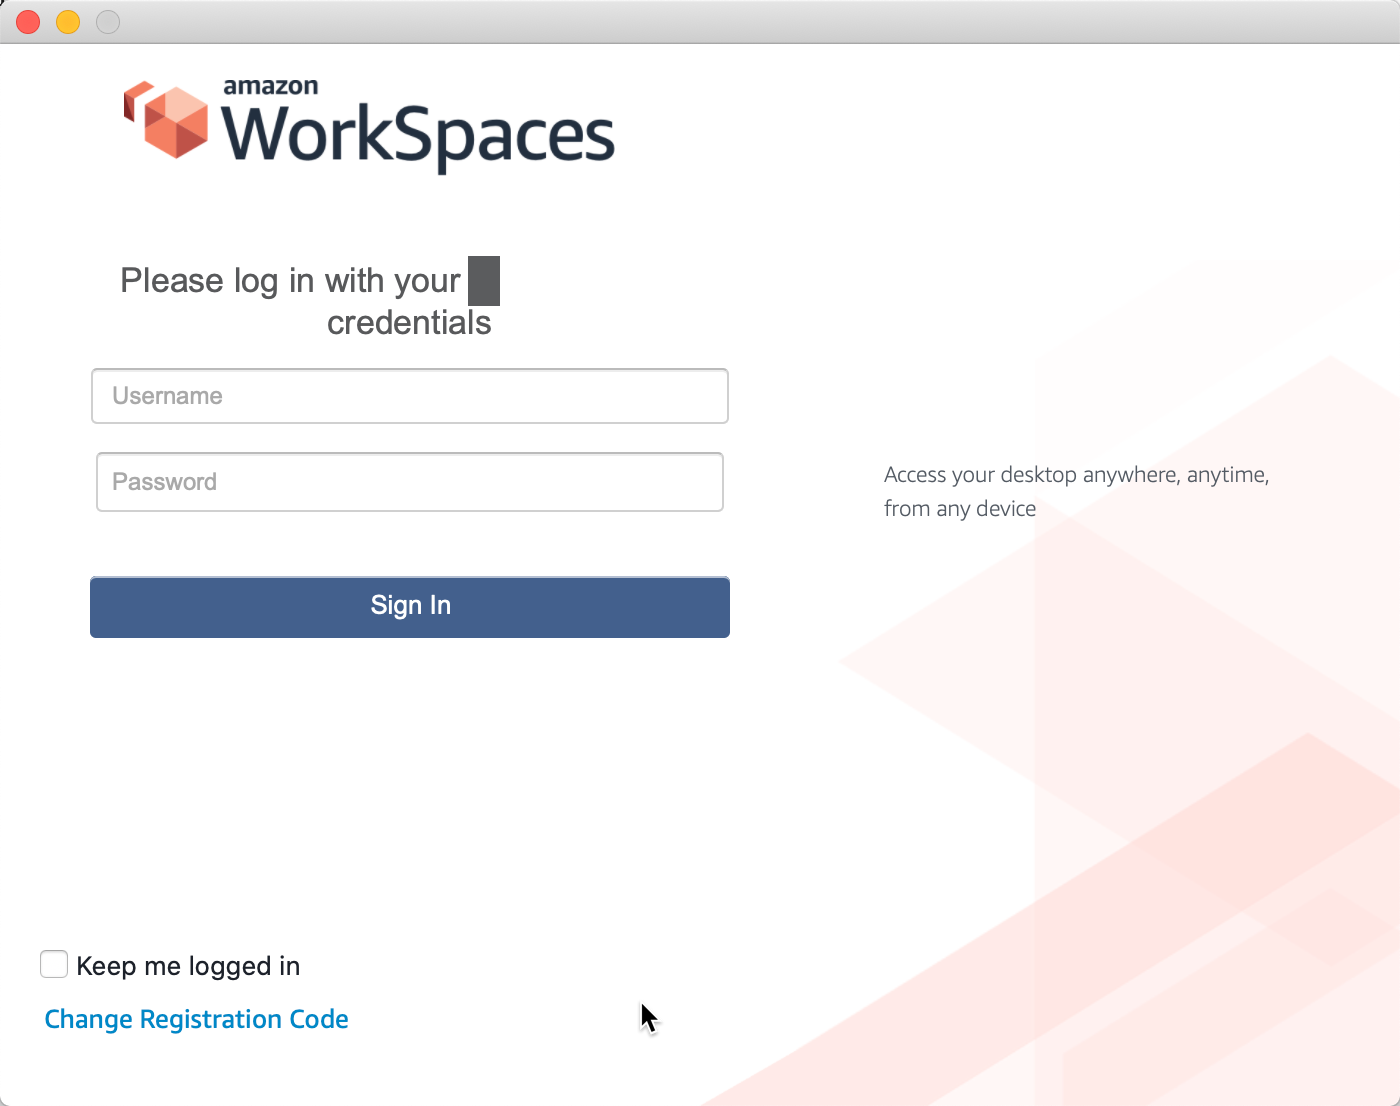
Step 4 – Log into Amazon Workspaces
You will then be asked to input your domain credentials.

After a few moments, you will have access to the desktop.
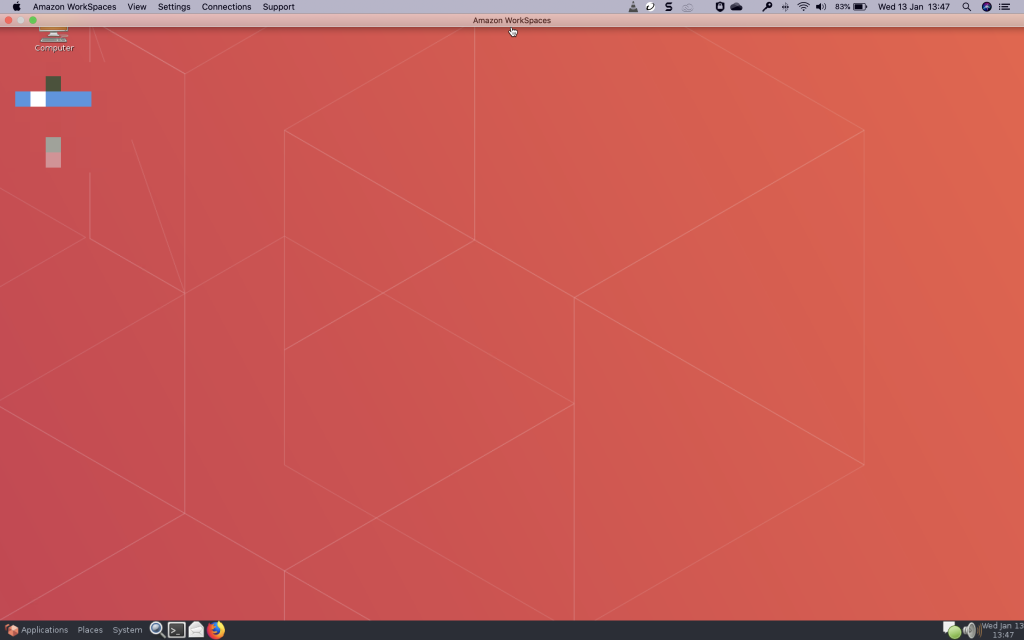
Simply expand the Workspace window to make it full-screen. With the Workspace App, you can manage hardware, multifactor authentication and even find the Amazon Workspaces user guide.
We have just scratched the surface of Amazon Workspaces, and you can use these images as a template for deploying your own customized user desktops. Change wallpapers, add server hardening, install applications such as Office 365 and so on.
That’s it; thanks for taking the time to read this article. if you have any questions or feedback, please write in the comment section below.
Leave a Reply