

Linux is a free, open-source operating system used by home users, developers, sysadmins, cloud engineers, and security professionals. If you are moving from Windows or macOS, the installation process can look intimidating at first, but modern Linux installers are much easier than they used to be.
This guide walks through the full beginner-friendly process: choosing a Linux distribution, checking your hardware, creating a bootable USB drive, booting from it, installing Linux, and completing the first setup tasks after installation.
Quick Answer: How to Install Linux
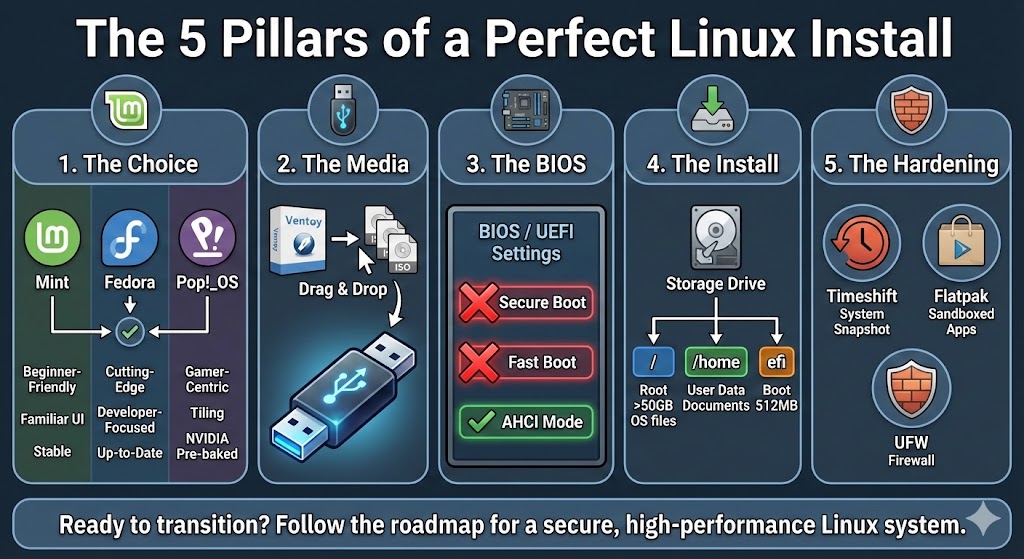
To install Linux, download an ISO image for a beginner-friendly distribution such as Linux Mint, Ubuntu, or Fedora Workstation. Write the ISO to a USB drive with Rufus, balenaEtcher, or Fedora Media Writer. Boot your PC from the USB drive through the BIOS or UEFI boot menu, then follow the installer to set your language, disk layout, user account, and password.
Before You Start: Safety Checklist
Before changing any disk partitions, take a few minutes to protect your existing data and avoid common dual-boot problems.
- Back up your files: Copy important documents, photos, browser exports, SSH keys, and project folders to external storage or cloud storage.
- Check Windows BitLocker: If your Windows drive is encrypted, suspend BitLocker before resizing partitions or installing a dual-boot system.
- Disable Windows Fast Startup: This reduces the chance of Linux seeing a Windows partition as unsafe to mount.
- Confirm UEFI mode: Most modern systems should install Linux in UEFI mode, not legacy BIOS mode.
- Verify the ISO: Use the checksum or signature from the distribution website if you want to confirm the download was not corrupted or tampered with.
- Use an empty USB drive: Writing the ISO will erase the USB drive.
Check System Requirements
Linux can run well on modest hardware, but the requirements depend on the distribution and desktop environment. For a comfortable 2026 desktop install, use the following as a practical baseline.
| Component | Practical 2026 recommendation |
|---|---|
| CPU | 64-bit Intel or AMD processor. A 2 GHz dual-core CPU or better is a sensible target for Ubuntu-style desktops. |
| Memory | 4 GB minimum for lightweight desktops. 6 GB or more is better for Ubuntu 26.04 LTS and modern GNOME desktops. |
| Disk space | 25 GB minimum for Ubuntu Desktop. 40 GB or more gives you more room for applications, updates, and snapshots. |
| USB drive | 8 GB or larger. |
| Display | 1024 x 768 or higher. |
| Internet | Recommended for installer updates, drivers, language packs, and security updates. |
If your computer has less than 4 GB of RAM, consider a lighter edition such as Linux Mint Xfce, Xubuntu, Lubuntu, Debian Xfce, or another lightweight desktop.
Choose a Linux Distribution
There are hundreds of Linux distributions, but beginners should start with one that has a polished installer, regular updates, clear documentation, and a large support community.
| Distribution | Best for | Download |
|---|---|---|
| Linux Mint | Beginners moving from Windows who want a familiar desktop layout. | Linux Mint downloads |
| Ubuntu Desktop | Beginners who want broad hardware support, lots of tutorials, and long-term support releases. | Ubuntu Desktop download |
| Fedora Workstation | Users who want a modern desktop, newer packages, and a clean GNOME experience. | Fedora Workstation download |
| Debian | Users who value stability and want a distribution widely used on servers and desktops. | Debian downloads |
Advanced and server-focused options include CentOS Stream, Red Hat Enterprise Linux, openSUSE Leap, openSUSE Tumbleweed, Arch Linux, Gentoo, and Slackware. They are useful in the right context, but they are not usually the easiest first Linux install.
Linux Market Share in 2026: Desktop, Server, and Gaming Context
Linux market share depends heavily on what you are measuring. A single distro ranking can be misleading, so the table below separates desktop web traffic, websites and servers, and gaming. Figures checked on 1 June 2026.
| Area measured | Current figure | What it means | Source |
|---|---|---|---|
| Worldwide desktop OS web traffic | Linux: 3.09% in May 2026 | This is a broad desktop web-usage estimate, not a distro-by-distro install count. | StatCounter Global Stats |
| Websites where the server OS is known | Linux: 61.3% on 29 May 2026 | Linux is much more common on servers than on consumer desktops. | W3Techs Linux usage |
| Linux website subtechnologies | Ubuntu: 14.9%, Debian: 6.2%, CentOS: 1.4% | These are website/server figures, not beginner desktop popularity figures. | W3Techs Linux subtechnologies |
| Steam users | Linux: 4.52% in April 2026 | This reflects Steam survey participants and is useful for gaming trends, not general desktop adoption. | Steam Hardware and Software Survey |
For a beginner install, choose based on hardware support, documentation, and ease of use rather than market-share percentages. Linux Mint, Ubuntu Desktop, and Fedora Workstation are the strongest starting points for most new users.
Step 1 – Prepare Your Bootable USB Drive
Download the ISO: Visit the official website for your chosen Linux distribution and download the latest stable desktop ISO for your computer. Most modern PCs use the 64-bit Intel or AMD image.
Choose a USB creation tool:
- Windows: Use Rufus.
- Windows, macOS, or Linux: Use balenaEtcher.
- Fedora: Fedora Media Writer is a good option if you are installing Fedora Workstation.
Create the bootable drive:
- Insert an empty USB drive.
- Open Rufus, balenaEtcher, or Fedora Media Writer.
- Select the downloaded ISO file.
- Select the USB drive as the target device.
- Double-check that you selected the correct USB drive.
- Start the write process and wait for it to finish.
For virtual machines: If you are installing Linux in VirtualBox, VMware, Hyper-V, or another hypervisor, you can usually attach the ISO directly to the virtual machine instead of creating a USB drive.
Step 2 – Boot from the USB Drive
After creating the USB drive, restart the computer and open the boot menu. The boot key varies by manufacturer, but common keys include F12, F10, F11, Esc, and Del.
- Restart your computer: Watch the first startup screen carefully.
- Open the boot menu: Press the boot menu key before the operating system starts.
- Select the USB drive: It may appear as USB HDD, UEFI USB, or the brand name of the flash drive.
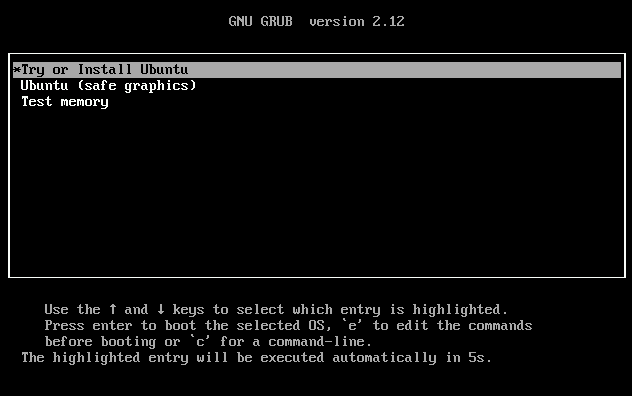
- Press Enter: The Linux installer should begin loading from the USB drive.
Step 3 – Begin Installing Linux
The exact screens vary between distributions, but most modern Linux installers follow the same basic flow.
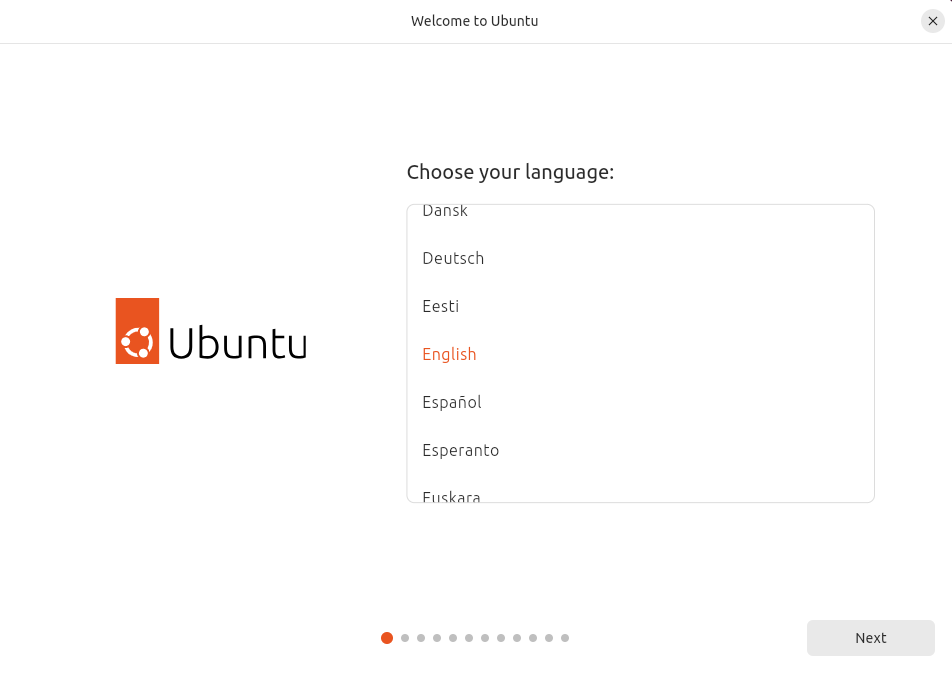
- Choose your language: Select the language you want the installer and desktop to use.
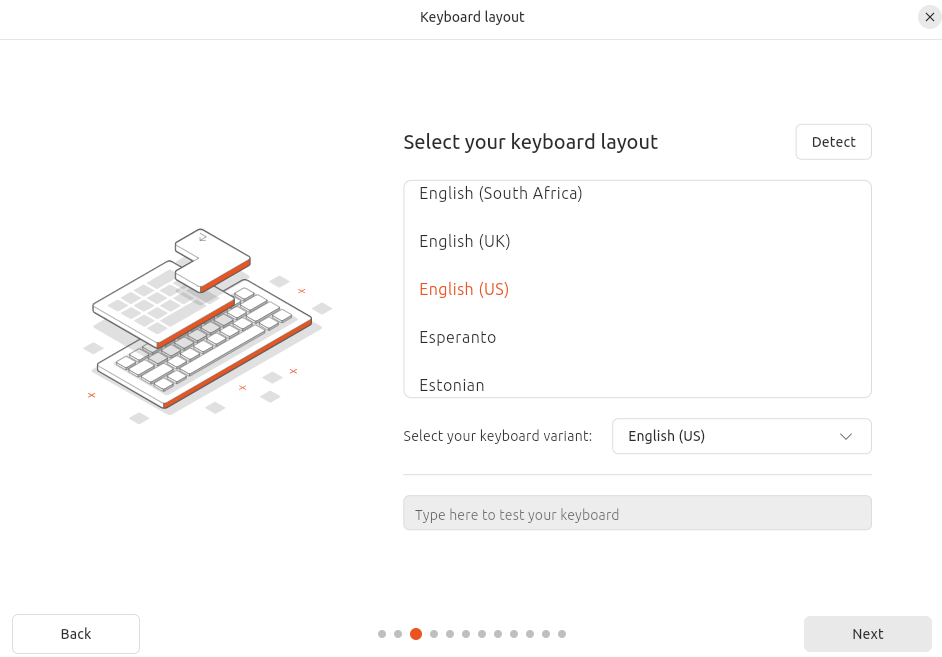
- Choose your keyboard layout: Select the keyboard layout that matches your physical keyboard.
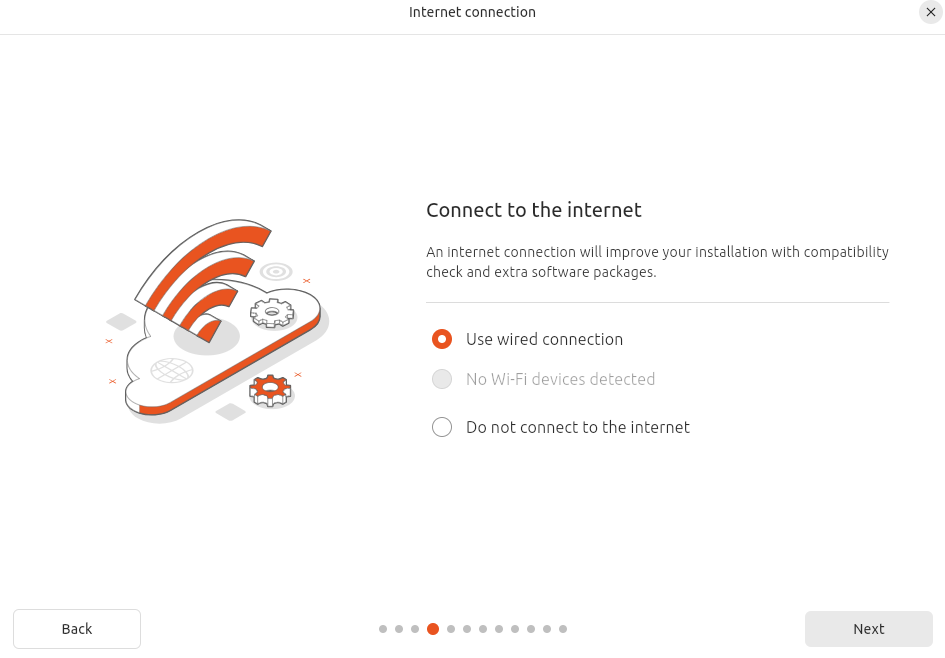
- Connect to the internet: This helps the installer download updates, language packs, and hardware drivers.
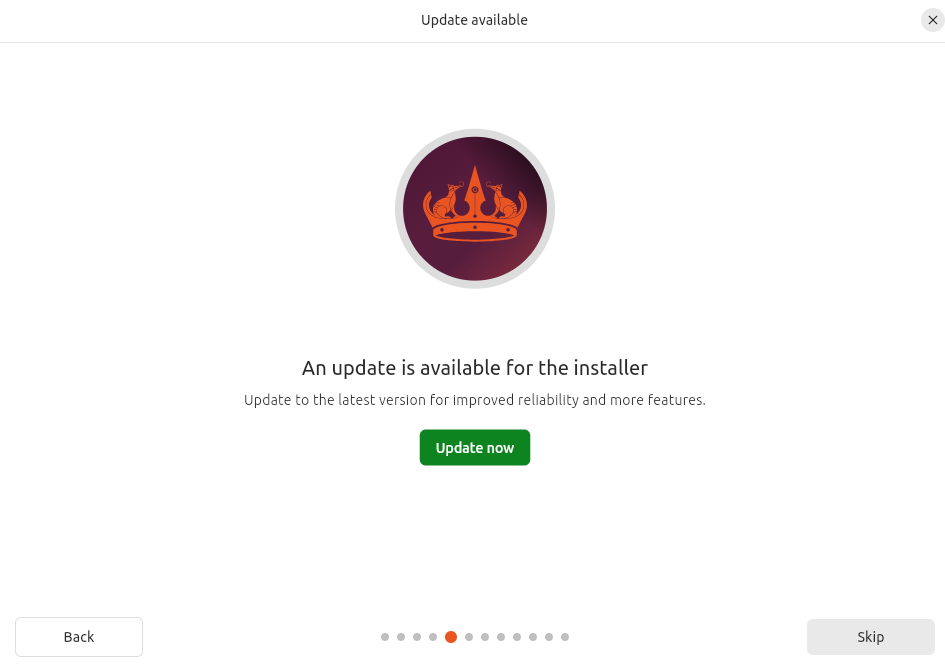
- Install updates if offered: Updating the installer can fix bugs and improve hardware support.
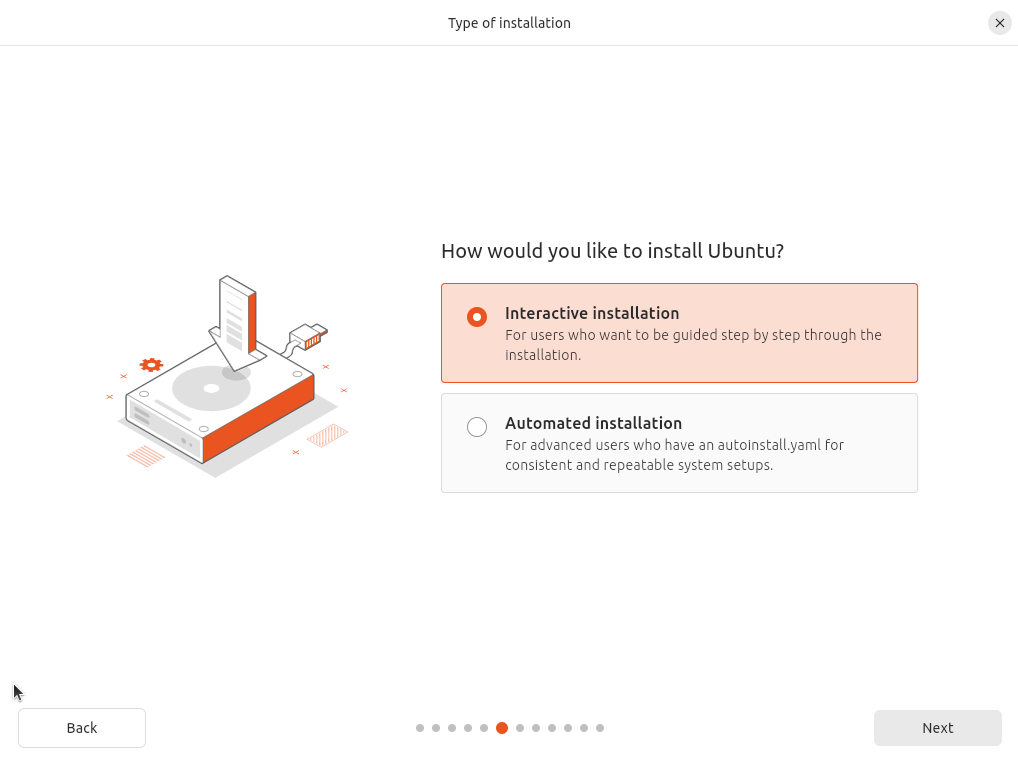
- Choose interactive installation: This gives you the clearest control over disk, account, and application choices.
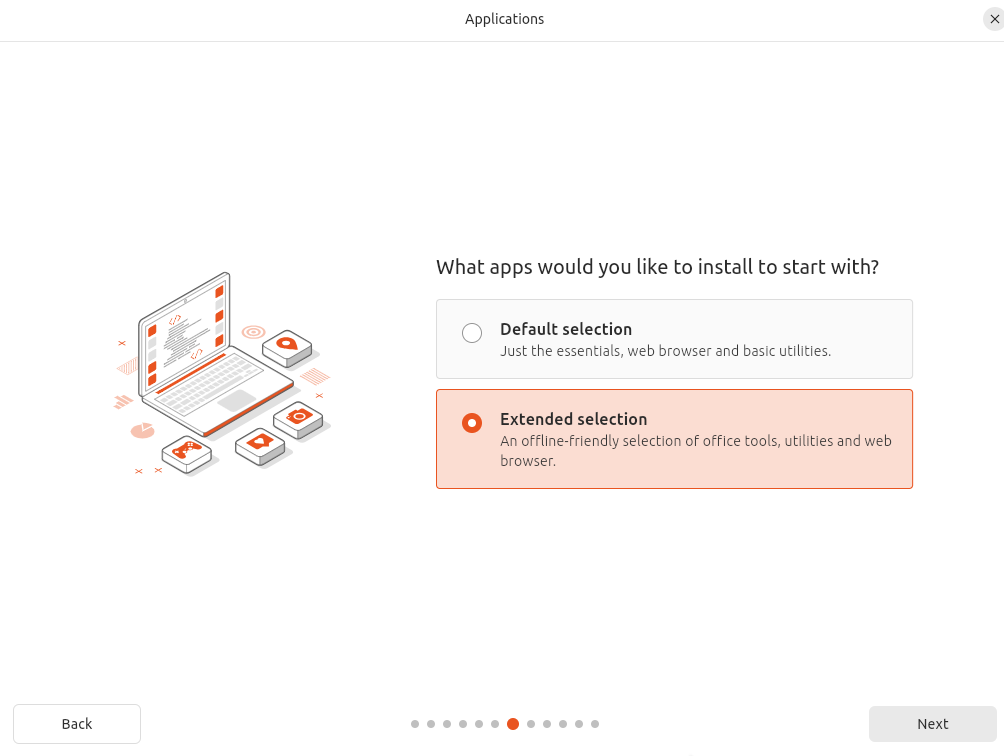
- Select your application set: A normal or extended install is best for most beginners. If the installer offers third-party media codecs or hardware drivers, enabling them is usually helpful on personal laptops and desktops.
Step 4 – Choose the Installation Type
The disk screen is the most important part of the install. Read it carefully before continuing.
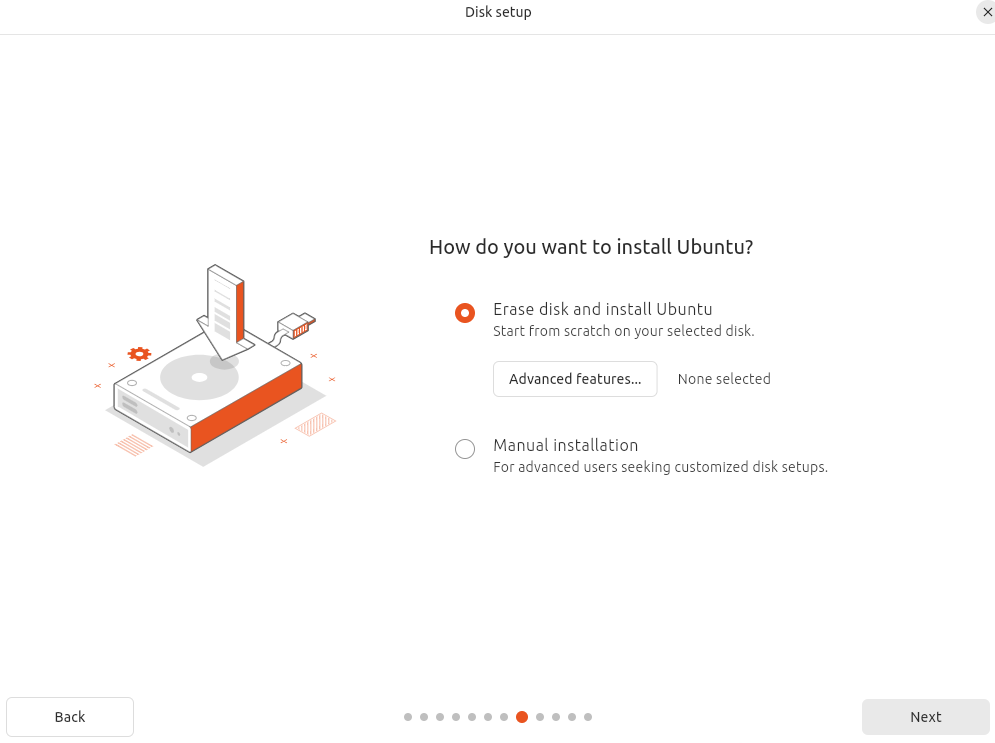
- Erase disk and install Linux: This removes everything on the selected drive and installs Linux as the only operating system. Use this only if your files are backed up and you do not need the existing operating system.
- Install alongside Windows: This creates a dual-boot setup so you can choose Windows or Linux at startup. Backups are still essential.
- Manual partitioning: This is for users who already understand EFI partitions, root partitions, swap, and mount points.
If you are doing a clean install on a test machine, Erase disk and install Linux is the simplest option. If you are keeping Windows, choose the alongside or manual option only after backing up and checking BitLocker.
Step 5 – Create or Confirm Partitions
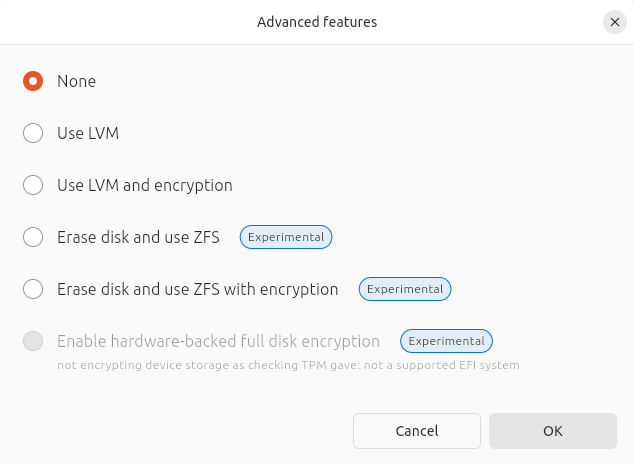
For most beginners, automatic partitioning is the right choice. If the installer offers Logical Volume Management, often shown as LVM, it can make storage management more flexible later.
If you choose manual partitioning, the common Linux partitions are:
- EFI System Partition: Used by UEFI firmware to boot the operating system.
- Root partition (/): The main Linux system partition.
- Home partition (/home): Optional separate partition for user files.
- Swap: Disk space used when RAM is full, and sometimes for hibernation.
If you are unsure, use the installer defaults. Manual partitioning is powerful, but it is also where beginners are most likely to wipe the wrong disk.
Step 6 – Set Up Your User Account
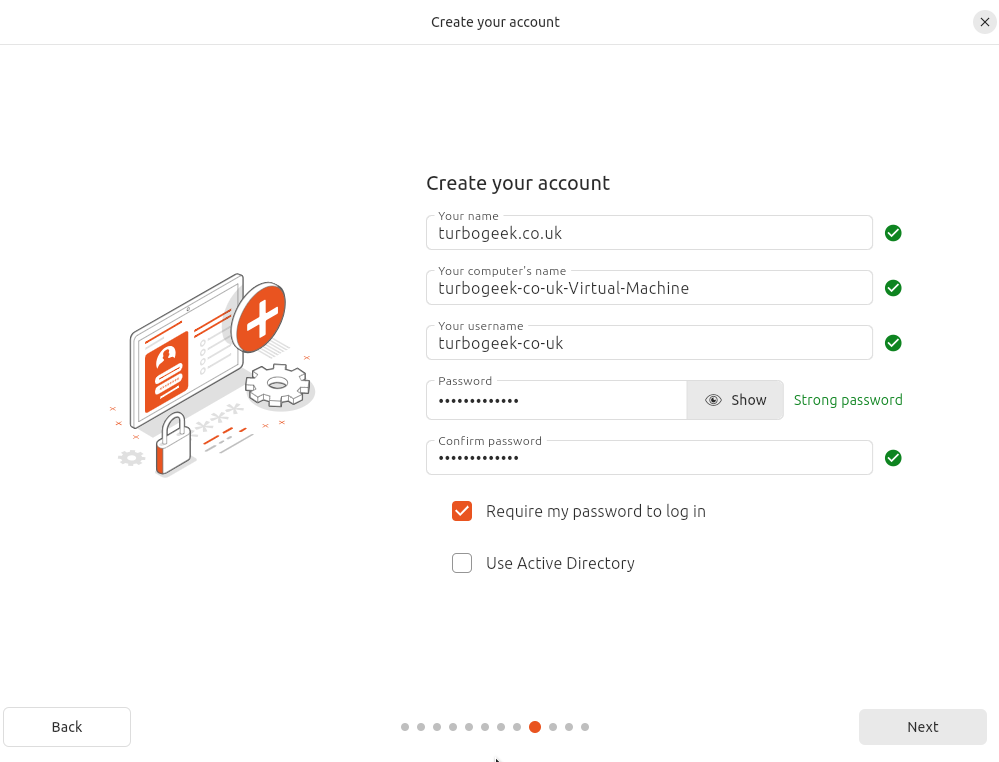
Next, create the first user account for the system. This account is used to log in and to approve administrator tasks.
- Your name: The display name shown on the login screen.
- Username: The short account name used in file paths and terminal commands.
- Password: Use a strong password that you can remember.
- Computer name: Also called the hostname. For example, linux-laptop or office-desktop.
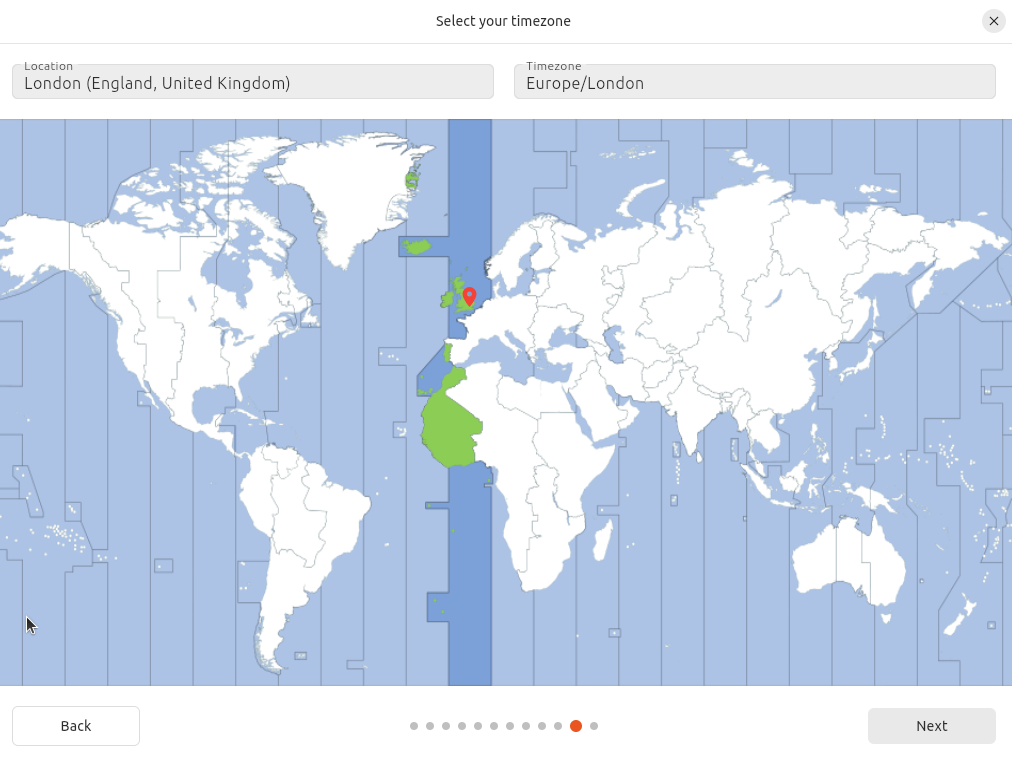
Set your time zone when prompted. If the computer is connected to the internet, the installer may detect this automatically.
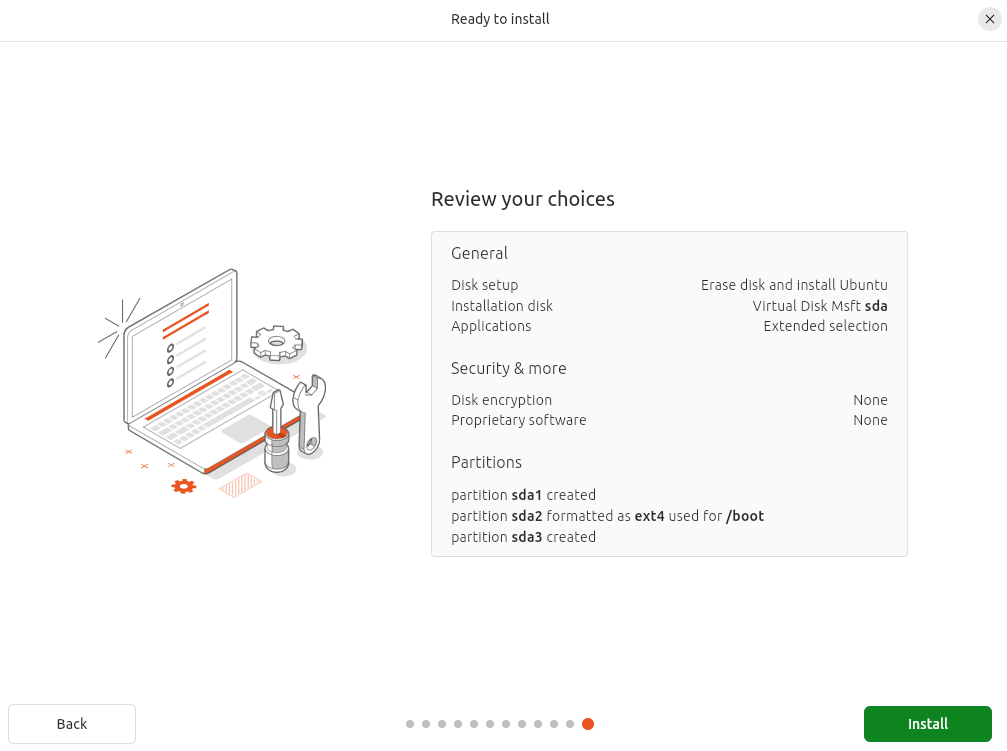
Review the installation summary before clicking the final install button.
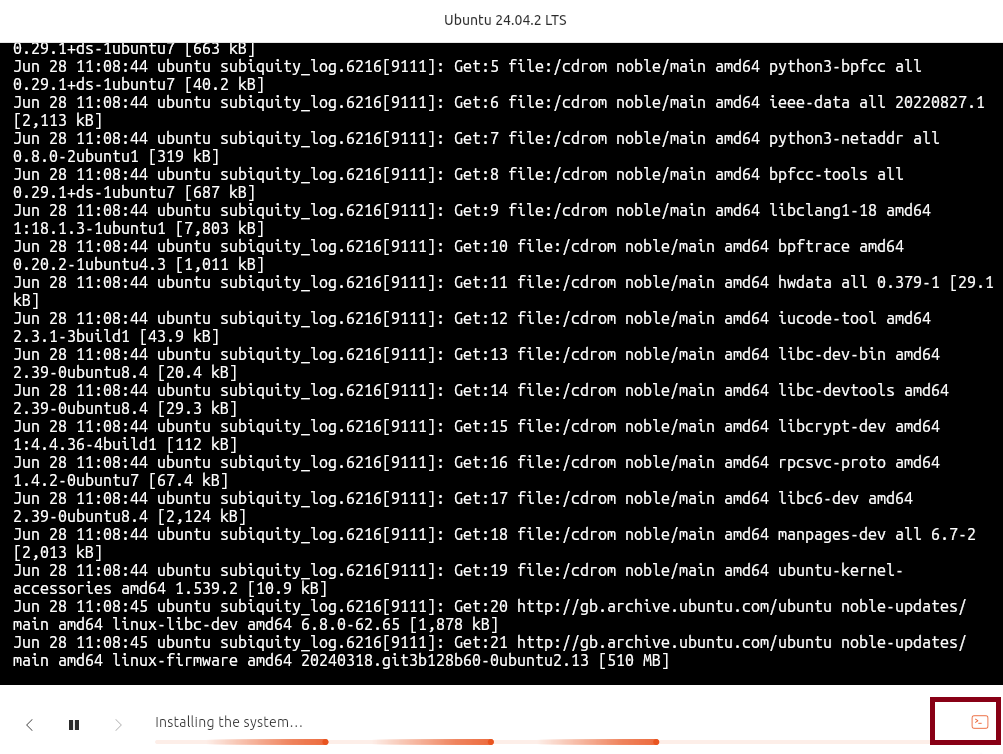
If you want to see more detail while the installer runs, click the terminal or log icon if your installer provides one.
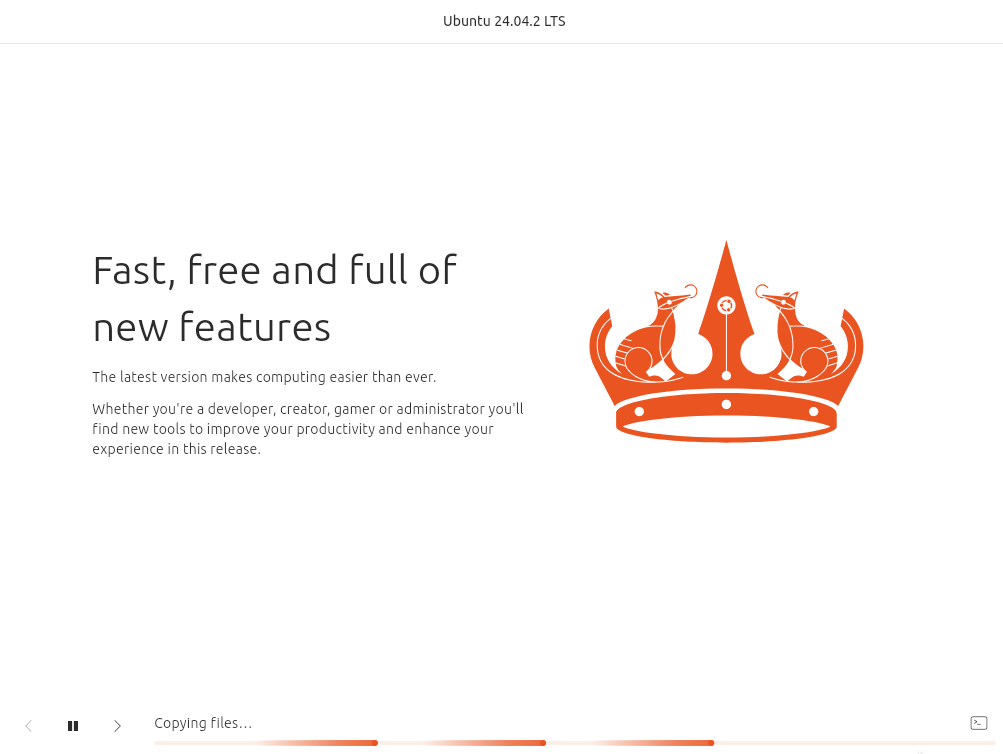
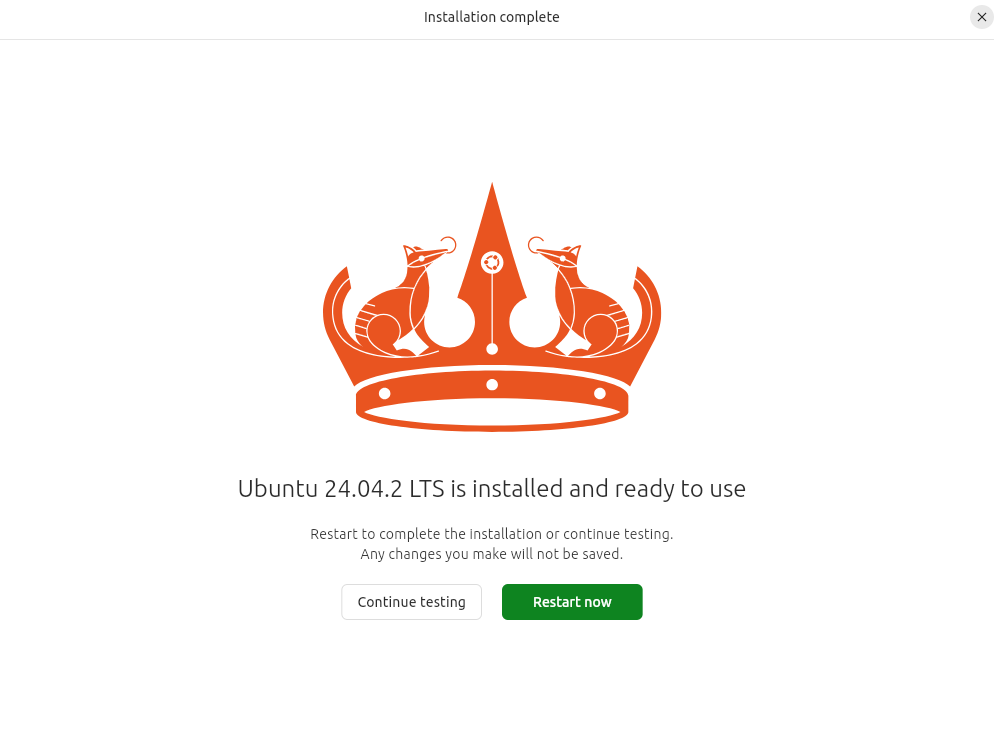
When the installation finishes, remove the USB drive when prompted and restart the computer.
Post-Installation: The First 60 Minutes
After the first reboot, finish the setup with updates, drivers, and a recovery snapshot.
- Install updates: On Ubuntu, Mint, or Debian, use the update manager or run
sudo apt update && sudo apt upgrade. On Fedora, use Software or runsudo dnf upgrade --refresh. - Install drivers and firmware: Check the driver manager or additional drivers tool, especially for Nvidia graphics and Wi-Fi adapters.
- Install CPU microcode if offered: On Ubuntu, Mint, or Debian this may be
intel-microcodeoramd64-microcode. - Enable Flatpak if needed: Flatpak is useful for desktop apps such as Spotify, Discord, and some developer tools. Fedora usually includes Flatpak support; Ubuntu users may need to install it.
- Create a snapshot: Use Timeshift or your distribution’s preferred backup tool before major customization.
- Restore your files carefully: Copy documents and project files back after confirming the system boots reliably.
Advanced Troubleshooting
- Black screen on boot: This is often a graphics driver problem. Try the safe graphics option if your installer offers one, or temporarily add
nomodesetto the boot options. - No Wi-Fi: Plug in Ethernet or use USB tethering from a phone, then open the driver manager or additional drivers tool.
- Windows missing from the boot menu: Check that both systems were installed in UEFI mode, then update GRUB from Linux.
- Wrong time after dual booting: Windows and Linux may handle the hardware clock differently. Configure both systems consistently if the clock changes after rebooting.
- Screen tearing or poor graphics performance: Check whether you are using Wayland or X11, and install the recommended GPU driver for your hardware.
Installing Linux is less complicated once you break it into stages: choose a beginner-friendly distribution, back up your files, create a bootable USB drive, boot from it, choose the right disk option, and complete the first update after reboot. For most beginners, Linux Mint, Ubuntu Desktop, and Fedora Workstation are the best places to start.
Want to learn more Linux facts? Check out the rest of our Tech Quicky content.
Leave a Reply