

A guide to installing Oracle 19c Client on a CIS Hardened Image of Red Hat Enterprise Linux
Are you looking for an unattended installation procedure? Check our other documentation here.
The Center for Internet Security (CIS) produces many security-hardened images that embed several security features into a standardized build. Using such features introduces a few gotchas, especially when installing any Oracle product.
This procedure will explain preparing a CIS-hardened image to install in the Oracle database client using X11 forwarding. It will explain how to prep the environment, set local environment variables, and a step-by-step guide to installing Oracle 19c Client using XQuartz. I will be using AWS to demonstrate the process.
If you want to learn how to install Oracle 19c using an unattended installed – check out this procedure [coming soon]
Step 1 – Launch a CIS Image from the AWS Marketplace
Log into your AWS account and navigate to your choice CIS-hardened Linux image. In this demo, I will be using this exact image:
https://aws.amazon.com/marketplace/pp/prodview-ljguy42h47f2w
Once booted, it’s recommended to run a Yum update.
yum update -yStep 2 – Create a 100GB EBS Volume
In the AWS console, browse EC2 > Storage, create a 100GB GP2 disk, and attach it to your instance.
Step 3 – Attach and Format the partitions in Linux
Ensure you are logged in as root.
On AWS, you log in as ec2-user first using the .pem file you created at Launching the Instance in step 1.
Switch to the root user by typing:
sudo su - As root, you must complete the following tasks.
- Locate the EBS volume you attached in Step 2
[root@ip ~]# lsblk
NAME        MAJ:MIN RM  SIZE RO TYPE MOUNTPOINT
nvme0n1     259:2    0  100G  0 disk
├─nvme0n1p1 259:3    0    1M  0 part
└─nvme0n1p2 259:4    0  100G  0 part /
nvme1n1     259:0    0   20G  0 disk
nvme2n1     259:1    0  100G  0 disk
From this example, you can see my instance has a 20GB root volume, a 100GB volume, and another 100GB EBS volume called nvme2n1
- Create a mount point.
sudo mkdir /oracleCheck to make sure no filesystem already exists
file -s /dev/nvme2n1- Create an XFS filesystem on the EBS volume.
mkfs -t xfs /dev/nvme2n1- Make the filesystem persistent by adding it to /etc/fstab
UUID="<my-uuid>" /oracle xfs defaults,nofail- Reboot the instance to test or type sudo mount -a
Step 4 – Create a SwapFile
I’m unsure why Oracle requires a swap file to install, but this is a prerequisite. If this step is missed, the installer will not launch.
In this example, I have created a swap file that is 1GB in size. It is located on the first 100GB partition that comes with the AMI.
- Check if you already have a swap file using the free -m command:
[root@ip ~]#  free -m
              total        used        free      shared  buff/cache   available
Mem:          31633         734       28680        1080        2218       29488
Swap: 0 0 0- Create a 1GB swap file.
sudo dd if=/dev/zero of=/swap_file bs=1GB count=1chmod 600 /swapfile
sudo chmod 600 /swapfile
sudo mkswap /swapfile
sudo swapon /swapfile
swapon -s- Add the following to the fstab to make changes persistent at reboot
sudo vi /etc/fstab- Add this entry to the new line
/swapfile swap swap defaults 0 0Step 5 – Expand tempfs
Oracle requires over 412MB tempfs to install the client, which is even more for the full versions of the Oracle database. The easiest way to do this is to extend your tempfs from fstab.
Add this line to your /etc/fstab
tmpfs /tmp tmpfs rw,nosuid,nodev,noexec,relatime,size=1G 0 0Step 6 – Prep Local System Environment
We recommend adding system environment variables to streamline the Oracle installation process. You must also set your TMPDIR to an alternative location because CIS-hardened images do not allow the execution of files in /tmp
- Edit /etc/environment
ORACLE_HOME=/oracle/app/oracle/product/19.0.0/client_1
PATH=/usr/local/bin:/bin:/usr/bin:/usr/local/sbin:/usr/sbin:/home/oracle/.local/bin:/home/oracle/bin
TEMP=/oracle/app/oracle/tmp/
HOSTNAME=<myhostname>- Create a symbolic link to the new temp folder. I will be offloading my /tmp to /opt/tmp. This is to prevent installation failures caused by CIS hardening
sudo ln -s /tmp /opt/tmpStep 7 – Prep X11 Forwarding
The Oracle installer for Red Hat requires X11 forwarding to install oracle from a GUI. This is a pain in the ass, but it needs to be done.
- Edit your ssh_config to allow X11 forwarding by adding or amending these parameters.
Host *
	GSSAPIAuthentication yes
# If this option is set to yes then remote X11 clients will have full access
# to the original X11 display. As virtually no X11 client supports the untrusted
# mode correctly we set this to yes.
	ForwardX11Trusted yes
# Send locale-related environment variables
	SendEnv LANG LC_CTYPE LC_NUMERIC LC_TIME LC_COLLATE LC_MONETARY LC_MESSAGES
	SendEnv LC_PAPER LC_NAME LC_ADDRESS LC_TELEPHONE LC_MEASUREMENT
	SendEnv LC_IDENTIFICATION LC_ALL LANGUAGE
SendEnv XMODIFIERS- Install the following packages
sudo yum install xclock libX* xdpyinfo unzip -y- Test X11 forwarding by running xclock. Simply type xclock and you should see:

If you experience any issues, you will need to troubleshoot the problem. X11 is fussy and often the hardest thing to get working.
Step 8 – Prep X11 forwarding via a Jumpbox (SSH tunneling) [Optional]
There is a good chance that you can access your AWS instances via a jump box or bastion host. If that is the case, you need to prep X11 and use SSH tunneling to relay the output to your local X11 client.
Make sure you have an X11 client installed locally. I use xQuartz for mac.
- SSH to the environment jump box:
ssh -XYA <ip address>- SSH to server
ssh -XYA <server ip address>- You now have to copy the .Xauthority file to a temp directory:
mkdir /tmp/$(whoami)
cp .Xauthority /tmp/$(whoami)
chmod 755 /tmp/$(whoami)/.Xauthority
echo $DISPLAY
$(whoami) will input your Linux username
echo $DISPLAY will show you the display port to use later
- Connect as an Oracle user –
sudo su - oracleChange to the user home directory and then cp the .Xauthority file:
cd ~
cp /tmp/[YOUR USERNAME]/.Xauthority . (don’t forget the '.')
export DISPLAY=<your display port eg. localhost:10.0>
Step 9 – Install Oracle 19c Client
Now everything is prepped, and you can install the Oracle client. Make sure you are logged in as an Oracle user.
Navigate to $ORACLE_HOME
cd $ORACLE_HOMEEnsure that $ORACLE_HOME is owned by the Oracle user
sudo chown oracle:oracle -R .Download the Oracle 19c Client from here.
The easiest way to get the file onto the server is by uploading it to an S3 bucket and then using the AWS CLI to copy it to the local file system.
aws s3 cp s3://<my-s3-bucket>/<my-prefix>/LINUX.X64_193000_client.zip .Ensure TMP is set
export TMP=/opt/tmp/Now install Oracle
sh $ORACLE_HOME/client/runInstallerThis should spin up an X11 Installer for Oracle
Starting Oracle Universal Installer...

Checking Temp space: must be greater than 415 MB.   Actual 78182 MB    Passed
Checking swap space: must be greater than 150 MB.   Actual 16383 MB    Passed
Checking monitor: must be configured to display at least 256 colors.    Actual 16777216    Passed
Preparing to launch Oracle Universal Installer from /opt/tmp/OraInstall2022-06-20_02-13-34PM. Please wait ...
Step 10 – Install Oracle via the installation GUI
Here is the step-by-step guide
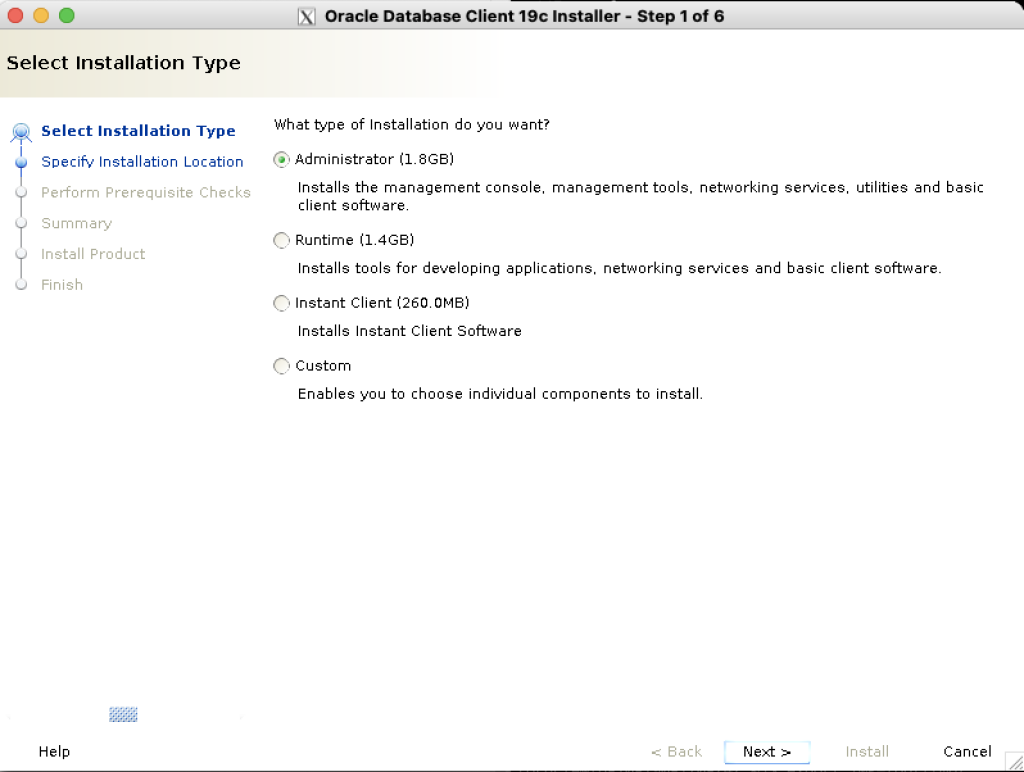
- Select Administrator as the type of installation, click Next
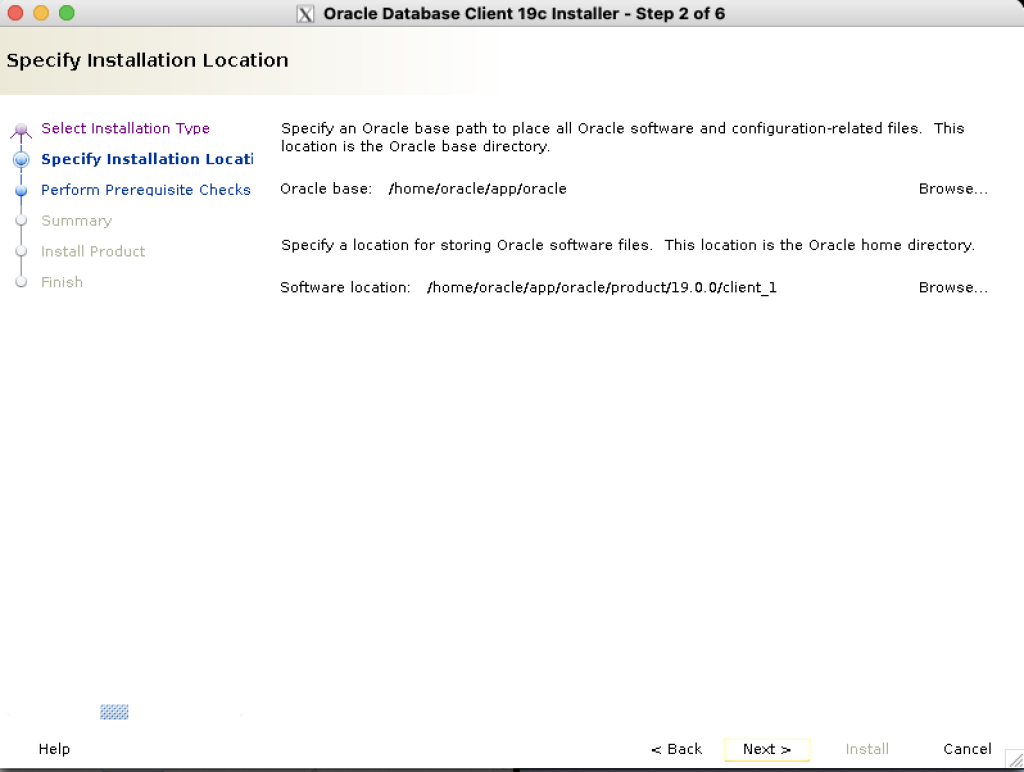
- set the Oracle base to /oracle/app/oracle
- set software location to /oracle/app/oracle/product/19.0.0/client_1
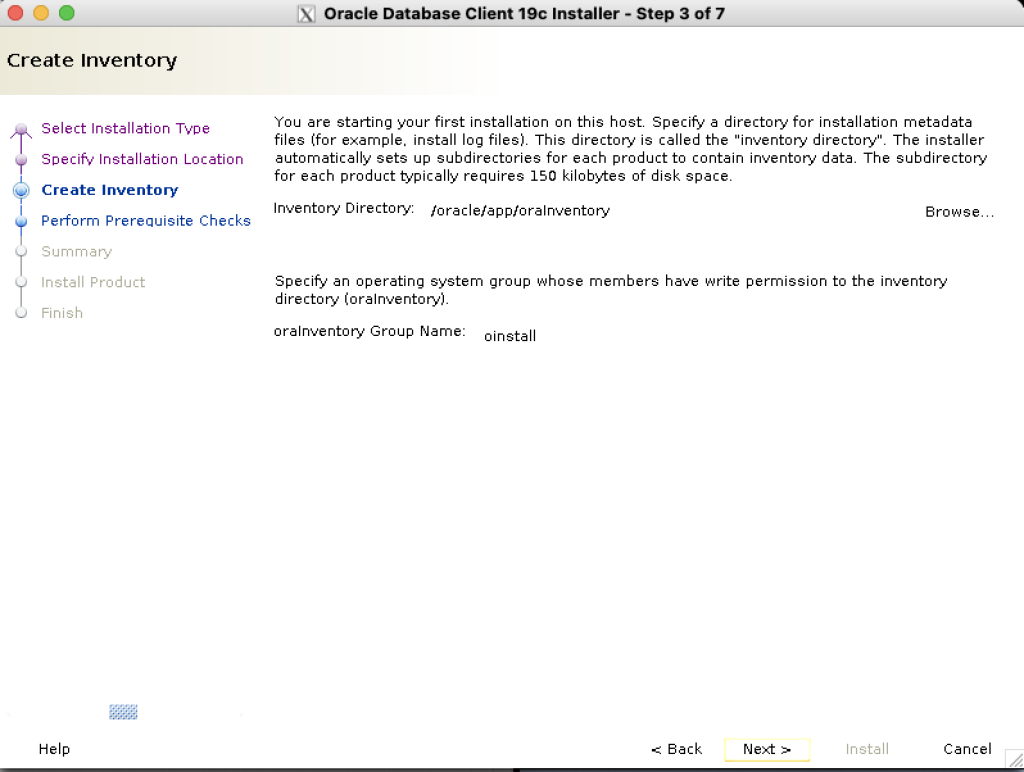
- Set Inventory Directory to /oracle/app/orainventory
- Ensure the group is set to install
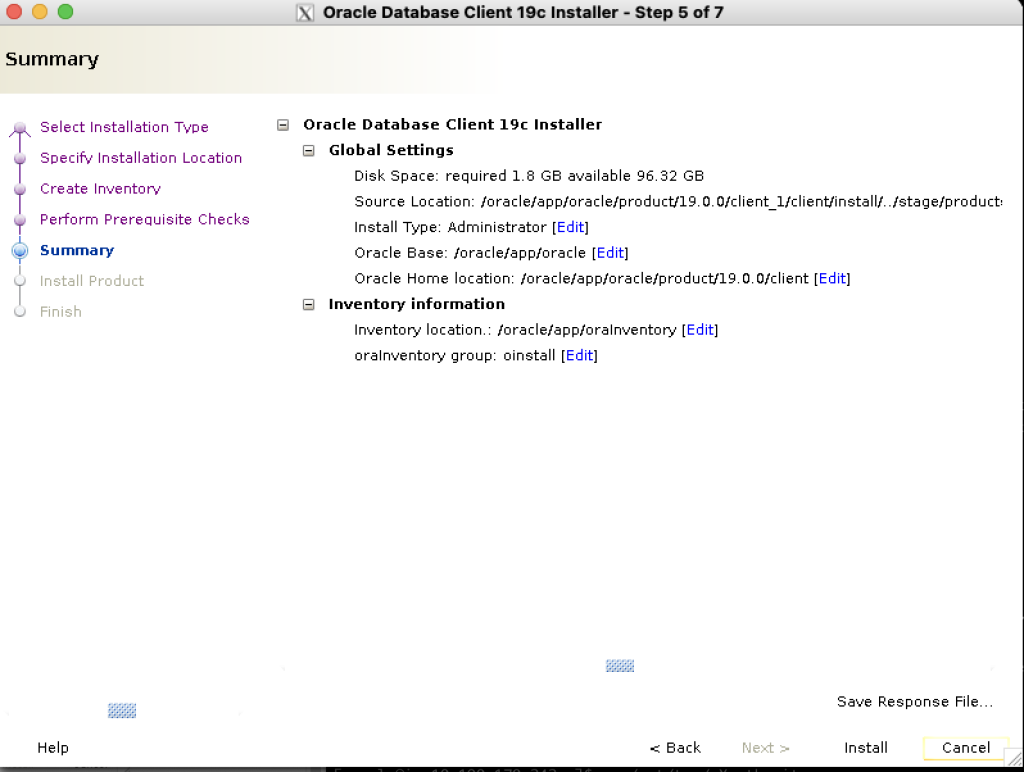
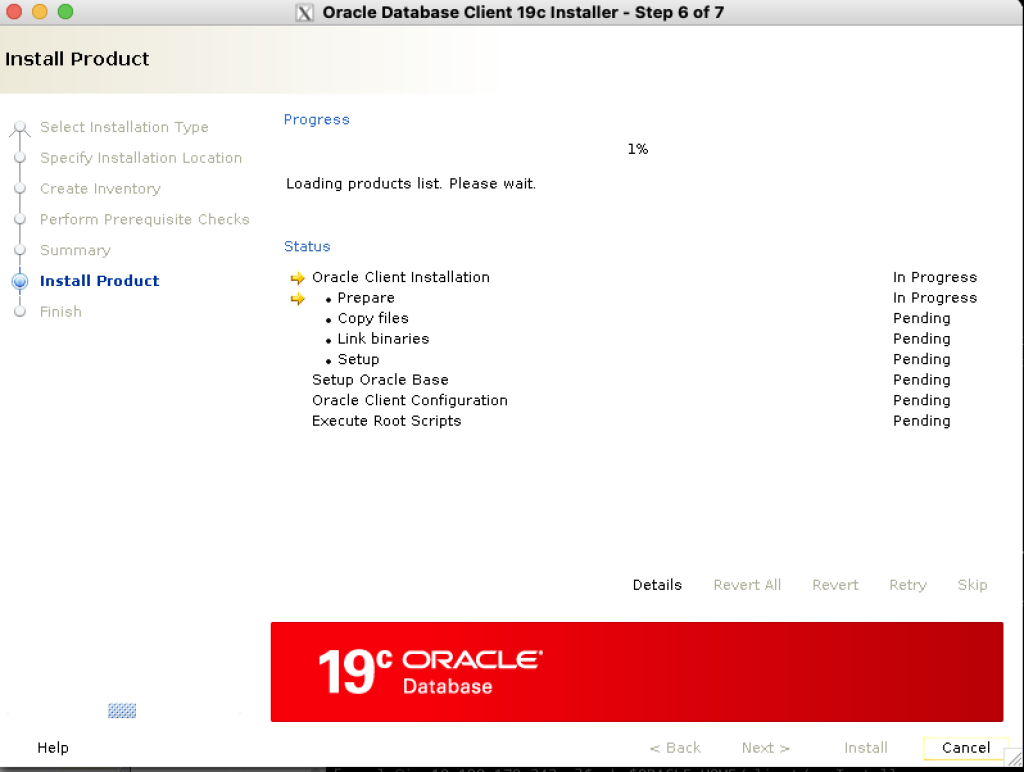
- Check if your settings are correct and click install
- The installation will take a few minutes
- Execute the local scripts as requested in the pop-out window
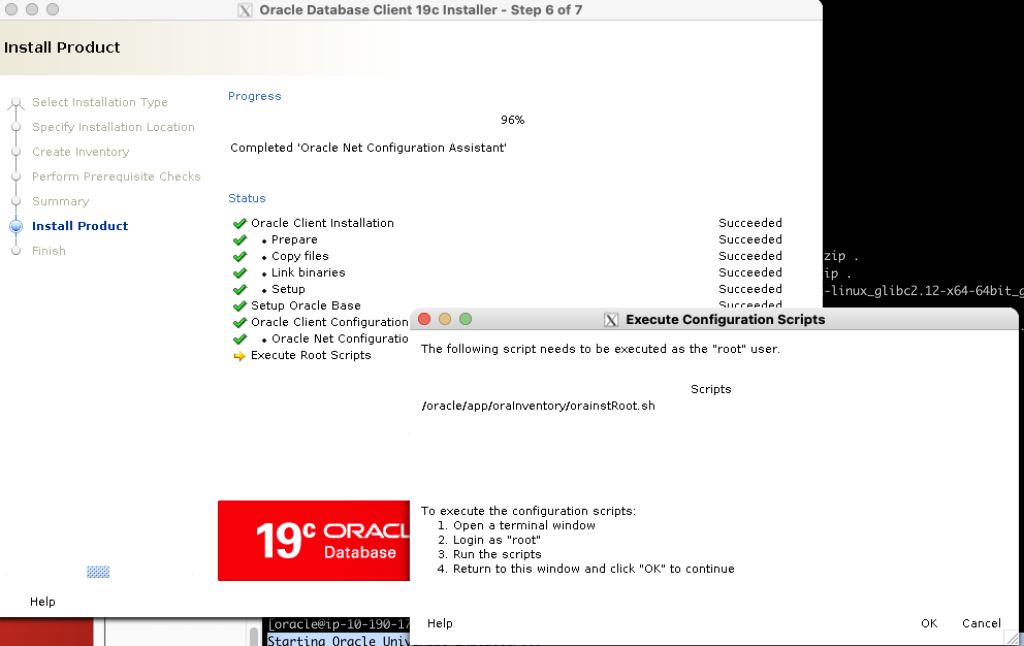
- Open a new terminal window on the server and log in as root
- Navigate to /oracle/app/orainventory
- run the command sh orainstRoot.sh
[root@ip-my-server ~]# cd /oracle/app/oraInventory/
[root@ip-my-server oraInventory]# sh orainstRoot.sh
Changing permissions of /oracle/app/oraInventory.
Adding read,write permissions for group.
Removing read,write,execute permissions for world.

Changing groupname of /oracle/app/oraInventory to oinstall.
The execution of the script is complete.
[root@ip-my-server oraInventory]#
Go back to the installer and click OK
That’s it, Oracle 19c Client is installed
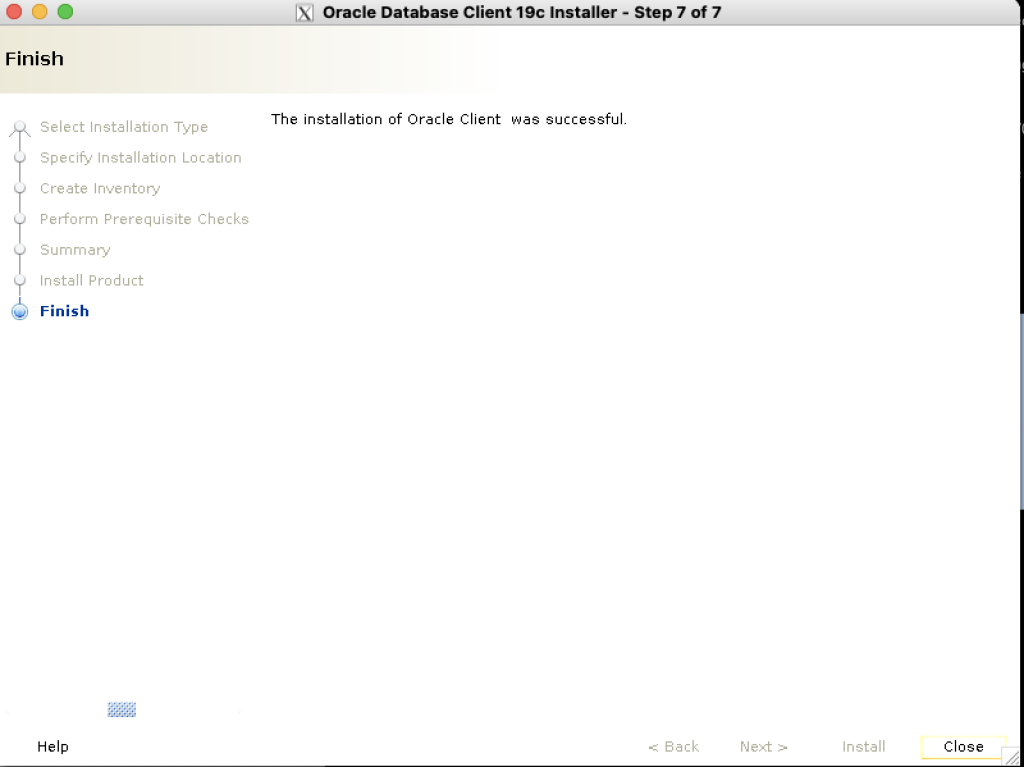
Oracle 19c client is now installed. I’m sure you agree that this seems overly complicated, and I really hope that the oracle addresses the complexity of the installation process in the future.
As always, please like, comment, and share.
Leave a Reply