
Here is a quick procedure for how to install Windows Server 2012 R2.
Windows Server 2012 R2, released in October 2013, is a server operating system from Microsoft. While it introduced valuable features like enhanced Storage Spaces, Hyper-V improvements, and PowerShell 4.0, it’s essential to remember that it’s an older version. Newer releases like Windows Server 2019, 2022, and Azure Stack HCI offer significant advancements in performance, security, and cloud integration. This guide focuses on installing Windows Server 2012 R2, but consider exploring these newer options depending on your needs and long-term goals.
You will need a Server or VM and a copy of Windows Server 2012 R2. In the post-configuration section, I will install the operating system and configure the server to my requirements.
Windows Server 2012 R2 is a server operating system developed by Microsoft as part of the Windows NT family of operating systems. It is the successor to Windows Server 2012 and was released in October 2013. This edition brought several enhancements and new features to improve the functionality, security, and management capabilities of server environments.
Some key features of Windows Server 2012 R2 include:
- Improved Storage Spaces: Windows Server 2012 R2 introduced enhancements to Storage Spaces, providing better storage virtualization and management capabilities. It allows administrators to create resilient and scalable storage solutions.
- Hyper-V Enhancements: Hyper-V, the virtualization platform, received upgrades such as increased scalability, improved performance, and new features like Generation 2 virtual machines, which offer better security and performance compared to their predecessors.
- Windows PowerShell 4.0: This version of Windows Server includes an updated version of PowerShell, Microsoft’s scripting and automation framework, offering administrators more powerful tools to manage and automate tasks.
- Dynamic Access Control (DAC): DAC is a feature that enables administrators to control access to files and resources based on their content and the user’s attributes, providing a more granular level of security.
- Web Application Proxy: Windows Server 2012 R2 introduced the Web Application Proxy role, which allows secure remote access to web applications and services through a reverse proxy.
- Improved Networking Features: The operating system includes enhancements to networking capabilities, such as improvements in Hyper-V networking, better DHCP management, and support for network virtualization.
- Workplace Join and Work Folders: These features enhance the integration of devices into the corporate environment, providing more flexibility for users while maintaining security and control for administrators.
Windows Server 2012 R2 has been widely used in various enterprise environments, offering a robust and feature-rich platform for managing and deploying server-based solutions. It is important to note that as technology evolves, newer versions of Windows Server have been released, such as Windows Server 2016 and Windows Server 2019, each bringing additional improvements and features.
Step 1 – Boot the Windows Server Media
Procedure: Booting Windows Server 2012 R2 on a Physical Server
Requirements:
- Windows Server 2012 R2 installation media (DVD or USB).
- Physical server with the necessary hardware specifications.
Steps:
- Insert the Installation Media:
- If you have a DVD, insert the Windows Server 2012 R2 DVD into the optical drive of the server.
- If you are using a USB drive, insert the USB drive into a USB port on the server.
- Power On the Server:
- Press the power button on the server to turn it on.
- Press the power button on the server to turn it on.
- Access the BIOS/UEFI Settings:
- Press the appropriate key to enter the BIOS or UEFI settings during the initial startup. This key is often displayed on the screen during boot-up and can be DEL, F2, F10, or another key depending on the server manufacturer.
- Press the appropriate key to enter the BIOS or UEFI settings during the initial startup. This key is often displayed on the screen during boot-up and can be DEL, F2, F10, or another key depending on the server manufacturer.
- Set Boot Order:
- In the BIOS/UEFI settings, navigate to the “Boot” or “Boot Order” section.
- Set the boot order to prioritize the media containing the Windows Server 2012 R2 installation files. Depending on your setup, this can be either the DVD drive or the USB drive.
- Save and Exit:
- Save the changes made to the boot order and exit the BIOS/UEFI settings. This is usually done by selecting the option to “Save & Exit” or a similar option.
- Save the changes made to the boot order and exit the BIOS/UEFI settings. This is usually done by selecting the option to “Save & Exit” or a similar option.
- Restart the Server:
- Restart the server to apply the changes to the boot order.
- Restart the server to apply the changes to the boot order.
- Initiate Boot from Installation Media:
- As the server restarts, it should now boot from the Windows Server 2012 R2 installation media.
- If using a DVD, you might see a prompt to press any key to boot from the DVD. If using a USB drive, the process should initiate automatically.
- Windows Setup Screen:
- Once the server successfully boots from the installation media, the Windows Setup screen will appear. Follow the on-screen instructions to proceed with the installation.
- Once the server successfully boots from the installation media, the Windows Setup screen will appear. Follow the on-screen instructions to proceed with the installation.
- Select Language and Keyboard Input:
- Choose your preferred language, time, and keyboard input method when prompted.
- On first screen presented – Change “Time and Currency format” to “English (United Kingdom)” – Next
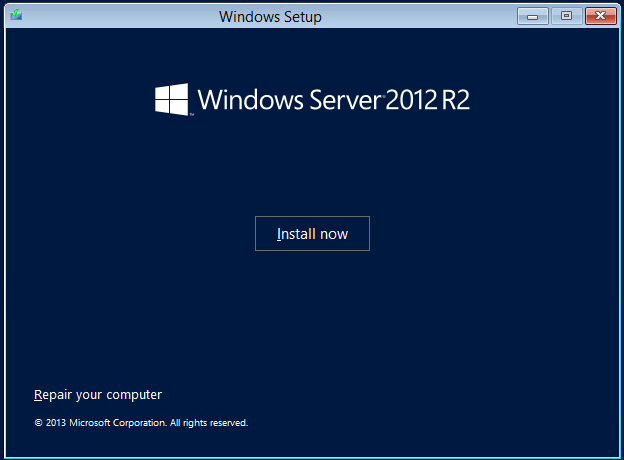
- Click “Instal Now”
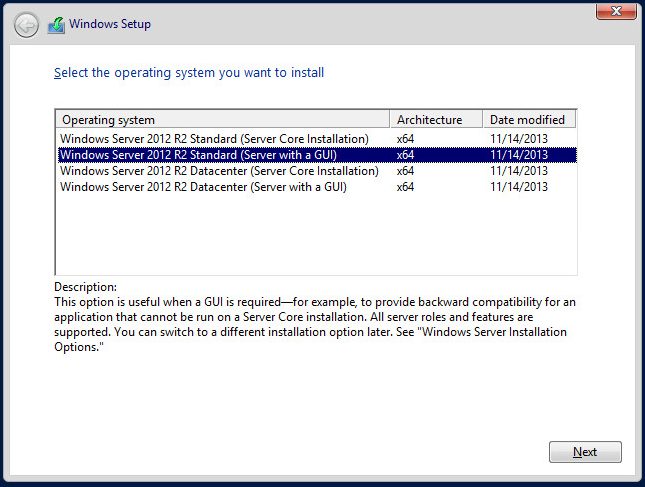
- Select “Windows Server 2012 R2 Standard (Server with a GUI) – Next
- Accept Terms and conditions – Next

Step 2 – Install the Operating System
- Begin the Installation:
- Click on the “Install Now” button to start the Windows Server 2012 R2 installation process.

- Enter Product Key:
- Enter the product key when prompted. This key is usually found on the Windows Server packaging or provided separately.
- Enter the product key when prompted. This key is usually found on the Windows Server packaging or provided separately.
- Accept License Terms:
- Read and accept the license terms to proceed with the installation.

- Choose Installation Type:
- Select the installation type (typically “Custom” for a clean installation).

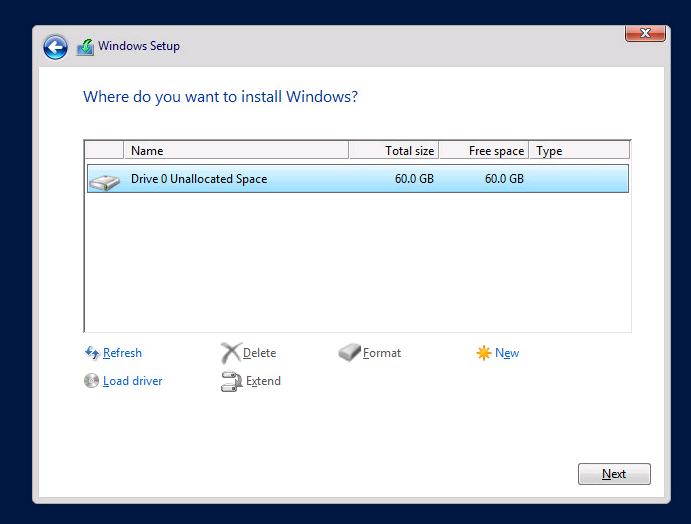
- Partition and Install:
- Create partitions as needed and choose the partition where you want to install Windows Server 2012 R2. Click “Next” to start the installation.
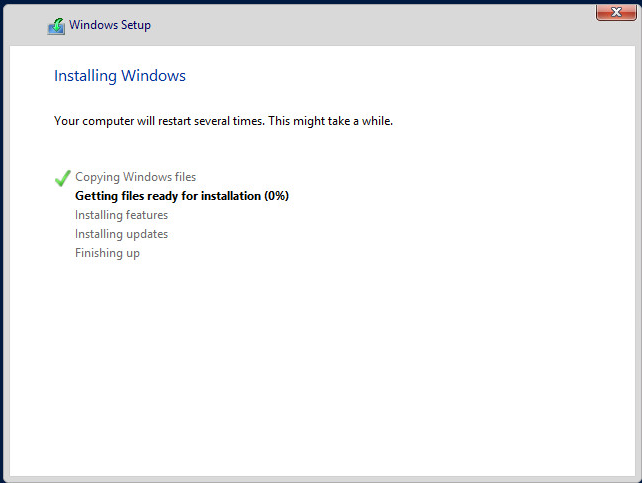
- Wait for Installation:
- The installation process will take some time. Allow the setup to complete the installation of Windows Server 2012 R2.
Step 3 – Log In and Configure Operating System
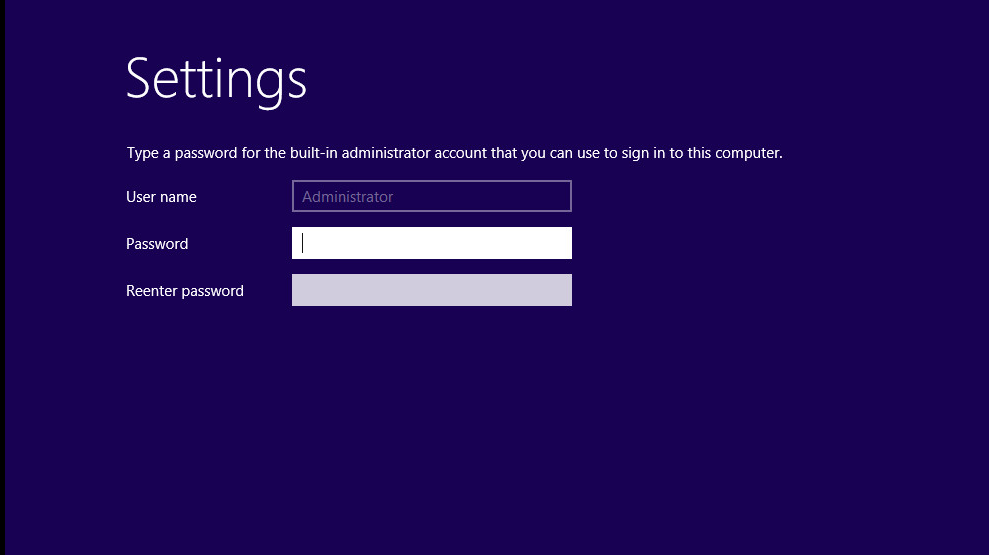
- Set Administrator Password:
- When prompted, set a strong password for the Administrator account.
- Complete Setup:
- Follow any additional on-screen instructions to personalize settings and complete the setup.
- Finalize Installation:
- Once the installation is complete, the server will restart. Remove the installation media (DVD or USB) to ensure the server boots from the newly installed operating system.
Step 4 – Post-Installation Configuration Steps for Windows Server 2012 R2
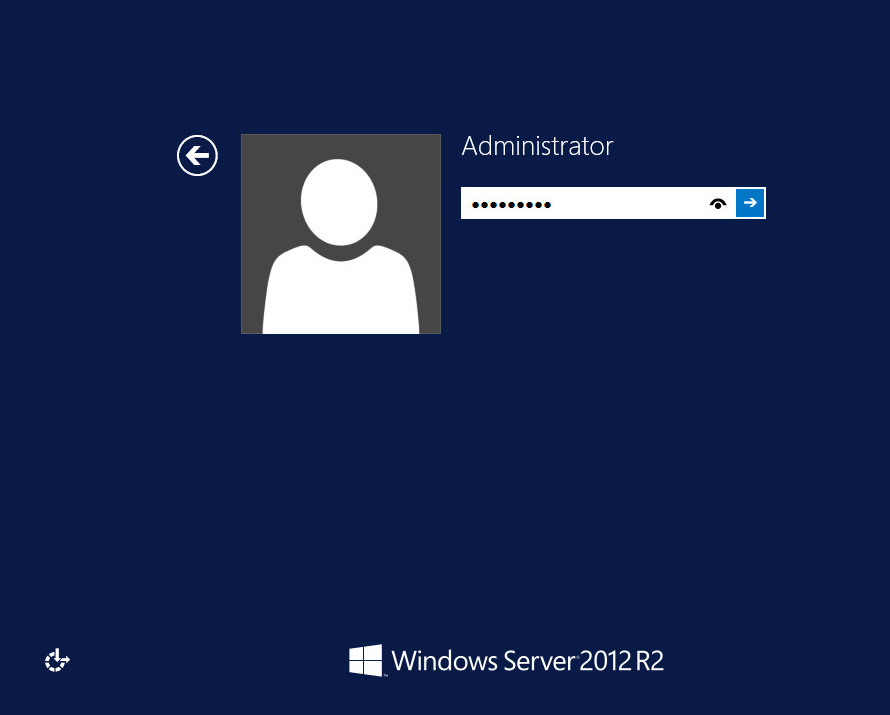
- Login to Server:
- Use your Administrator credentials to log in to the Windows Server.
- Send CTRL-ALT-INSERT:
- If you are accessing the server through a virtual environment, use the CTRL-ALT-INSERT key combination to send the secure attention sequence (SAS) and proceed to the logon screen.
- If you are accessing the server through a virtual environment, use the CTRL-ALT-INSERT key combination to send the secure attention sequence (SAS) and proceed to the logon screen.
- Enter Password:
- Enter the password for the Administrator account and press Enter to access the desktop.
- Enter the password for the Administrator account and press Enter to access the desktop.
- Open Server Manager:
- Locate and open Server Manager from the Start menu or taskbar.
- Locate and open Server Manager from the Start menu or taskbar.
- Select “Local Server”:
- In Server Manager, select the “Local Server” option from the left-hand menu.
- In Server Manager, select the “Local Server” option from the left-hand menu.
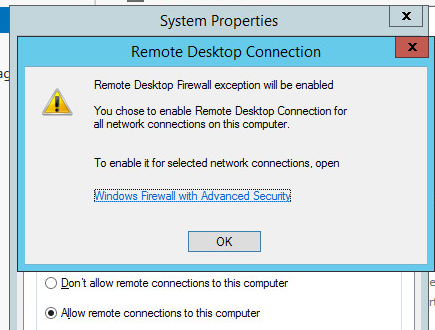
- Enable Remote Desktop:
- Under the “Properties” section, find the “Remote Desktop” setting.
- Click on “Enabled” next to “Remote Desktop” to initiate the configuration.
- Allow Remote Connections:
- Check the option for “Allow remote connections to this computer.”
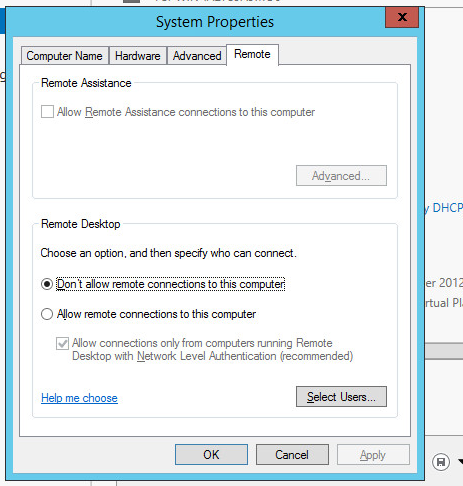
- Click “OK”:
- Click “OK” to confirm and apply the Remote Desktop settings.
- Click “OK” to confirm and apply the Remote Desktop settings.
- Open Command Prompt:
- Open a Command Prompt window by searching for “CMD” in the Start menu.
- Open a Command Prompt window by searching for “CMD” in the Start menu.
- Check IP Address:
- In the Command Prompt, type
ipconfig /alland press Enter to display network configuration details, including the server’s IP address.
- In the Command Prompt, type
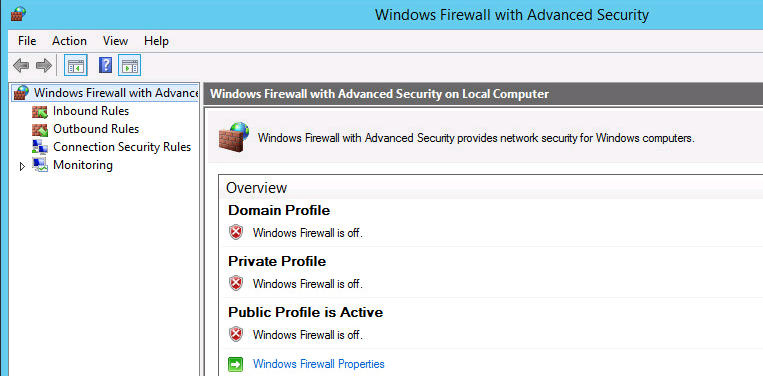
- Configure Windows Firewall:
- Return to Server Manager and click on “Windows Firewall” in the dashboard.
- Click “Public On” to enable the firewall for public networks.
- Go to “Advanced Settings” for more granular control.
- Turn Off Firewall for Private, Public & Domain:
- In the Windows Firewall with Advanced Security window, navigate to the “Domain Profile,” “Private Profile,” and “Public Profile.”
- Turn off the firewall for each of these profiles. Please note that I am sitting behind a physical CISCO firewall. Hence, I need to disable these.
- Remote Desktop Connection:
- Use a Remote Desktop Connection (RDP) client to connect to the server using its IP address.
- Use a Remote Desktop Connection (RDP) client to connect to the server using its IP address.
- Verify Remote Desktop Connection:
- Confirm the successful remote connection to the server.
Step 5 – Additional Recommended Configuration Tasks
- Configure Windows Firewall:
- Return to Server Manager and click on “Windows Firewall” in the dashboard.
- Click “Public On” to enable the firewall for public networks.
- Navigate to “Advanced Settings” for more granular control.
- Turn Off Firewall for Private, Public & Domain:
- In the Windows Firewall with Advanced Security window, navigate to the “Domain Profile,” “Private Profile,” and “Public Profile.”
- Turn off the firewall for each of these profiles.
- Update Windows Server:
- Check for and install any available Windows updates to ensure the server is up-to-date.
- Check for and install any available Windows updates to ensure the server is up-to-date.
- Configure Network Settings:
- Review and configure additional network settings as needed, such as DNS servers.
- Review and configure additional network settings as needed, such as DNS servers.
- Install Antivirus Software:
- Install and configure antivirus software to enhance server security.
- Install and configure antivirus software to enhance server security.
- Create Additional User Accounts:
- Consider creating additional user accounts with appropriate privileges for security and access management.
- Consider creating additional user accounts with appropriate privileges for security and access management.
- Configure Time Zone and Date/Time Settings:
- Verify and adjust the time zone and date/time settings for accurate timekeeping.
- Verify and adjust the time zone and date/time settings for accurate timekeeping.
- Set up Monitoring and Logging:
- Configure monitoring tools and logging settings for performance tracking and error reporting.
- Configure monitoring tools and logging settings for performance tracking and error reporting.
- Implement Group Policies:
- Utilize Group Policy settings to enforce security policies and standard configurations.
- Utilize Group Policy settings to enforce security policies and standard configurations.
- Backup Configuration:
- Establish a backup strategy for critical data and system configurations.
- Establish a backup strategy for critical data and system configurations.
- Document Configuration Changes:
- Maintain documentation of configuration changes for troubleshooting and reference.
- Maintain documentation of configuration changes for troubleshooting and reference.
- Review Security Policies:
- Assess and adjust security policies, including password policies and user access controls.
- Assess and adjust security policies, including password policies and user access controls.
- Test Remote Desktop Connectivity:
- After configuring Remote Desktop, perform thorough testing to ensure secure and reliable remote connections.
- After configuring Remote Desktop, perform thorough testing to ensure secure and reliable remote connections.
- Verify Remote Desktop Connection:
- Confirm the successful remote connection to the server.
- Confirm the successful remote connection to the server.
- Activate Windows – Product Key
Leave a Reply