Can I Install MediaWiki on My Ubuntu 22.04 LAMP Stack? Find Out Here!
Want to Install MediaWiki? Great! It is an open-source Wiki web application used by Wikipedia. It is written in PHP and requires a Database backend to function. It has been publicly released to the Open-Source community.
Note: This procedure was revisited and tested in January 2024. It has been validated and updated to work on Ubuntu 22.04
MediaWiki is a free and open-source wiki engine software that powers many websites, including the popular online encyclopedia Wikipedia. It was developed by the Wikimedia Foundation and released under the GNU General Public License.
MediaWiki provides a platform for collaborative editing and publishing of content on the web, allowing users to create and edit pages using a simple markup language and offering features such as version control, page history, and discussion forums.
The software is highly customizable and extensible, allowing developers to create plugins and extensions to add new features and functionality to the platform. It has been used for a wide range of projects, including documentation, knowledge management, and collaborative writing.
So, let’s start by Installing MediaWiki.
Instructions to Install MediaWiki on Ubuntu
Step 1 – Update your local Repositories
To update the local repositories on an Ubuntu system, you can use the following command:
apt update -yThis command will connect to the configured package repositories and update the local package index to reflect any changes or updates that have been made since the last update. It’s a good idea to run this command regularly to ensure your system has the latest software and security updates.
(Optional) If any updates are available, you can then install them using the following command:
apt upgrade -y
This command will download and install any available updates for your installed packages. You can also use the apt-get command instead of apt if you prefer, as they are essentially equivalent.
Step 2 – Install MediaWiki Pre-Reqs
Install MediaWiki Application Pre-Requisites
First, you need to configure Ubuntu to work with PHP 7.4
sudo add-apt-repository ppa:ondrej/php -yThe next command you provided will install several packages on an Ubuntu system:
apache2: This is the Apache web server, which is one of the most popular web servers in use today.php: This is the PHP scripting language, which is often used to develop dynamic web applications.texlive: This comprehensive TeX system includes many utilities and packages for typesetting documents.php-mbstring: This is a PHP extension that provides multibyte string functions.php-xml: This is a PHP extension that provides XML parsing and manipulation functions.php-apcu: This is a PHP extension that provides a high-performance object cache.php-horde-cache: This PHP package provides a caching framework for PHP applications.
sudo apt install apache2 mariadb-server imagemagick libapache2-mod-php7.4 php7.4 php7.4-common php7.4-intl php7.4-xml php7.4-curl php7.4-gd php7.4-mbstring php7.4-mysql php7.4-apcu -yNow Set MariaDB and Apache to start at boot-up
sudo systemctl is-enabled apache2
sudo systemctl is-enabled mariadb
Step 3 – Configure PHP
Edit the following file.
sudo nano /etc/php/7.4/apache2/php.iniChange the default values as follows. Save and Exit the file upon completion.
upload_max_filesize = 80M
memory_limit = 512M
max_execution_time = 360
Restart the Apache service to pick up the new config:
sudo systemctl restart apache2Step 4 – Configure MariaDB
It is advisable to run the mysql_secure_installation
mysql_secure_installationYou will be asked the following questions for the MariaDB configurations:
- The default MariaDB installation comes without a root password. Press ENTER to continue.
- Input n to keep the default authentication method and not use the unix_socket authentication (this is for the MariaDB root user).
- Input Y to set up the MariaDB root password, then input the new password and repeat.
- Input Y to remove the default anonymous user.
- Input Y to disable the remote login for the MariaDB root user.
- Input Y to delete the default database “test” from your MariaDB installation.
- Lastly, input Y again to reload all table privileges and apply new changes.
Log into the MariaDB database, create a Database, and grant privileges.
sudo mysql -u root
CREATE DATABASE mediawikidb;
CREATE USER mediawiki@localhost IDENTIFIED BY 'my-super-strong-password';
GRANT ALL ON mediawikidb.* TO mediawiki@localhost WITH GRANT OPTION;
FLUSH PRIVILEGES;
\q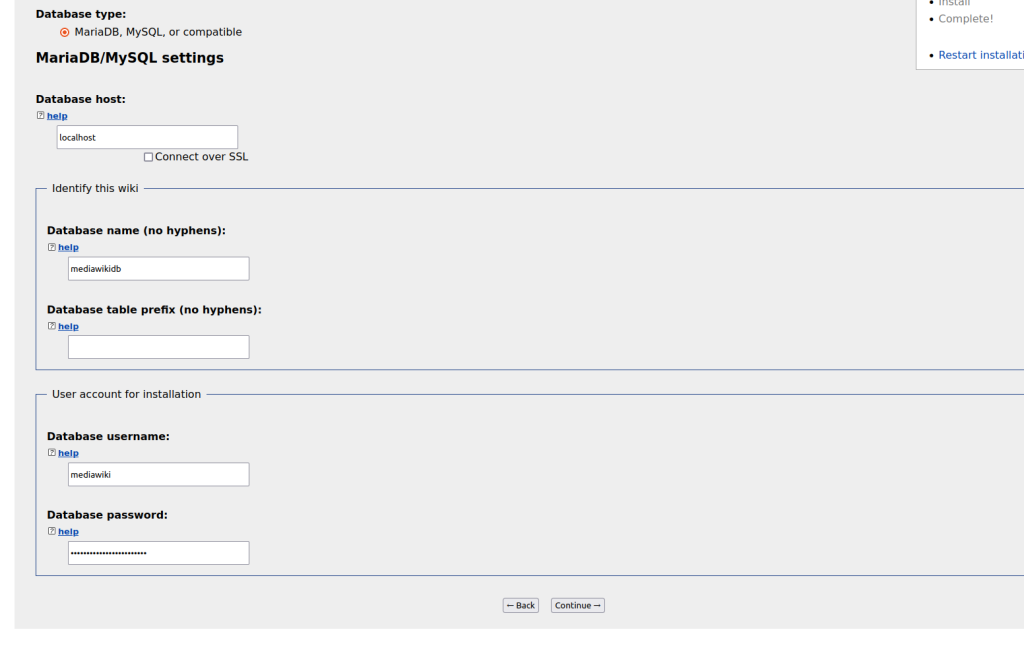
This will grant the permissions needed and create a DB username called WIKI and Password password. Remember this, as you will need it later.
Step 5 – Download MediaWiki and Unzip
Next, download the MediaWiki zipped application and move to /var/www
Check the Mediawiki website for the latest versions.
cd /var/www/
wget https://releases.wikimedia.org/mediawiki/1.41/mediawiki-1.41.0.tar.gz
sudo gunzip mediawiki-1.41.0.tar.gz
sudo tar -xvf mediawiki-1.41.0.tar
mv mediawiki-*/ mediawiki/
sudo chown -R www-data:www-data /var/www/mediawiki
sudo chmod 755 /var/www/mediawiki
Step 6 – Configure & Restart Apache to apply all configuration
Create a reference to your ServerName in your Apache Config file:
sudo nano /etc/apache2/apache2.confAdd your server name at the bottom of the config file. For me, I use:
ServerName turbogeek.co.ukNext, Create a MediaWiki Apache Config file.
sudo nano /etc/apache2/sites-available/mediawiki.confFor Example:
<VirtualHost *:80>
    ServerAdmin [email protected]
    DocumentRoot /var/www/mediawiki/
    ServerName mediawiki.turbogeek.co.uk

    <Directory /var/www/mediawiki/>
        Options FollowSymLinks
        AllowOverride All
        Order allow,deny
        allow from all
    </Directory>

    ErrorLog /var/log/apache2/mediawiki_error
    CustomLog /var/log/apache2/mediawiki_access common
</VirtualHost>
Now Restart the Apache service
sudo service apache2 restartNow Test Apache Configuration:
Test 1:
sudo a2ensite mediawiki.conf

#Example Output
Site mediawiki enabled
Test 2:
sudo apachectl configtest

#Example Output
##Syntax OK
Step 7 – Navigate to the Web interface to Install MediaWiki
Launch the wiki in your favorite web browser. This will usually be the server IP followed by index.php
For Example, http://192.168.1.157/index.php/ or http://yourdomain.com
Click “Setup your first wiki”
Choose your language

and accept the terms and conditions
Step 8 – Setup Database to Install MediaWiki
You will need the username and password created earlier
Under MySQL Settings
Database host = localhost
Database name = mediawikidb
Database table prefix = LEAVE BLANK
Database Username: wiki
Database Password: password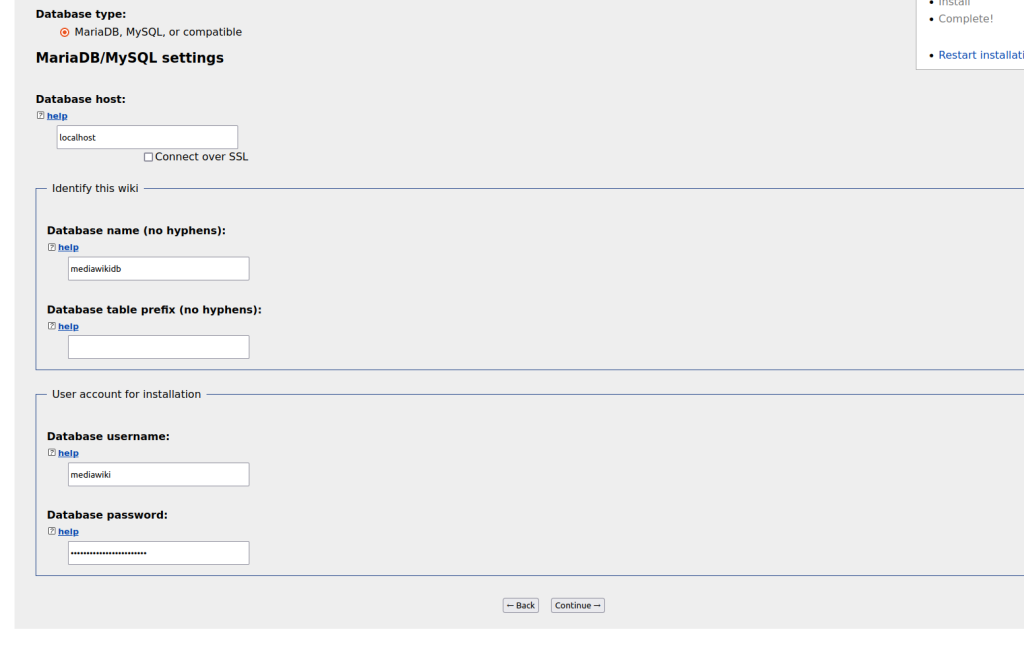
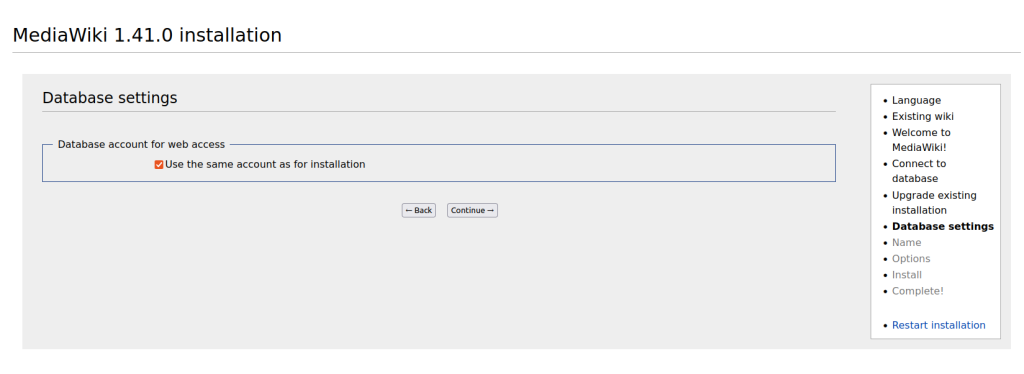
Step 9 – Wiki Name
Give your Wiki a Name
Enter details as you require:
Name of Wiki: YOUR WIKI NAME
Project namespace: Leave set as “Same as the wiki name”
Your Username – ENTER NEW WIKI ADMINISTRATOR ACCOUNT
Password – ENTER NEW PASSWORD
Email – ENTER EMAIL ADDRESS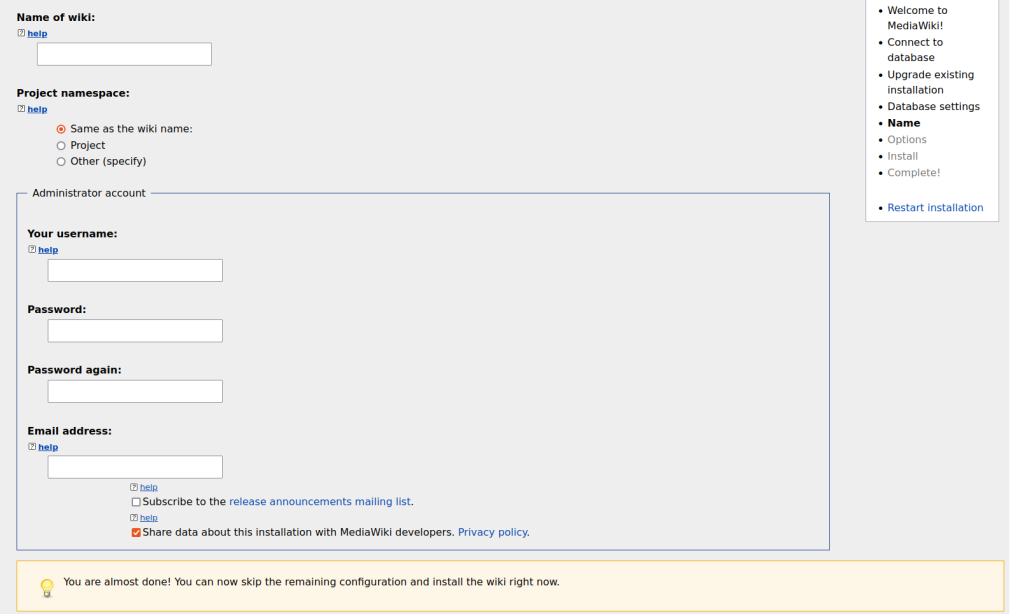
Step 10 – Install
Click the install button and wait for the media wiki to install.
This can take over 5 minutes, depending on the hardware.
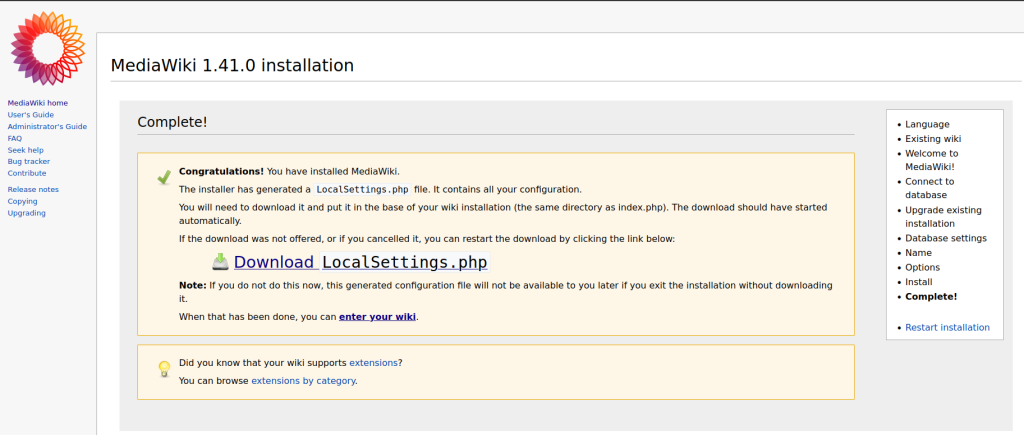
Once the installations are completed, you will be prompted to download the localsettings.php the installer has just created. Download and then FTP these files to the UBUNTU server. Must be copied to /var/www/html/.
FTP programs like WinSCP.
Here is a video of the entire process
Mediawiki Q&A
Q1: What is MediaWiki, and what is it commonly used for?
A: MediaWiki is a free and open-source wiki software that powers websites like Wikipedia. It allows users to collaboratively create and edit content in a structured and organized manner. MediaWiki is commonly used for knowledge bases, documentation, and collaborative platforms where multiple users can contribute and manage content.
Q2: How do I install MediaWiki on my web server?
A: To install MediaWiki on your web server, follow these steps:
- Download the latest version of MediaWiki from the official website.
- Upload the downloaded files to your web server using FTP or any file manager provided by your hosting provider.
- Create a new MySQL database and user for MediaWiki.
- Navigate to your domain in a web browser and follow the on-screen installation instructions provided by MediaWiki.
- Complete the setup by providing the database details and setting up an admin account.
Q3: How can I customize the appearance of my MediaWiki site?
A: MediaWiki allows you to customize the site’s appearance through its skinning system. You can choose from various pre-built skins or create your own. To change the skin, log in as an administrator, go to “Special:Preferences,” and select the desired skin under the “Appearance” tab. For custom skinning, refer to MediaWiki’s documentation on creating and installing custom skins.
Q4: Can I restrict editing access to certain pages in MediaWiki?
A: Yes, MediaWiki provides robust access control features. You can restrict editing access to specific pages or namespaces by adjusting user permissions. Administrators can assign user groups and set different levels of access rights, such as read-only, edit, or administrative privileges. Navigate to “Special:UserRights” to manage user permissions.
Q5: How do I enable file uploads in MediaWiki?
A: By default, MediaWiki allows file uploads. To enable this feature, log in as an administrator and go to “Special:Upload” to upload files. However, you may want to adjust the file upload settings to control the file types and sizes allowed. Access the “LocalSettings.php” file and modify the relevant configurations. Remember to also set appropriate permissions on the server for the upload directory.
Q6: Is it possible to integrate MediaWiki with other applications?
A: Yes, MediaWiki supports integration with various applications and services. For example, you can integrate MediaWiki with an authentication system like LDAP or OAuth to manage user logins. Additionally, there are extensions available to embed content from external sources like YouTube or Google Maps. Explore MediaWiki’s official extensions repository for a wide range of integration options.
Q7: How can I backup and restore my MediaWiki site?
A: To backup your MediaWiki site, follow these steps:
- Create a backup of your MediaWiki files and directories.
- Export your MediaWiki database using a tool like phpMyAdmin or the MySQL command line.
To restore your site:
- Upload the backup files to the server.
- Create a new MySQL database and user (if not already done).
- Import the backed-up database into the newly created database.
Q8: Where can I find additional help and support for MediaWiki?
A: For additional help and support, you can refer to the official MediaWiki documentation available at mediawiki.org. The website includes user guides, developer resources, and a community forum where you can ask questions and seek assistance from experienced users and developers.
Remember to continuously update and expand your Q&A section as new questions arise or changes occur in the MediaWiki ecosystem. This will ensure that your website remains a valuable resource for users seeking information on MediaWiki.
Want a video showing how to Install MediaWiki – Check out this page on our site.
Thanks for taking the time to read this article. if you have any questions or feedback, please write in the comment section below.



Very helpful blog post on installing MediaWiki! The step-by-step instructions are clear and concise, making the installation process much easier. I appreciate the inclusion of tips and troubleshooting advice throughout the guide. This will be invaluable for anyone looking to set up their own MediaWiki site. Thank you for sharing.