
In this guide, I will demonstrate step-by-step how to install and configure Azure Site Recovery for on-premise VMware vCenter servers.
Azure site recovery performs both replication and orchestration for VM’s, and although Microsoft does not recommend it, many system admins still use Azure Site Recovery for migration.
I agree with Microsoft, use Azure Migrate if you are moving workloads to the cloud as part of a Cloud Migration Strategy, and only use ASR for an Azure Site Recovery failover strategy.
I found the process quite difficult at first, and there were many gotchas during the onboarding process.
I found that there was little help online, even the Microsoft documentation was very poor, as they focus mainly on Hyper-V on-premise solutions.
Before we begin, please make sure you have the following information available:
- Azure Subscription information
- Create a Resource Group specifically for ASR
- Create a Recovery Services Vault Specifically for ASR, if you are failing between different regions I would recommend one vault per region
- Create a Recovery Services Vault in your Resource group in an Azure datacenter region
- Have a Blob Storage Account available
- Create a storage account in the same Azure datacenter region for cached data files
- You must have Administrator Access to vCenter
- You must have root access to Linux servers (yes really!)
- An Azure account with the Application Developer contributor permission
Step 1 – Download the Azure Site Recovery OVA
- Log in to the Azure portal
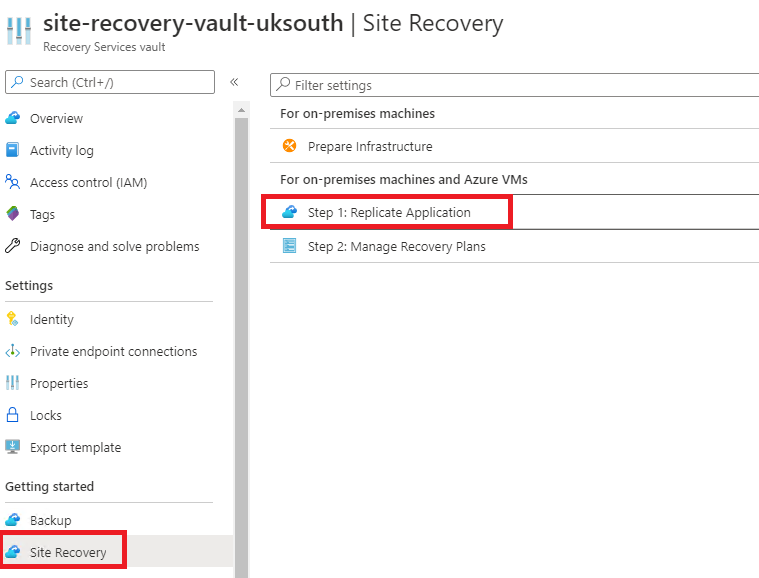
- Navigate to the Azure Recovery Services blade
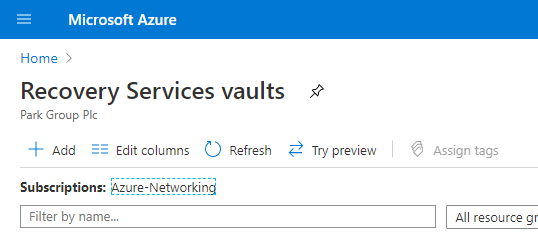
- Find the ‘getting started’ submenu and click site recovery, then select prepare infrastructure (see below)
- Next, we need to configure the protection goal, prepare the source and target, then configure the replication settings.
- In this example, I will be protecting on-premise servers, and replicating them to Azure using an Azure configuration server installed on vSphere.
- Click Site Recovery > Prepare Infrastructure

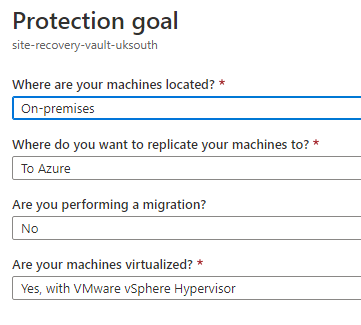
On the next screen you will see
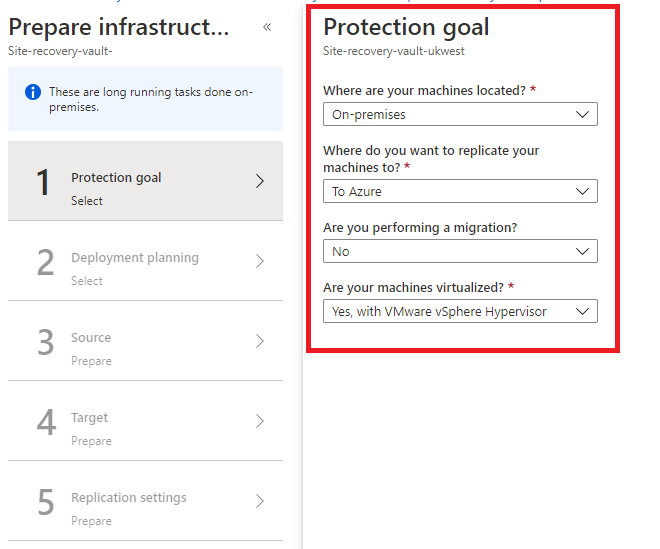
- Set the protection goal to your desired needs (see example above) and click ok
Notes:
- You can skip the Deployment planning if you are just testing
- The OVA is region-locked, so it will only work with the Correct Vault in the Correct Region, you cannot download this and use it for any other region or Vault.
- At the time of writing, the download is 21GB in size!

- To download the OVA. On the source screen, you will find a download link.

Step 2 – Deploy the OVA template to vCenter
- Once the file is downloaded, open your vCenter management client right-click on the datacenter > select Deploy OVF Template
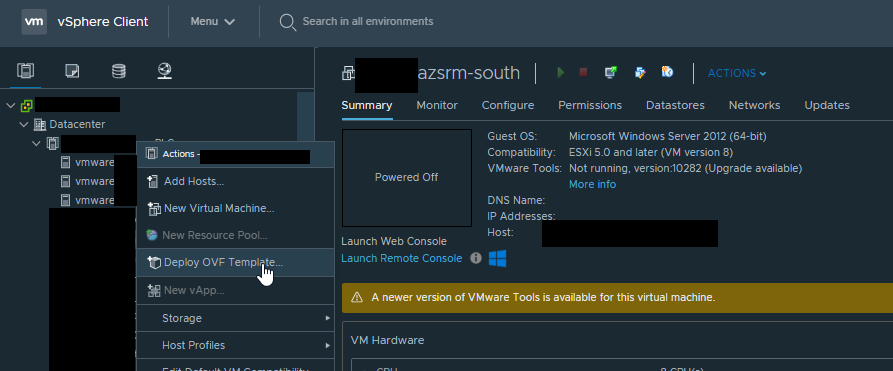
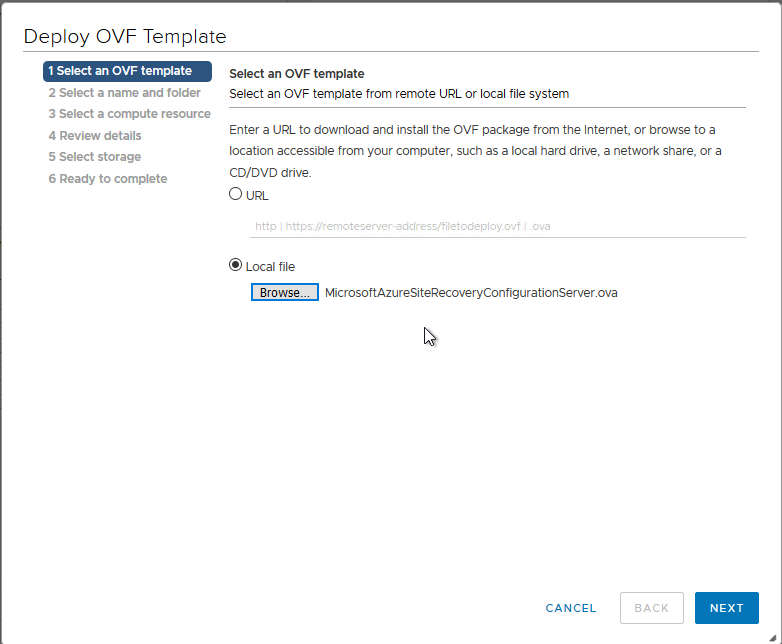
- Click Next, give the VM a name, choose your appropriate network, and accept the defaults to continue the installation
- Wait for the OVA to upload to vCenter. It took mine a long time to complete
- Once completed, power up the VM and launch a remote console
- Accept the Licence terms
- Create an administrator password
- Log in and wait for the automated boot sequence to complete
Step 3 – Configure the Azure Site Recovery configuration virtual machine
After the automated boot sequence has completed, you will see the following screen.
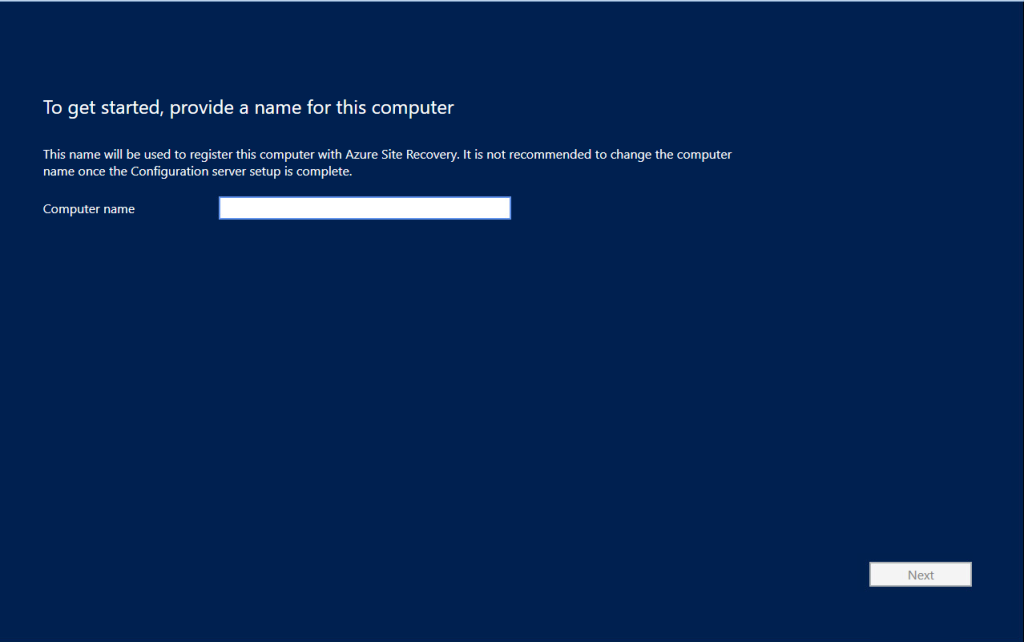
- Give the server a Computer Name (DNS)
- Next give it an IP Address
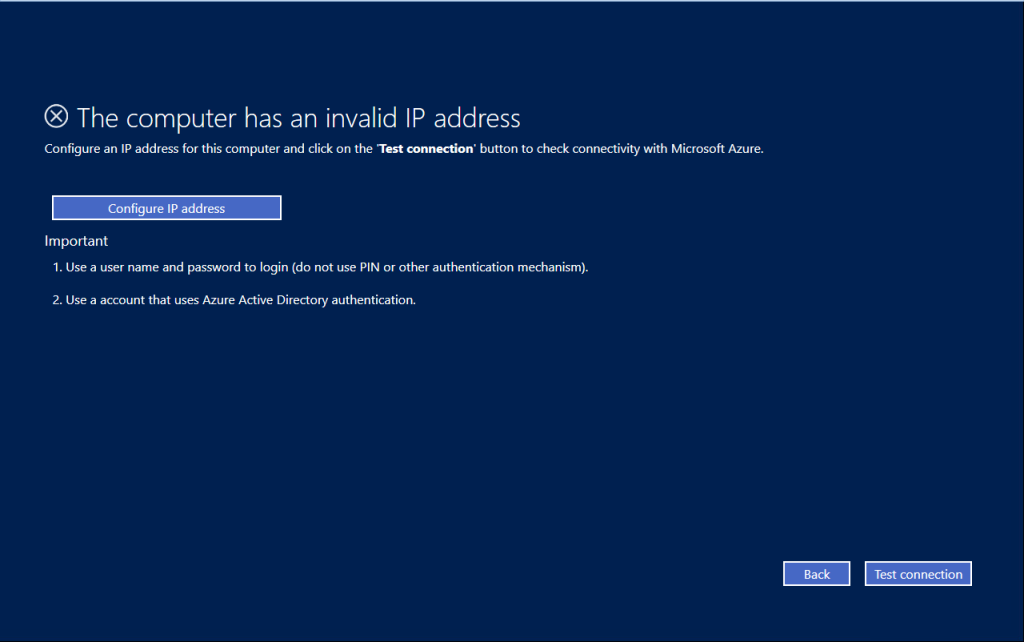
- Click Configure IP Address
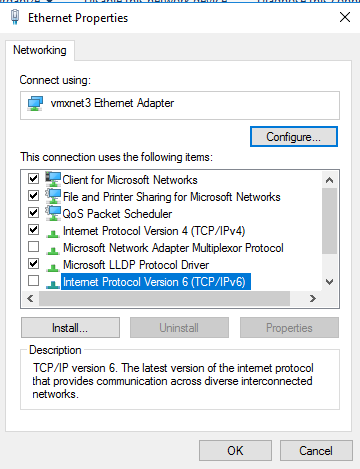
- Select your Network Adapter > right click > Properties
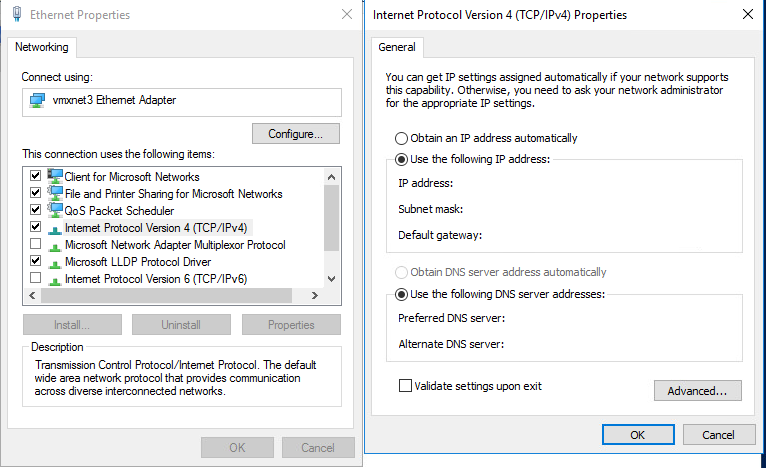
- Turn off IPV6 then select IPV4 properties
- Set the IPV4 address you need, see your network engineer if you need to be allocated an IP address
- Next click the Test Connection button and providing your network layer is open to the internet you will see this page:
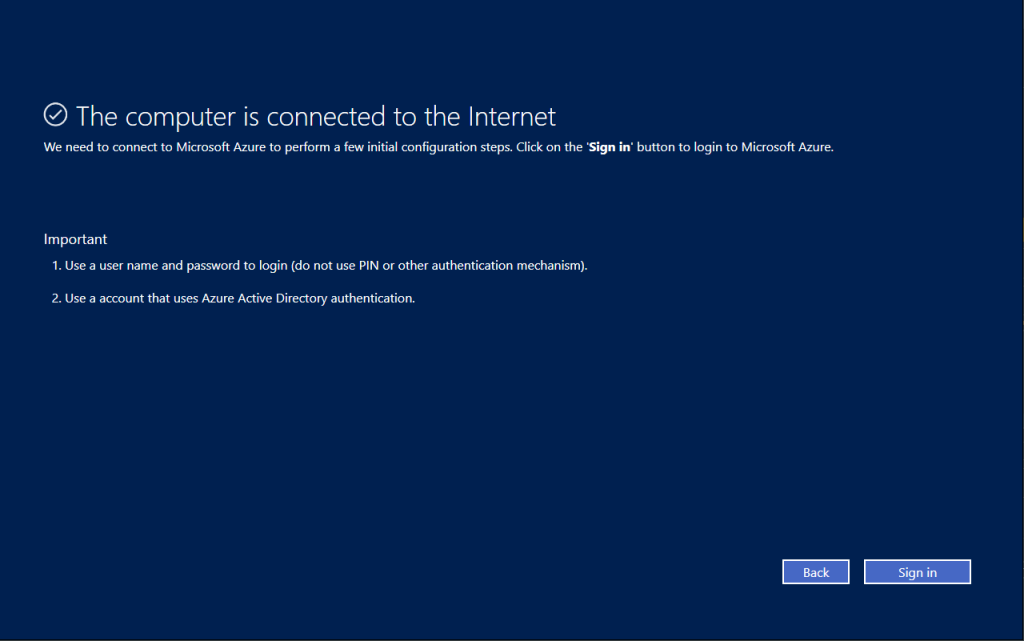
- Press the Sign-In button and log into Azure with your credentials
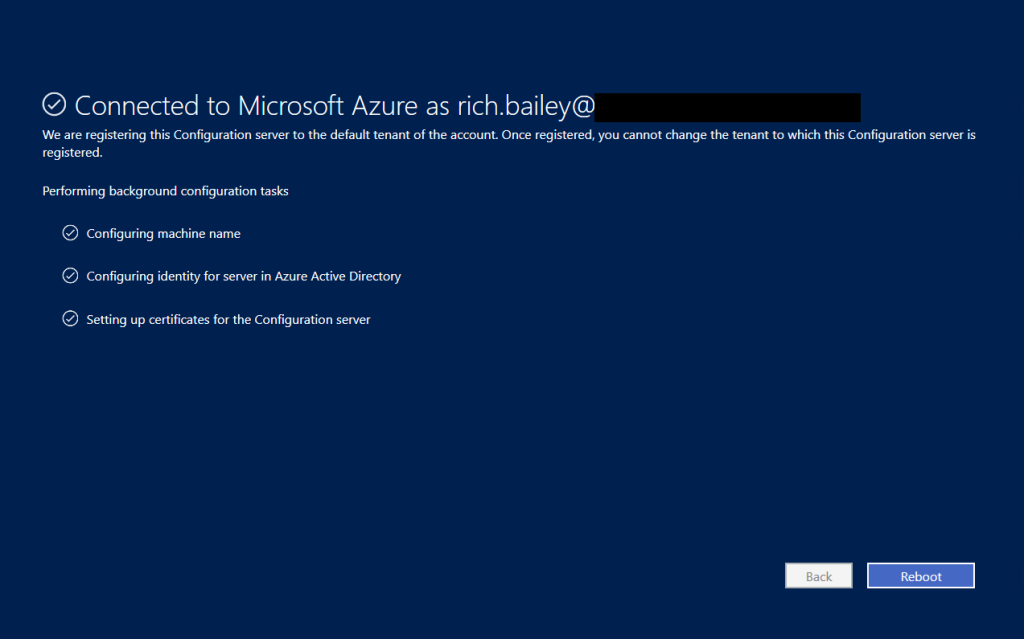
- Once the initail config is completed reboot the server
- IMPORTANT – You must have “Application Developer” permissions to complete this task.
Step 4 – Post-installation configuration
- You will be prompted to log back into Azure after the server has rebooted
- If you are behind a proxy you will be asked to set it up here
- Next, select the primary network interface card (NIC)
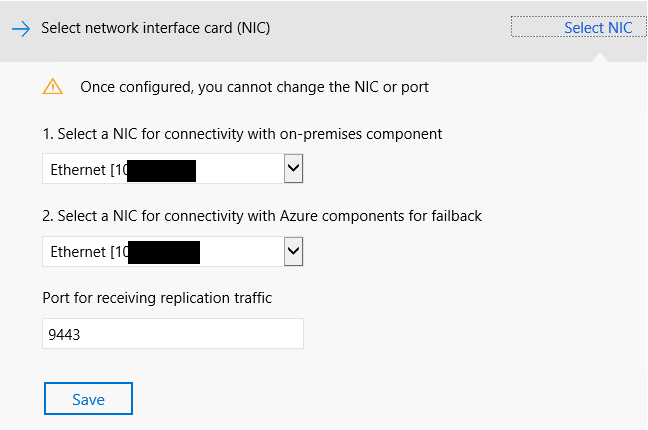
- Click save and continue to move to “Select Recovery Services Vault“
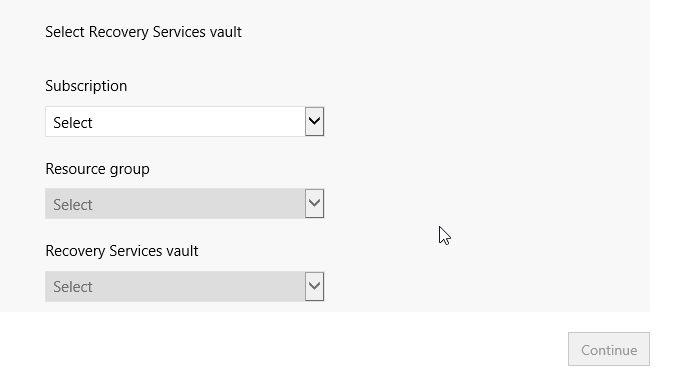
- You will be asked to log in again and sync your details. Accept the prompt on the “Permissions Requested” pop-up
- Select your appropriate Subscription, resource group, and Recovery Services Vault
- Click continue
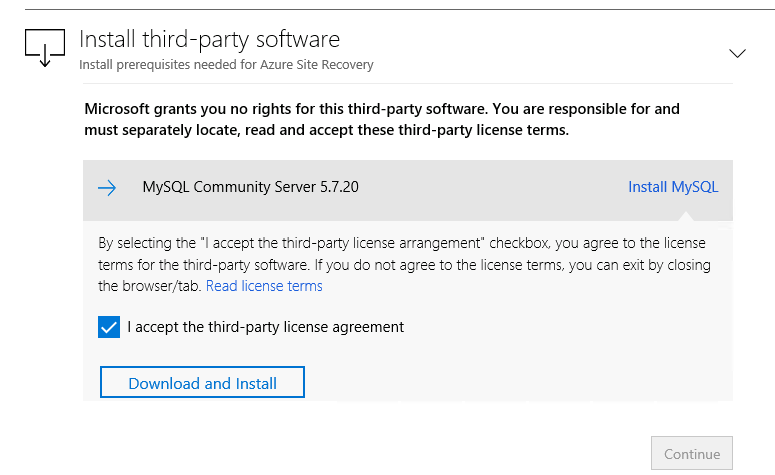
- Next, Install the Mysql, accept the third-party license agreement, and click download and install. This process is completely automated and takes a few minutes. Once completed, press continue.
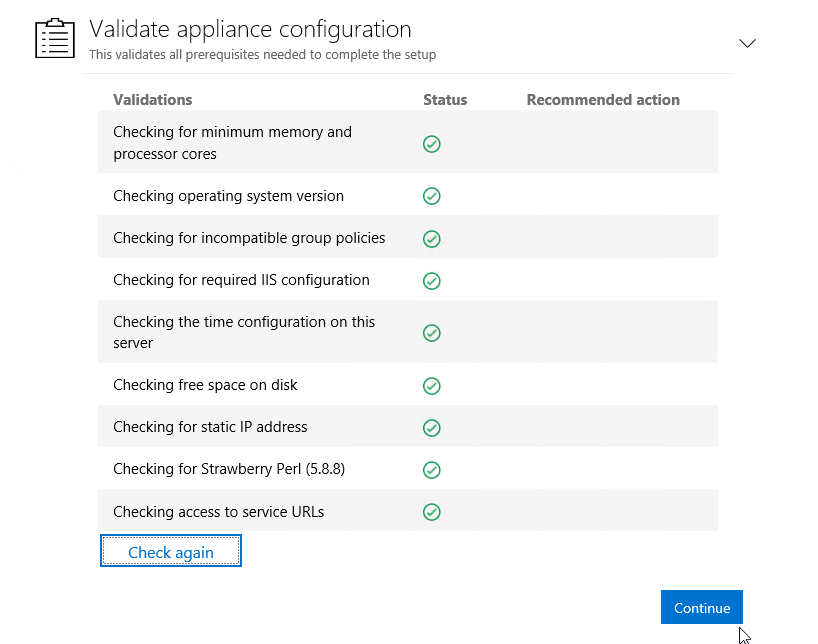
- Next and config check is completed automatically, click continue
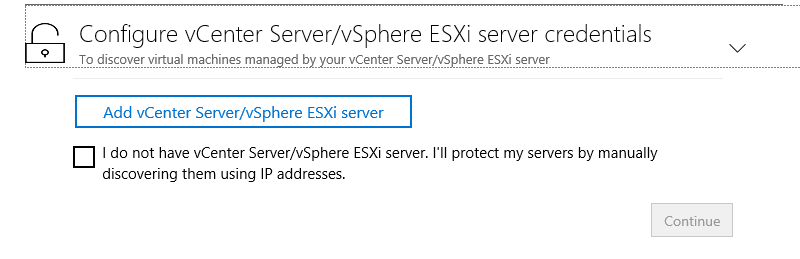
- Now the important bit , configuring vCenter or your ESXi hosts and credentials. Click the Add vCenter Server / vSphere ESXi server button
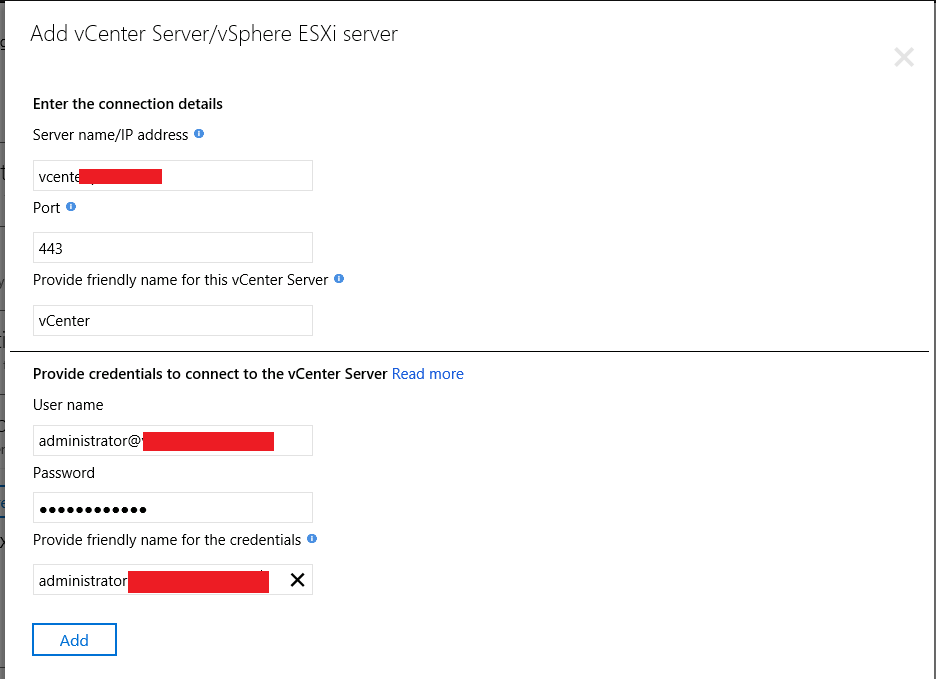
- Enter your vCenter Server DNS name (or IP)
- Leave default port at 443
- Provide a Friendly Name of vCenter
- Add the administrator vCenter credentials. (Click here for details)
- Once the credentials are validated, click continue
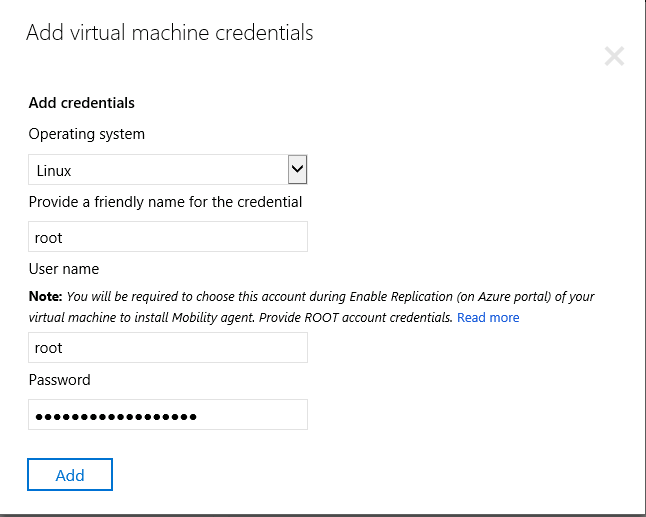
Next, we need to configure the Virtual Machine credentials. Annoyingly I have only got this working with root credentials. The microsoft documentation suggests root is the only way this works.
In my mind, demanding root credentials is very very poor from Microsoft and a major headache for security. My security team was not happy that we have to give root creds. Sudo will not work, even Sudo NOPASSWD doesn’t work! – Madness. If you know a workaround, please get in touch.
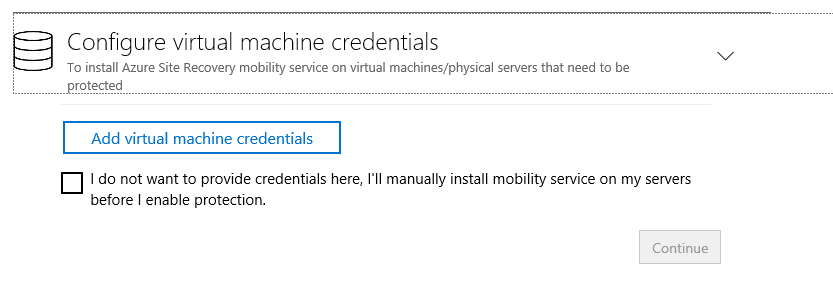
- Click Add virtual Machine credentials and enter your creds
- Once completed, click continue and Finalize Configuration (this final step takes several minutes

Step 5 – Configuring Azure SRM to connect to vSphere
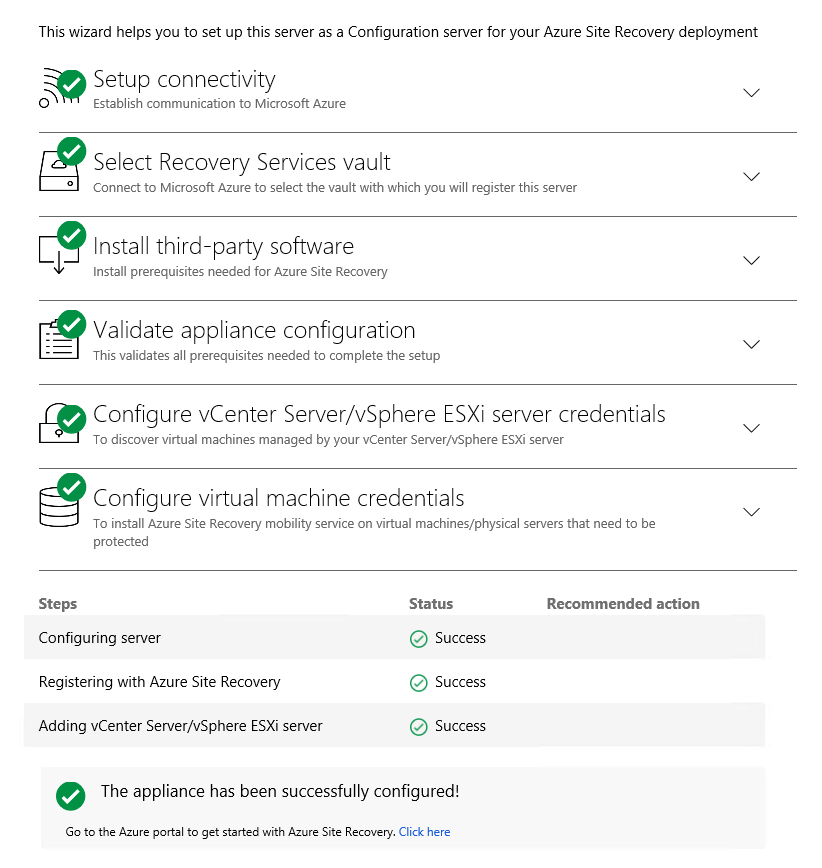
After the Azure Site Recovery configuration server has finished configuring. You should have a screen of green ticks.
- Log in to the Azure portal
- Navigate to the Site Recovery Vault
- Find the “getting started” submenu, and click on Site Recovery and the Prepare Infrastructure (This is exactly the same as we did at the very top of this procedure)
- Double-check your Protection Goal is saved as your requirements
- Press next and click

- Click next and state yes I have done it on the Deployment planning page
- Now, on the prepare source section, the OVA configuration server you have just deployed should now be visible, as well as your vCenter server.
- NB – If you see nothing, please be aware it can take 15 minutes to populate Azure

- Click OK, on the Target Prepartion page select your Azure Subscription, and choose Resource Manager as the deployment model used after failover
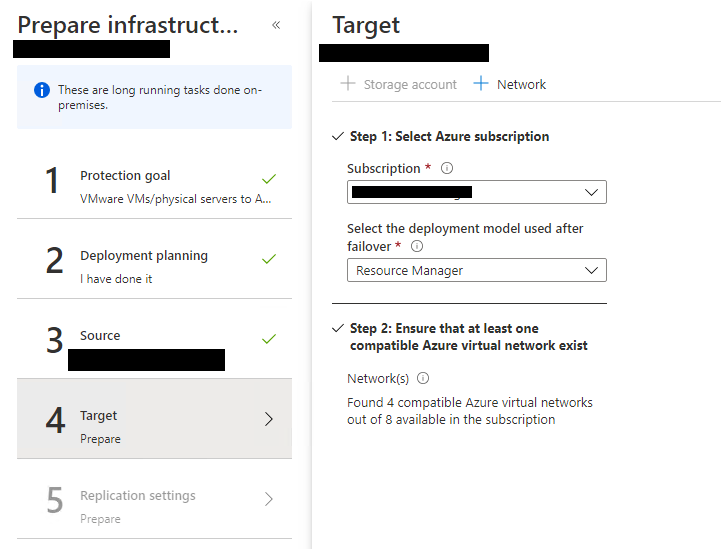
- Click OK to view the Replication Policy page.
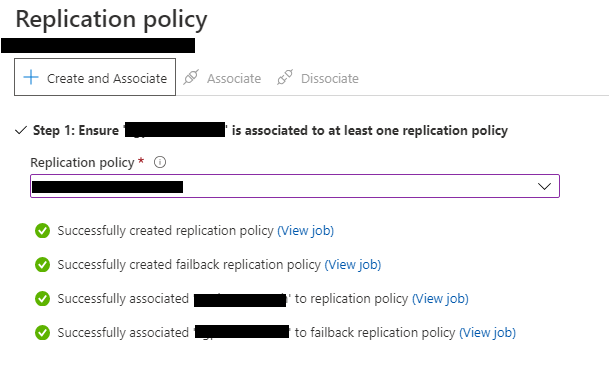
- Click Create and Associate
- Give your policy a name
- Set the RPO and RTO
- I would leave the other settings as default
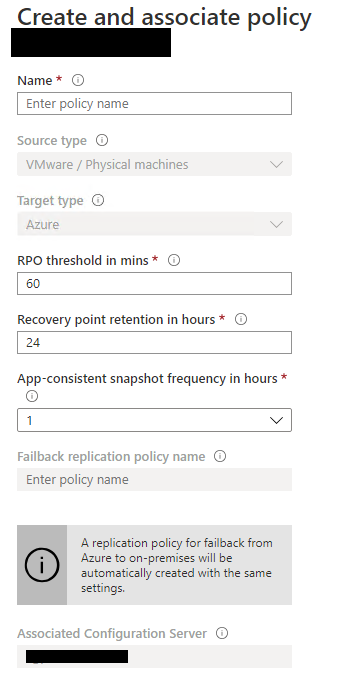
- Wait a few minutes for the policy to be created and click ok to finish
Step 6 – Configure Replicate Application
- Back on the Site Recovery main page, Find the “getting started” submenu, and click on Site Recovery and the Replicate Application
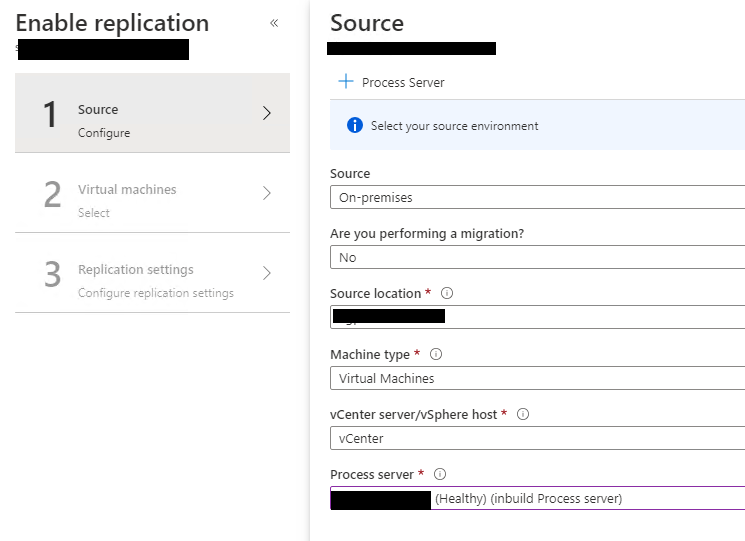
- Complete the Source information page, generally the only thing you need to change is the “Process Server” at the bottom. Everything else should be autocompleted.
- Click OK, on the target page check your details for the Azure Subscription, and the post-failover resource group. Leave the Post-Failover deployment model set to Resource Manager.
- Under Azure Network, select Configure now for selected Machine and point the configuration to your pre-configured Post-Failover Azure Network and Subnet
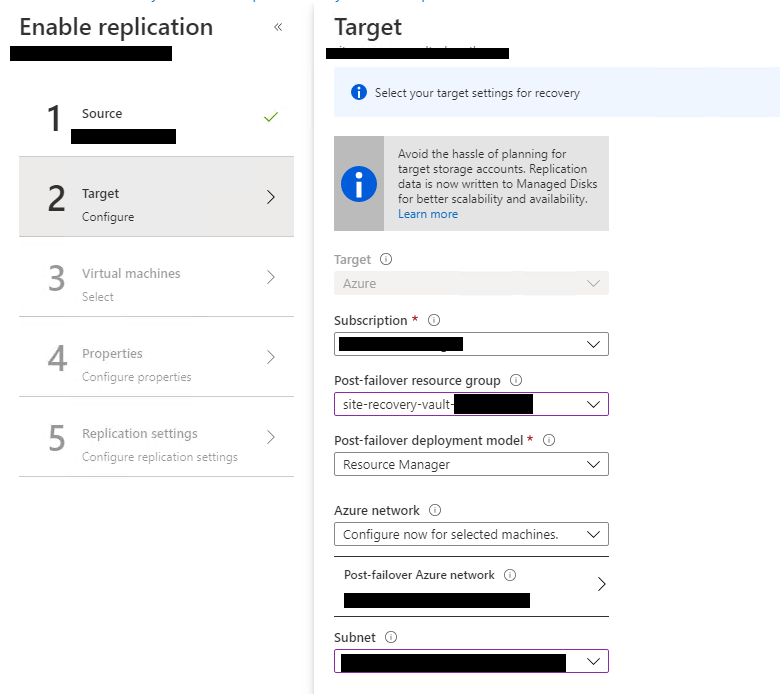
- Press OK to continue
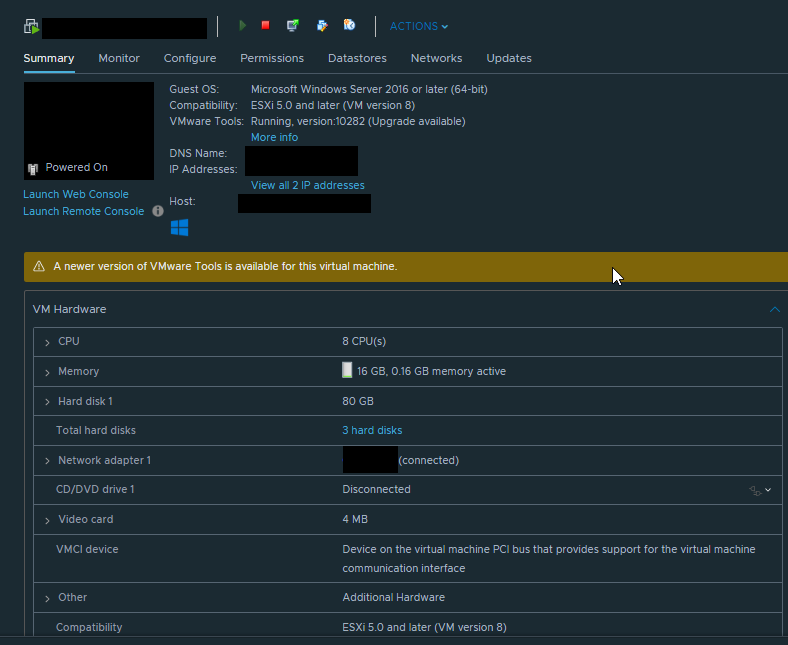
- Next, on the Select Virtual Machines page chose the VMs you want to protect
- IMPORTANT – Your VMs much have VMware Tools installed for Azure Site Recovery to recognize them
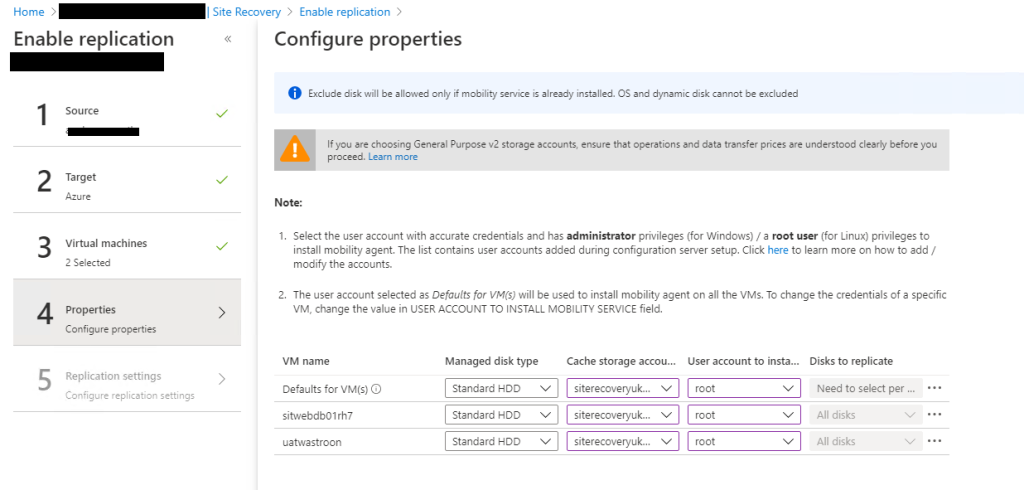
- Press OK to continue to the Configure Properties page
- Set the Managed Disk Type
- Set the Cache Storage Account
- Set the User Credentials
- Press OK to continue
- On the next page make sure you select the Replication Policy you created earlier, click OK and then Enable Replication
- Azure will now go off and configure everything. It can take several minutes to complete.
- You can check the progress by Clicking on the Replicated Items
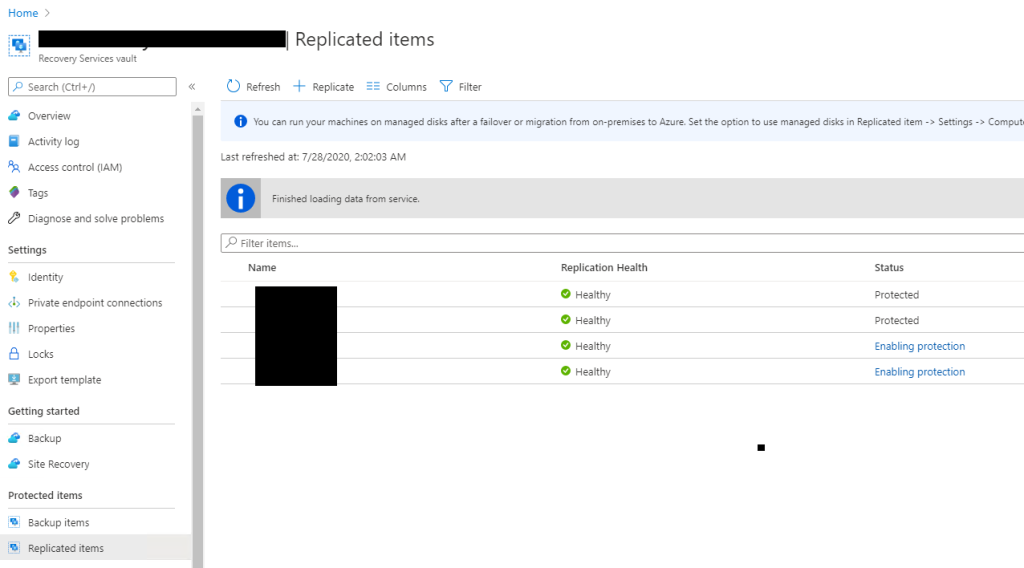
- Click on the job you can dig deeper and check the progress in more detail. If the process fails, it will almost always be a typo in your username/password combination
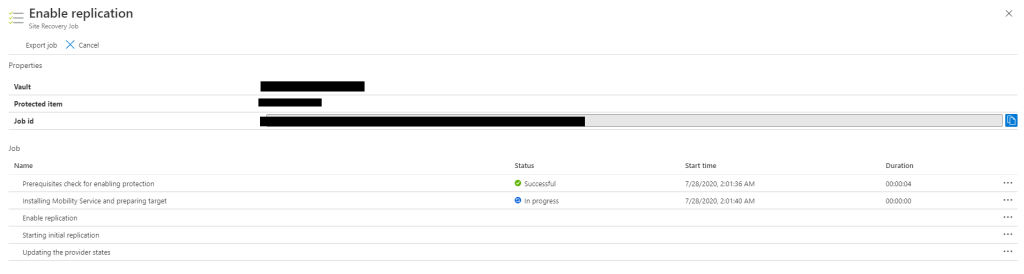
You should see the following information, and your VMs will start replicating to Azure. Come back in an hour and your VMs should be sorted and ready to go.

Step 7 – Creating an Azure Recovery Plan
This content is coming soon….
Leave a Reply