
Introducing a Scalable EC2 Configuration with AWS CDK
Its essential to ensure that your infrastructure is not only robust but also scalable. Building a flexible environment that can grow with your needs is necessary for supporting modern applications.
That’s why I’m excited to share a practical solution that leverages the power of AWS Cloud Development Kit (AWS CDK) to create a tailored EC2 instance configuration. This code, written in TypeScript, lays the groundwork for a highly scalable and easily managed infrastructure.
What Does It Do?
The code provides a step-by-step guide to setting up an EC2 Auto Scaling group on AWS with specific configurations, including:
- IPv6 Native VPC: Setting up a new Virtual Private Cloud (VPC) with IPv6 enabled from the start, alongside IPv4.
- User Data Scripting: Automating the installation of essential packages and the execution of setup scripts on instance launch (e.g., for Node.js, Elastic Agent).
- Secure IAM Roles & Security Groups: Ensuring secure, least-privilege access to the EC2 instances and integrating with AWS Systems Manager (SSM) for management.
- Enhanced Instance Security: Implementing EBS volume encryption and requiring IMDSv2 for better protection.
- Auto Scaling: Implementing an Auto Scaling Group to allow the system to dynamically adjust to demands, scaling in and out as needed, with considerations for updates and health checks.
- Reusable Stack Design: Structuring the CDK code for better reusability across different environments (dev, prod).
Why Is It Important?
This approach offers a clean, programmatic way to define cloud resources, making it easier to manage, scale, and replicate environments. By harnessing the power of AWS CDK, we’re moving away from manual configurations and error-prone scripting, embracing a more maintainable and version-controlled way of defining our cloud infrastructure.
Whether you’re a seasoned cloud engineer or just getting started with AWS, this guide offers a clear path to understanding and implementing a versatile EC2 setup. The provided code is not just an abstract example; it’s a practical tool that can be adapted to various real-world scenarios.
Getting Started: Stack Properties for Reusability
Before we define the resources, let’s define an interface for our stack’s properties. This makes our Ec2Stack more reusable and configurable for different environments or applications.
// At the top of your stack file (e.g., lib/ec2-stack.ts)
import * as cdk from 'aws-cdk-lib';
import * as ec2 from 'aws-cdk-lib/aws-ec2'; // Needed for InstanceType, IMachineImage

export interface ScalableEc2StackProps extends cdk.StackProps {
  envName?: string; // e.g., 'Dev', 'Prod' for naming and tagging
  instanceType?: ec2.InstanceType;
  machineImage?: ec2.IMachineImage;
  minCapacity?: number;
  maxCapacity?: number;
  desiredCapacity?: number;
  vpcId?: string; // Optional: For using an existing VPC
}
Now, let’s build the stack. The following steps will be part of a CDK Stack class. We’ll show the full class structure at the end.
Step 1 – Define the VPC with IPv6 Enabled
A foundational piece is the Virtual Private Cloud (VPC). We’ll create a new VPC with IPv6 enabled by default. This VPC will include public subnets (for resources like load balancers or NAT Gateways) and private subnets (where our EC2 instances will reside for better security). The private subnets will have egress capabilities, allowing instances to reach the internet for updates or to call other AWS services, while not being directly reachable from the internet.
// This code goes inside your Stack class constructor

// vpc: ec2.IVpc; // Declare as a class member if you need to access it outside the constructor or pass it around

if (props?.vpcId) {
  // If a vpcId is provided in props, look up and use an existing VPC
  // Ensure this existing VPC is IPv6 enabled and configured appropriately if you need IPv6.
  this.vpc = ec2.Vpc.fromLookup(this, 'ImportedVpc', { vpcId: props.vpcId });
} else {
  // Create a new VPC with IPv6 enabled
  this.vpc = new ec2.Vpc(this, 'MyIPv6Vpc', {
    vpcName: `${props?.envName || 'Default'}Vpc`,
    assignGeneratedIpv6CidrBlock: true, // Enable IPv6 and have AWS assign a /56 CIDR
    maxAzs: 2, // Use 2 Availability Zones for this VPC
    subnetConfiguration: [
      {
        cidrMask: 24, // IPv4 CIDR mask for subnets
        name: 'Public',
        subnetType: ec2.SubnetType.PUBLIC,
        mapPublicIpOnLaunch: true, // Instances in public subnets get a public IP
      },
      {
        cidrMask: 24,
        name: 'PrivateWithEgress', // Instances can reach the internet via NAT Gateway/Egress-Only IG
        subnetType: ec2.SubnetType.PRIVATE_WITH_EGRESS,
      },
      // For truly isolated subnets (no internet access at all, even outbound):
      // {
      //   cidrMask: 28,
      //   name: 'PrivateIsolated',
      //   subnetType: ec2.SubnetType.PRIVATE_ISOLATED,
      // }
    ],
    // IPv6 CIDRs (/64) will be automatically assigned to subnets in this VPC
  });
}
Step 2 – Import Necessary Modules for AWS-CDK EC2 Instance
Before creating the stack resources, import the necessary AWS CDK and AWS SDK modules within your stack file (e.g., lib/ec2-stack.ts).
import * as cdk from 'aws-cdk-lib';
import * as iam from 'aws-cdk-lib/aws-iam';
import * as ec2 from 'aws-cdk-lib/aws-ec2'; // Includes MachineImage, UserData, AmazonLinuxCpuType etc.
import * as autoscaling from 'aws-cdk-lib/aws-autoscaling';
import { Construct } from 'constructs';
// Potentially other imports if you add more specific resources like S3, KMS:
// import * as s3 from 'aws-cdk-lib/aws-s3';
// import * as kms from 'aws-cdk-lib/aws-kms';
(The ScalableEc2StackProps interface shown earlier would also be in this file, typically above the class definition).
Step 3 – Create User Data
Define a user data script to automate installations and configurations when your EC2 instances launch. We’ll use bash -xe for robust scripting (print commands and exit on error).
// This code goes inside your Stack class constructor

const userData = ec2.UserData.forLinux({
    shebang: '#!/bin/bash -xe' // Execute with bash, print commands, exit on error
});
userData.addCommands(
    'yum update -y', // Update all packages
    'yum install -y amazon-ssm-agent', // Ensure AWS Systems Manager Agent is present
    'systemctl enable amazon-ssm-agent --now', // Enable and start the SSM agent

    // --- Your command list here... ---
    // Example: Install Node.js v20.x
    // 'curl -fsSL https://rpm.nodesource.com/setup_20.x | sudo bash -',
    // 'yum install -y nodejs',

    // Example: Download and install Elastic Agent (replace with actual version and logic)
    // 'ELASTIC_AGENT_VERSION="8.13.4"', // Define version
    // 'wget https://artifacts.elastic.co/downloads/beats/elastic-agent/elastic-agent-${ELASTIC_AGENT_VERSION}-x86_64.rpm',
    // 'rpm -ivh elastic-agent-${ELASTIC_AGENT_VERSION}-x86_64.rpm',
    // 'systemctl enable elastic-agent --now', // Enable and start agent

    'echo "User data script completed successfully at $(date)!"'
);
Self-host or use pre-baked AMIs for critical dependencies to avoid reliance on public internet availability during instance launch if deploying into PRIVATE_ISOLATED subnets or for improved reliability.
Step 4 – Create IAM Role
Define an IAM role that the EC2 instances will assume. This role grants necessary permissions for AWS Systems Manager (SSM) to manage the instances. For application-specific permissions (e.g., accessing S3 buckets or KMS keys), you would add more policies to this role, adhering to the principle of least privilege.
// This code goes inside your Stack class constructor

// instanceRole: iam.Role; // Declare as a class member

this.instanceRole = new iam.Role(this, 'InstanceRole', {
  // It's a CDK best practice to let CDK generate physical names where possible,
  // or ensure names are unique if explicitly set.
  // roleName: `${props?.envName || 'Default'}-InstanceRole`, // Example of custom naming
  assumedBy: new iam.ServicePrincipal('ec2.amazonaws.com'),
  description: 'IAM role for EC2 instances with SSM access and application needs',
});

// Attach the AWS managed policy for core SSM functionality
this.instanceRole.addManagedPolicy(iam.ManagedPolicy.fromAwsManagedPolicyName('AmazonSSMManagedInstanceCore'));

// **Guidance for Application-Specific Permissions (like your Talend role example):**
// If your application on these EC2 instances needs to interact with other AWS services,
// grant specific permissions here.
// For example, to grant Read/Write to a specific S3 bucket:
// const myAppBucket = s3.Bucket.fromBucketName(this, 'SpecificAppBucket', 'your-actual-bucket-name');
// myAppBucket.grantReadWrite(this.instanceRole);

// For KMS encrypt/decrypt on a specific key:
// const myAppKey = kms.Key.fromKeyArn(this, 'SpecificAppKey', 'arn:aws:kms:REGION:ACCOUNT:key/KEY_ID');
// myAppKey.grantEncryptDecrypt(this.instanceRole);

// Avoid overly broad permissions like allowing access to ALL S3 buckets (`s3:ListAllMyBuckets`
// on `Resource: '*'`) unless the instance's core function absolutely requires it.
// Always scope permissions to specific resources and actions needed.
Step 5 – Create a Security Group
Define a security group to control inbound and outbound traffic for your EC2 instances. We’ll allow all outbound traffic (both IPv4 and IPv6) so instances can download updates or communicate with other AWS services. By default, no inbound traffic will be allowed, enhancing security. SSM agent communicates outbound, so no inbound rules are needed for it.
// This code goes inside your Stack class constructor

const SgName = `${props?.envName || 'Default'}InstanceSecurityGroup`;
const instanceSecurityGroup = new ec2.SecurityGroup(this, 'InstanceSecurityGroup', {
  securityGroupName: SgName,
  vpc: this.vpc, // Associate with our VPC
  description: 'Controls traffic to EC2 instances; allows outbound, no inbound by default.',
  allowAllIpv6Outbound: true, // Allow all outbound IPv6 traffic
  allowAllOutbound: true,      // Allow all outbound IPv4 traffic (this is often the default)
});

// If you need to allow inbound traffic (e.g., SSH from a bastion, or HTTP from a Load Balancer):
// instanceSecurityGroup.addIngressRule(ec2.Peer.ipv4('YOUR_BASTION_IP/32_OR_SG_ID'), ec2.Port.tcp(22), 'Allow SSH from Bastion');
// instanceSecurityGroup.addIngressRule(ec2.Peer.ipv6('YOUR_BASTION_IPV6::/64_OR_SG_ID'), ec2.Port.tcp(22), 'Allow SSH from Bastion (IPv6)');
Step 6 – Create a Launch Template
Define a launch template with all the necessary parameters for your EC2 instances. This includes the IAM role, security group, instance type, machine image, user data, and security enhancements like EBS encryption and IMDSv2.
TypeScript
// This code goes inside your Stack class constructor

const launchTemplate = new ec2.LaunchTemplate(this, 'AppLaunchTemplate', {
  launchTemplateName: `${props?.envName || 'Default'}AppLaunchTemplate`,
  machineImage: props?.machineImage || ec2.MachineImage.latestAmazonLinux2023({
    cpuType: ec2.AmazonLinuxCpuType.X86_64, // Or ARM_64
  }),
  instanceType: props?.instanceType || ec2.InstanceType.of(ec2.InstanceClass.T3, ec2.InstanceSize.MICRO),
  role: this.instanceRole,
  securityGroup: instanceSecurityGroup,
  userData: userData,
  detailedMonitoring: true, // Enable detailed CloudWatch monitoring (recommended for prod)
  blockDevices: [
    {
      deviceName: '/dev/xvda', // Root volume device name (common for Linux)
      volume: ec2.BlockDeviceVolume.ebs(30, { // 30 GiB EBS volume
        volumeType: ec2.EbsDeviceVolumeType.GP3, // General Purpose SSD (GP3)
        encrypted: true, // **Best Practice: Encrypt EBS volumes**
        deleteOnTermination: true, // Delete volume when instance terminates
      }),
    },
  ],
  httpTokens: ec2.LaunchTemplateHttpTokens.REQUIRED, // **Best Practice: Enforce IMDSv2**
  // If you need EC2 key pair access (not recommended if using SSM Session Manager):
  // keyName: 'your-ec2-key-pair-name',
});
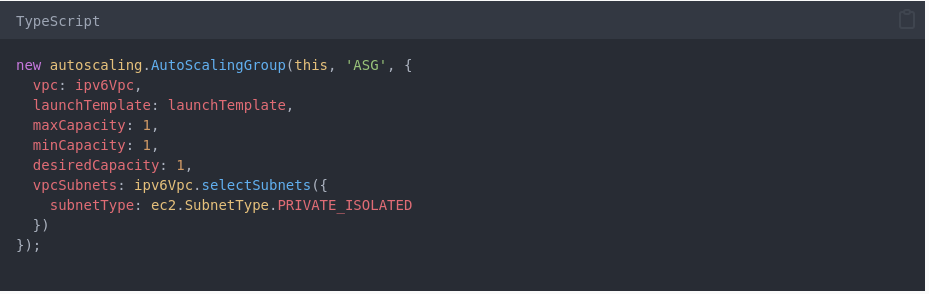
Step 7 – Create an Auto Scaling Group
Finally, create an Auto Scaling Group (ASG) using the launch template. The ASG ensures your application can scale based on demand and maintains the desired number of instances. It will launch instances into the private subnets of our VPC.
// This code goes inside your Stack class constructor

// asg: autoscaling.AutoScalingGroup; // Declare as a class member

this.asg = new autoscaling.AutoScalingGroup(this, 'AppASG', {
  autoScalingGroupName: `${props?.envName || 'Default'}AppASG`,
  vpc: this.vpc,
  launchTemplate: launchTemplate,
  minCapacity: props?.minCapacity ?? 1,
  maxCapacity: props?.maxCapacity ?? (props?.envName === 'Prod' ? 3 : 1), // Example conditional capacity
  desiredCapacity: props?.desiredCapacity ?? 1,
  // Place instances in private subnets that have outbound internet access
  vpcSubnets: this.vpc.selectSubnets({
    subnetType: ec2.SubnetType.PRIVATE_WITH_EGRESS,
    // onePerAz: true, // Distribute instances across AZs for better availability
  }),
  healthCheck: autoscaling.HealthCheck.ec2({
    // Time ASG waits after instance launch before checking health (allows UserData to run)
    grace: cdk.Duration.minutes(5),
  }),
  // Example of an update policy for rolling updates
  updatePolicy: autoscaling.UpdatePolicy.rollingUpdate({
    maxBatchSize: 1, // Update one instance at a time
    minInstancesInService: props?.minCapacity ? Math.max(0, props.minCapacity - 1) : 0,
    waitOnResourceSignals: false, // Set to true if using cfn-signal in UserData for readiness
    // pauseTime: cdk.Duration.minutes(5), // Optional: time to wait between batches
  }),
  // newInstancesProtectedFromScaleIn: false, // Consider for stateful or critical workloads
});
Step 8 – Define and Export the Stack Class
Wrap all the above steps within a CDK Stack class. This class can then be instantiated in your CDK application.
// Full structure of your lib/ec2-stack.ts file:

import * as cdk from 'aws-cdk-lib';
import * as iam from 'aws-cdk-lib/aws-iam';
import * as ec2 from 'aws-cdk-lib/aws-ec2';
import * as autoscaling from 'aws-cdk-lib/aws-autoscaling';
import { Construct } from 'constructs';
// import * as s3 from 'aws-cdk-lib/aws-s3'; // Uncomment if using S3 examples
// import * as kms from 'aws-cdk-lib/aws-kms'; // Uncomment if using KMS examples

// (ScalableEc2StackProps interface defined earlier)
export interface ScalableEc2StackProps extends cdk.StackProps {
  envName?: string;
  instanceType?: ec2.InstanceType;
  machineImage?: ec2.IMachineImage;
  minCapacity?: number;
  maxCapacity?: number;
  desiredCapacity?: number;
  vpcId?: string;
}


export class ScalableEc2Stack extends cdk.Stack {
  // Public properties to access key resources from outside the stack if needed
  public readonly vpc: ec2.IVpc;
  public readonly instanceRole: iam.Role;
  public readonly asg: autoscaling.AutoScalingGroup;

  constructor(scope: Construct, id: string, props?: ScalableEc2StackProps) {
    super(scope, id, props);

    // Step 0: Define or Import the VPC (code from Step 0 above)
    if (props?.vpcId) {
      this.vpc = ec2.Vpc.fromLookup(this, 'ImportedVpc', { vpcId: props.vpcId });
    } else {
      this.vpc = new ec2.Vpc(this, 'MyIPv6Vpc', { /* ... VPC config from Step 0 ... */
        vpcName: `${props?.envName || 'Default'}Vpc`,
        assignGeneratedIpv6CidrBlock: true,
        maxAzs: 2,
        subnetConfiguration: [
          { cidrMask: 24, name: 'Public', subnetType: ec2.SubnetType.PUBLIC, mapPublicIpOnLaunch: true, },
          { cidRMask: 24, name: 'PrivateWithEgress', subnetType: ec2.SubnetType.PRIVATE_WITH_EGRESS, },
        ],
      });
    }

    // Step 2: Create User Data (code from Step 2 above)
    const userData = ec2.UserData.forLinux({ shebang: '#!/bin/bash -xe' });
    userData.addCommands( /* ... user data commands ... */
        'yum update -y',
        'yum install -y amazon-ssm-agent',
        'systemctl enable amazon-ssm-agent --now',
        'echo "User data script completed successfully at $(date)!"'
    );

    // Step 3: Create IAM Role (code from Step 3 above)
    this.instanceRole = new iam.Role(this, 'InstanceRole', { /* ... role config from Step 3 ... */
      assumedBy: new iam.ServicePrincipal('ec2.amazonaws.com'),
      description: 'IAM role for EC2 instances with SSM access and application needs',
    });
    this.instanceRole.addManagedPolicy(iam.ManagedPolicy.fromAwsManagedPolicyName('AmazonSSMManagedInstanceCore'));

    // Step 4: Create a Security Group (code from Step 4 above)
    const SgName = `${props?.envName || 'Default'}InstanceSecurityGroup`;
    const instanceSecurityGroup = new ec2.SecurityGroup(this, 'InstanceSecurityGroup', { /* ... SG config from Step 4 ... */
        securityGroupName: SgName,
        vpc: this.vpc,
        description: 'Controls traffic to EC2 instances; allows outbound, no inbound by default.',
        allowAllIpv6Outbound: true,
        allowAllOutbound: true,
    });

    // Step 5: Create a Launch Template (code from Step 5 above)
    const launchTemplate = new ec2.LaunchTemplate(this, 'AppLaunchTemplate', { /* ... LT config from Step 5 ... */
      launchTemplateName: `${props?.envName || 'Default'}AppLaunchTemplate`,
      machineImage: props?.machineImage || ec2.MachineImage.latestAmazonLinux2023({ cpuType: ec2.AmazonLinuxCpuType.X86_64, }),
      instanceType: props?.instanceType || ec2.InstanceType.of(ec2.InstanceClass.T3, ec2.InstanceSize.MICRO),
      role: this.instanceRole,
      securityGroup: instanceSecurityGroup,
      userData: userData,
      detailedMonitoring: true,
      blockDevices: [ { deviceName: '/dev/xvda', volume: ec2.BlockDeviceVolume.ebs(30, { volumeType: ec2.EbsDeviceVolumeType.GP3, encrypted: true, deleteOnTermination: true, }), }, ],
      httpTokens: ec2.LaunchTemplateHttpTokens.REQUIRED,
    });

    // Step 6: Create an Auto Scaling Group (code from Step 6 above)
    this.asg = new autoscaling.AutoScalingGroup(this, 'AppASG', { /* ... ASG config from Step 6 ... */
      autoScalingGroupName: `${props?.envName || 'Default'}AppASG`,
      vpc: this.vpc,
      launchTemplate: launchTemplate,
      minCapacity: props?.minCapacity ?? 1,
      maxCapacity: props?.maxCapacity ?? (props?.envName === 'Prod' ? 3 : 1),
      desiredCapacity: props?.desiredCapacity ?? 1,
      vpcSubnets: this.vpc.selectSubnets({ subnetType: ec2.SubnetType.PRIVATE_WITH_EGRESS, }),
      healthCheck: autoscaling.HealthCheck.ec2({ grace: cdk.Duration.minutes(5), }),
      updatePolicy: autoscaling.UpdatePolicy.rollingUpdate({ maxBatchSize: 1, minInstancesInService: props?.minCapacity ? Math.max(0, props.minCapacity - 1) : 0, }),
    });

    // **NEW: Applying Tags**
    // Tagging is crucial for cost tracking, automation, and organization.
    cdk.Tags.of(this.asg).add('Name', `${props?.envName || 'Default'}-AppInstance`);
    cdk.Tags.of(this.asg).add('Environment', props?.envName || 'Default');
    cdk.Tags.of(this.asg).add('Application', 'MyScalableApp'); // Customize as needed

    // **NEW: Adding Stack Outputs**
    // Outputs provide easy access to important resource identifiers after deployment.
    new cdk.CfnOutput(this, 'ASGNameOutput', {
      value: this.asg.autoScalingGroupName,
      description: 'Name of the Auto Scaling Group',
    });
    new cdk.CfnOutput(this, 'VpcIdOutput', {
      value: this.vpc.vpcId,
      description: 'ID of the VPC',
    });
    if (this.vpc.vpcIpv6CidrBlocks) { // Check if IPv6 CIDR blocks are available (they should be if newly created)
        new cdk.CfnOutput(this, 'VpcIpv6CidrBlock', {
            // Fn.select can get an element from a list. VPCs can technically have multiple IPv6 CIDRs.
            value: cdk.Fn.select(0, this.vpc.vpcIpv6CidrBlocks),
            description: 'Primary IPv6 CIDR block of the VPC',
        });
    }
    new cdk.CfnOutput(this, 'InstanceRoleArnOutput', {
      value: this.instanceRole.roleArn,
      description: 'ARN of the EC2 Instance Role',
    });
  }
}
Notes & Next Steps – AWS-CDK EC2 Instance:
- VPC Configuration: The procedure now explicitly defines an IPv6-enabled VPC. If you choose to use an existing VPC (via the
vpcIdprop), ensure it’s properly configured with IPv6 and appropriate subnet routing if you intend to use IPv6 within your instances. - UserData Internet Access: Instances launched in
PRIVATE_WITH_EGRESSsubnets can access the internet for UserData scripts. If you were to usePRIVATE_ISOLATEDsubnets, UserData scripts would need all dependencies pre-baked into the AMI or rely solely on VPC Endpoints. - Security: We’ve incorporated EBS encryption and IMDSv2 enforcement. Always review IAM permissions and Security Group rules to ensure they follow the principle of least privilege.
- Customization: This is a template. Customize the instance type, machine image, UserData scripts, IAM permissions, and scaling policies to fit your specific application requirements.
- Testing: Thoroughly test your stack in a non-production environment, paying close attention to UserData script execution and instance health.
Now, you can use this ScalableEc2Stack class in your main CDK application file (e.g., bin/my-app.ts) to create the EC2 stack with the specified configurations for different environments:
// Example in bin/my-app.ts

#!/usr/bin/env node
import 'source-map-support/register';
import * as cdk from 'aws-cdk-lib';
import { ScalableEc2Stack } from '../lib/ec2-stack'; // Adjust path as needed
import * as ec2 from 'aws-cdk-lib/aws-ec2';

const app = new cdk.App();

// Common properties for all environments, like AWS account and region
const commonEnv = {
  // account: process.env.CDK_DEFAULT_ACCOUNT, // Or your specific account
  // region: process.env.CDK_DEFAULT_REGION,   // Or your specific region
};

new ScalableEc2Stack(app, 'DevScalableEc2', {
  ...commonEnv,
  envName: 'Dev',
  instanceType: ec2.InstanceType.of(ec2.InstanceClass.T3, ec2.InstanceSize.NANO),
  minCapacity: 1,
  maxCapacity: 1,
});

new ScalableEc2Stack(app, 'ProdScalableEc2', {
  ...commonEnv,
  envName: 'Prod',
  instanceType: ec2.InstanceType.of(ec2.InstanceClass.M5, ec2.InstanceSize.LARGE),
  // Consider using a custom, hardened AMI for production:
  // machineImage: ec2.MachineImage.lookup({name: "my-hardened-prod-ami-*"}),
  minCapacity: 2,
  maxCapacity: 5,
  desiredCapacity: 2,
});

app.synth();
Leave a Reply