
Arcserve is a robust backup and restore solution, essential for system engineers handling server restoration. Restoring a Linux server will appear challenging at first, but this guide will simplify the process. It offers a step-by-step outline for performing a bare metal restore of a Linux server into VMware.
While this example focuses on VMware, the principles can be applied to a physical server as well.
Prerequisites:
Before delving into the bare metal restore process, ensure you have the essential prerequisites in place.
This includes a VMware Virtual Cluster (vSphere) setup, a spare IP address available on the network, and a designated VMware ‘bare metal server.’ These foundational elements are crucial for a seamless and successful restoration journey.
Steps to Build the Arcserve BMR VM in VMware:
- Disk Size Configuration: Ensure you allocate a disk size sufficient for the backup. The size should reflect the server disk size, not just the backup size.
- CPU & Memory Configuration: Adjust the CPU and memory allocations based on your server’s needs.
- Network Setup:
- The backup server should be accessible from the same network where the VM is being rebuilt.
- In cases where networks are segregated by firewalls, it’s recommended to reconstruct the VM on the identical core network as the backup server for ease of access.
- Linux Live CD:
- Download the Linux Live CD from Arcserve.
- Upload this CD to your VMware datastore. Note: This CD is stored on your Linux-BU VM, an integral part of the Arcserve configuration.
- Mount the Disk: Connect the disk to the server you’ve just created.
Configuring ArcServe for Restore:
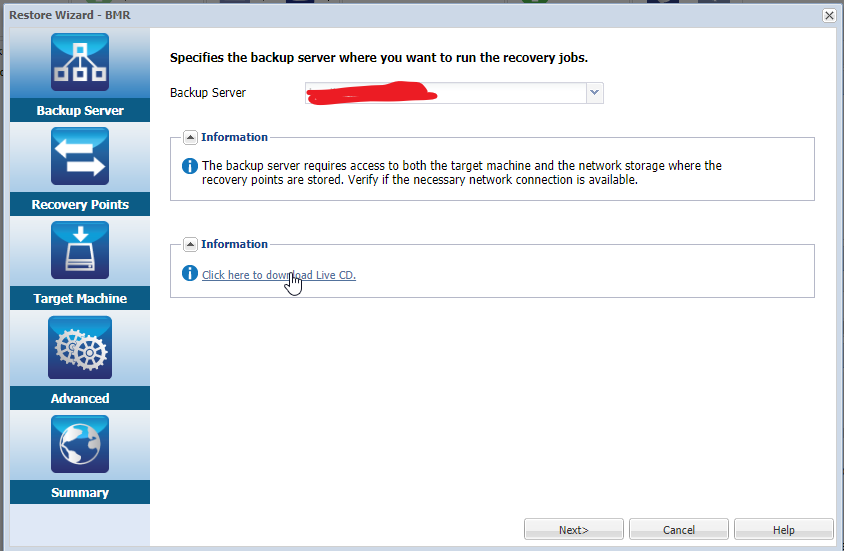
- After establishing the VM bare metal server, the subsequent step involves configuring ArcServe for the restore process.
- Launch ArcServe UDP.
- Navigate to the server you intend to restore.
- Right-click and select the ‘Restore’ button. Wait for the UDP restore page to appear and then select the BMR option.
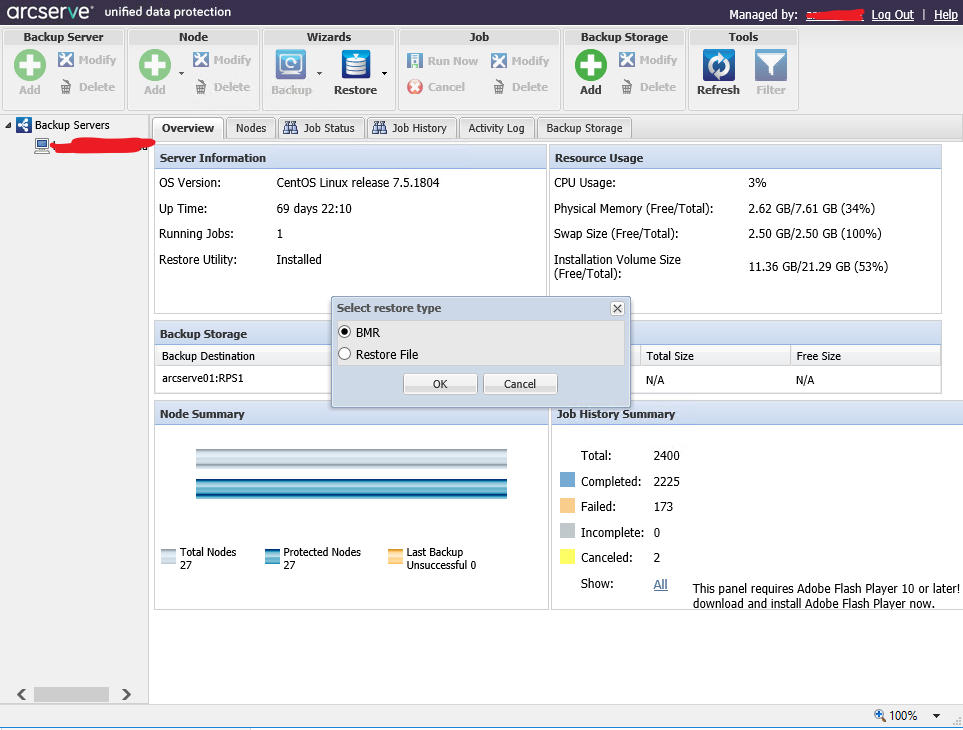
- If you have multiple ArcServe nodes, make sure you have the correct one selected.
Restoration Configuration in ArcServe:
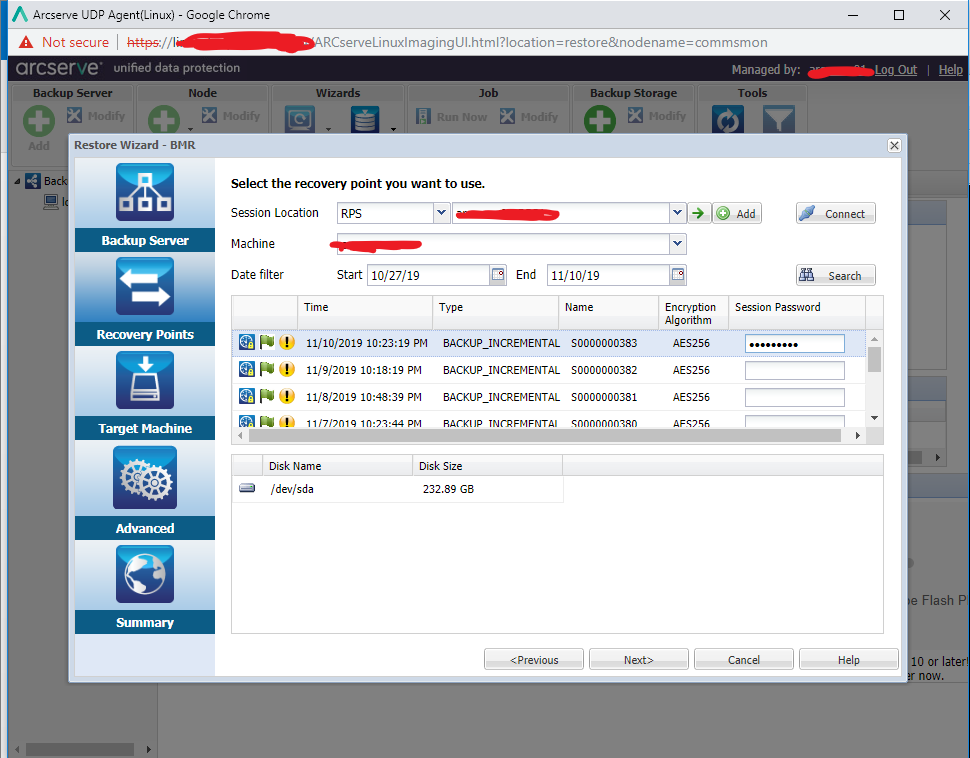
- Verify RPS Node Selection: Ensure the appropriate Recovery Point Server (RPS) node is chosen.
- Confirm Server for Restoration: Double-check that Arcserve has pinpointed the correct server for the restore operation.
- Set Date Filter: Input the desired date range to narrow down your restore point options.
- Choose a Restore Point: Select the specific restore point that best aligns with your recovery needs.
- Input Session Password: Enter the required session password. If uncertain, consult your system administrator, as this information should be documented.
Configuring ArcServe to Link with the New Base VM Template:
To ensure ArcServe interacts correctly with the base VM template you created earlier, specific configurations are necessary. Remember, the details you provide will be unique to your organization. It’s essential to confirm that network ports are actively open between the ArcServe backup server and the endpoint server.
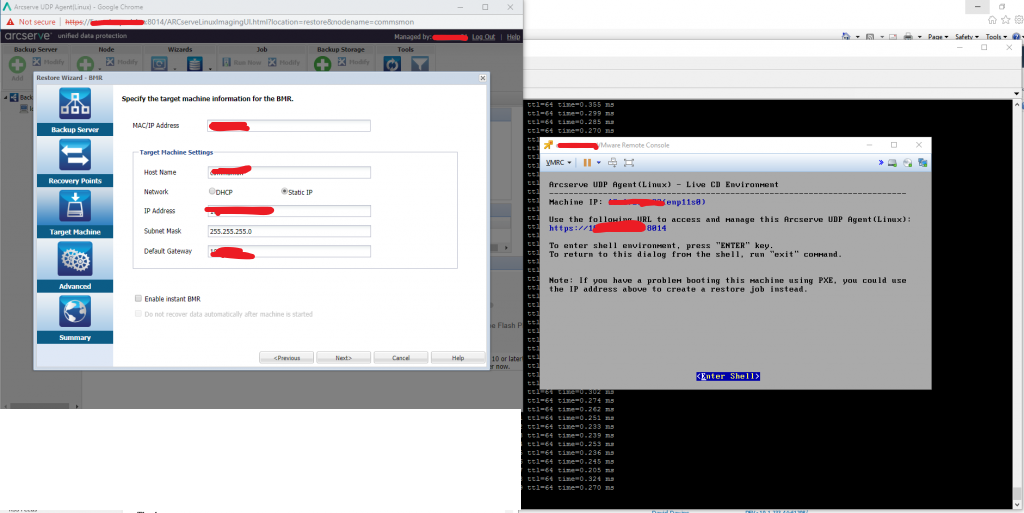
Please input the following details:
- IP Address: Specify the IP address assigned to the new VM.
- Subnet: Enter the subnet information of the new VM.
- Default Gateway: Provide the default gateway associated with the VM.
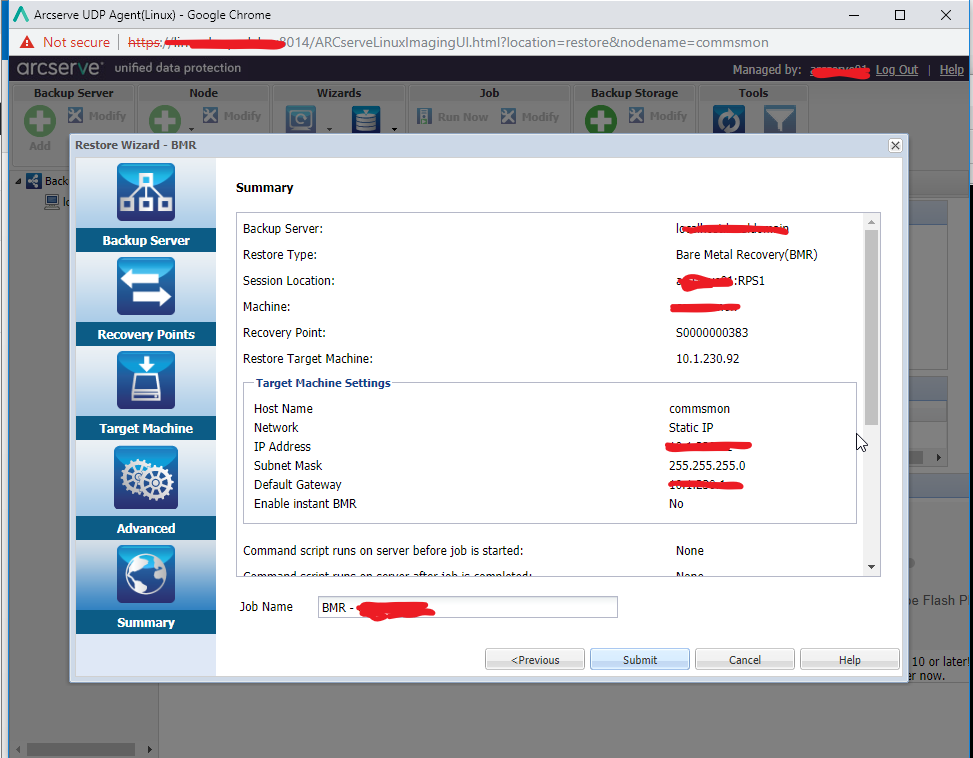
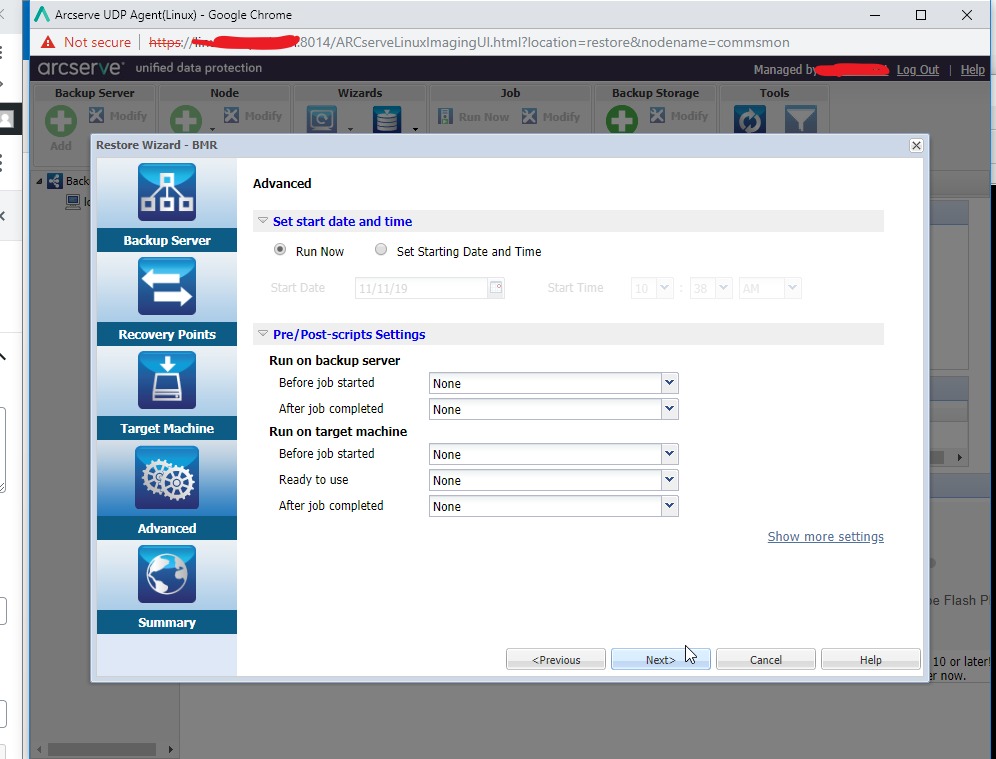
Initiating the Restore Point with Arcserve:
Upon clicking ‘Next’, Arcserve will commence the restore point operation. Given that this is a Bare Metal Restore (BMR), Arcserve will solicit the IP details and await the activation of the configured IP.
Steps to Boot the New VM with Live CD:
- Power Up the VM: Start the new VM.
- Boot Using the ArcServer UDP Linux ISO: Ensure that the VM boots from the ArcServer UDP Linux ISO image to kick off the restoration process.
Note: In a straightforward network setup that uses DNS, Arcserve should detect the new VM immediately upon power-up. However, based on experience, this mechanism doesn’t always work flawlessly. There have been numerous instances where manual intervention became necessary.
- Mounting the Live CD: Either insert the Live CD into the drive or mount the .iso file of the Live CD onto the CD-ROM drive of the target node.
- Boot from CD-ROM: Restart the target machine, ensuring it boots from the CD-ROM.
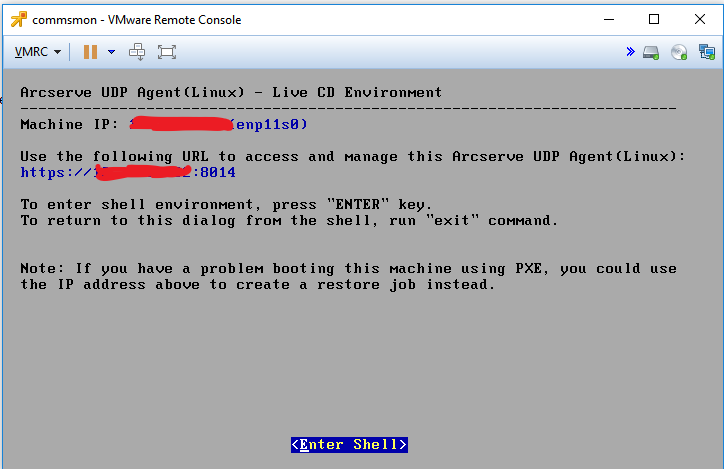
- Arcserve UDP Agent Environment: Post boot-up, the machine will operate within the Arcserve UDP Agent (Linux) Live CD environment. An important indicator here is that the IP address of the target machine will be visible on the screen.
Configuring Static IP Manually:
If the target machine’s static IP hasn’t been automatically detected, you’ll need to set it up manually.
Here’s how to configure the static IP using the default Live CD:
- Access the Shell Environment: On the display of the target machine, press ‘Enter’ to dive into the shell environment.
- Set the Static IP: Execute the following command:
ifconfig <interface_name> <server_IP> netmask <netmask_value>Establish the Default Gateway: Implement this command:
route add default gw <default_gateway_IP>Replace <interface_name>, <server_IP>, <netmask_value>, and <default_gateway_IP> with the respective values specific to your network setup.
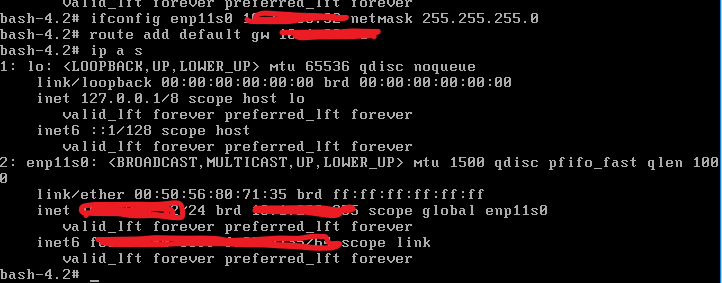
When you exit the shell, check the status of the ArcServe UDP, and it should pick up the new server details
IMPORTANT:
Ensure that the chosen network operates on the same layer as the backup server. If not, it’s essential to establish the necessary routing and adjust firewall settings accordingly.
Leave a Reply