
Many users feel it’s overly complicated to move to another WordPress provider, sometimes feeling locked in. But fear not; you can absolutely Migrate WordPress, and there is no need for expensive plugins!
To Migrate WordPress to another server can be a daunting experience, especially if you’re unfamiliar with the technical aspects of web hosting. How WordPress is used varies dramatically; some users loan cPanel WordPress solutions while others host their own cloud server.
I will walk you through this step by step, demonstrating that the process can be easy and stress-free with the right guidance and knowledge. We will cover the various tools and techniques you can use to make the process as smooth as possible, including manual migration methods and automated solutions such as plugins and services. We’ll also address common issues and pitfalls that may arise during the migration process and provide you with tips on how to avoid them.
By the end of this article, you will have the knowledge and confidence to migrate your WordPress site to a new server with ease, without the risk of losing any data or compromising the functionality of your site. So, let’s start on this exciting learning and discovery journey!
If you don’t use cPanel, you can still Migrate WordPress site to another server by following these steps:
Step 1 – Backup your WordPress site:
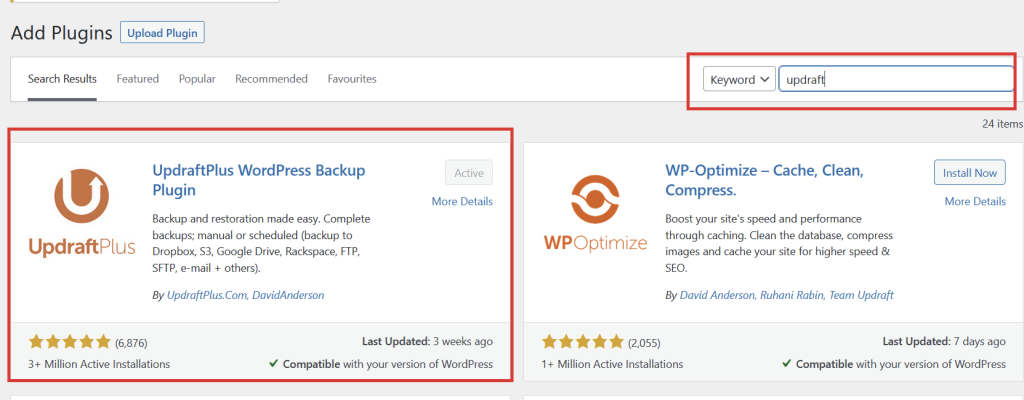
The first step is to back up your existing site. You can do this in many different ways, however, my preference is to use a free plugin called Updraftplus. Ignore all the marketing blurb; we are just using Updraft to back up the existing WordPress site.
- Install a backup plugin like UpdraftPlus or BackWPup and use it to create a backup of your site. You can do this from:
Plugins > Add new > Search.
- Alternatively, you can manually back up your files and database using FTP and phpMyAdmin.
- You can find detailed instructions on how to back up your WordPress here.
Step 2 – Export your WordPress database:
Exporting your WordPress database is necessary if you plan to migrate your site to another server.
There are several ways to do this.
Export Database using Console.
Here are the steps you can follow to export your WordPress database:
- Log in to your WordPress dashboard and go to the “Tools” menu.
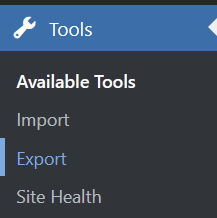
- Click on “Export” to go to the export page.
- On the export page, you’ll see different options, such as the type of content you want to export, the date range, and the author. You can select any combination of these options depending on your needs. I recommend you select all content.

- Once you’ve selected it, click the “Download Export File” button.
- Your browser will then download an XML file that contains your WordPress content and save it somewhere you can access, such as My Downloads.
Export Database using a Plugin
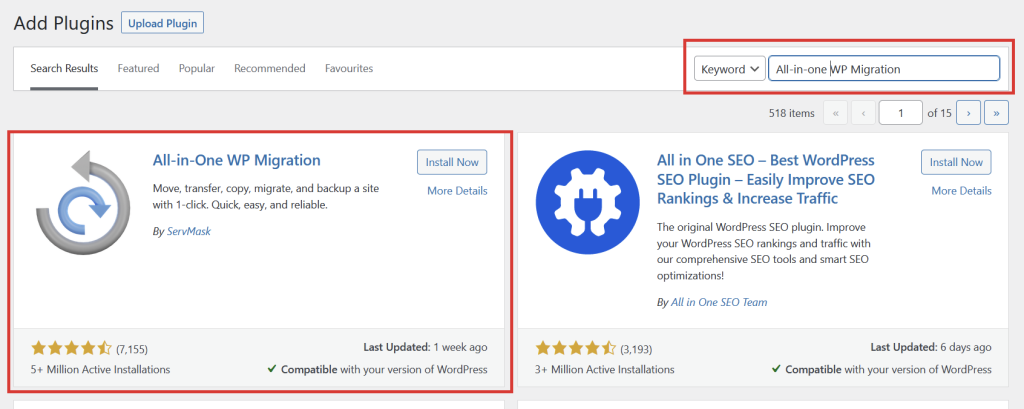
Alternatively, you can use a plugin like “All-in-One WP Migration” to export your database. Here’s how:
- Install and activate the “All-in-One WP Migration” plugin.
- Go to the “Export” tab on the plugin’s dashboard.
- Choose the “Export To” option, and select the destination to which you want to export your site (e.g. a file, a server, or cloud storage).
- Select “Export” to start the process.
- Wait for the plugin to complete the export process. Once it’s done, you can download the exported file or use it to import your site to the new server.

Export Database using PHPMyAdmin
Exporting your WordPress database using phpMyAdmin is a simple and popular method that doesn’t require any command-line knowledge. Here are the steps you can follow to export your WordPress database using phpMyAdmin:
- Log in to your web hosting control panel, such as cPanel, or direct to your MyPHPAdmin URL (See documentation)
- Navigate to the “Databases” section and click on “phpMyAdmin.”
- In the left-hand sidebar of phpMyAdmin, select the database for your WordPress site.
- Click on the “Export” tab at the top of the page.
- On the export page, you can choose the export method you prefer. The “Quick” option will export the entire database with default settings. If you want to customize the export options, select the “Custom” method.
- If you selected the “Custom” method, choose the tables you want to export and select the export format. The default format is SQL, which is compatible with most database software. You can also choose to compress the export file to make it smaller.
- Once you select your export options, click the “Go” button to start the export process.
- Your browser will then download an SQL file containing your WordPress database. Save this file to your computer.
Export Database using the Command Line
Next, use the following command to export your WordPress database:
mysqldump -u username -p your_database_name > /path/to/your/exported/file.sqlReplace “username” with your MySQL username, “your_database_name” with the name of your WordPress database, and “/path/to/your/exported/file.sql” with the path to the location where you want to save the exported SQL file.
The export process may take some time, depending on the size of your database. Once it’s done, you should see a confirmation message in your terminal.
Exporting your WordPress database using the command line can be a more efficient way to export large databases. However, it requires familiarity with the MySQL command-line client and terminal commands. Make sure to have a database backup before proceeding with any migration process.
Step 3 – Copy your WordPress files to the New Server
Here are the steps you can follow to copy your WordPress files to the new server:
- Connect to your new server via FTP or SFTP. You can use an FTP client like FileZilla to do this.
- Once you’re connected to the new server, navigate to the root directory of your web server (usually called “public_html” or “www”).
- Upload your WordPress files to this directory. You can drag and drop the files from your local computer to the remote server.
- Depending on your FTP client, you may be prompted to overwrite existing files. If prompted, select “Yes” to overwrite the files on the new server.
- Wait for the upload to complete. This may take some time, depending on the size of your site.
- Once the upload is complete, you should see all your WordPress files on the new server.
Copying your WordPress files to the new server can be time-consuming, especially if you have a large site. Be sure to have a backup of your WordPress files before you proceed with any migration process.
Step 4 – Create a new database
To create a new database for WordPress, you’ll need to follow these steps:
- Log in to your web hosting control panel, such as cPanel.
- Navigate to the “Databases” section and click on “MySQL Databases” or “MariaDB Databases”.
- You’ll see a form to create a new database on the MySQL Databases page. Enter a name for your new database in the “New Database” field.
- Click on the “Create Database” button to create your new database.
- Once your database is created, you must create a new MySQL user and assign it to your new database. You can do this on the same page under the “MySQL Users” section.
- Enter a username and password for your new MySQL user.
- Click the “Create User” button to create your new MySQL user.
- On the same page, scroll down to the “Add User to Database” section.
- Select your new database from the dropdown menu and your new MySQL user from the second dropdown menu.
- Click the “Add” button to add your new MySQL user to your new database.
- On the next page, you’ll see options to set privileges for your MySQL user. Select “All Privileges” and click on the “Make Changes” button to save your changes.
You’ve now successfully created a new database for WordPress and assigned a new MySQL user to it. When you install WordPress, you must enter your database name, username, and password in the WordPress installation wizard.
Step 5 – Import your WordPress database:
- Log in to your new server’s phpMyAdmin.
- Select the new database you created and click on the “Import” tab.
- Upload the SQL file of your exported database from step 2 and click “Go” to import it.
Step 6 – Edit your WordPress configuration file:
- Using a text editor like Notepad++, open the wp-config.php file in the root folder of your WordPress site on your new server.
- Replace the database name, username, password, and hostname with the details of the new database you created in Step 4.
Update your domain name:
- If you change your domain name, update the site URL and home URL in the WordPress dashboard under Settings > General.
- Update your DNS records with your new server’s IP address or domain name.
Test your site:
- Visit your new site to make sure everything is working properly.
- Log in to your WordPress dashboard and check that all your content ensures migrate WordPress was successful.
Leave a Reply