
Looking to Install XRDP on the latest versions of Ubuntu? Check out our new guide here.
🗝️ Key Takeaways
- What is xRDP? xRDP is an open-source server that allows you to use Microsoft’s Remote Desktop Protocol (RDP) to get a full graphical desktop from your Linux machine.
- The “Black Screen” Problem: On older Ubuntu versions (like 14.04), the default Unity desktop is often incompatible with xRDP, causing a black or blank screen after login.
- The Fix: The most reliable solution is to install a lightweight desktop environment, such as XFCE, and configure xRDP to use it instead of Unity.
- Persistent Sessions: By default, xRDP creates a new session every time you connect. You can fix this by editing
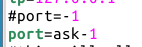
xrdp.iniand changing the port setting toport=ask-1, which lets you reconnect to an existing session. - Firewall: You must open TCP port 3389 on your server’s firewall (e.g., UFW) to allow RDP connections.
What is xRDP?
xRDP is an open-source tool that allows you to control a Linux machine graphically from a remote location using Microsoft’s Remote Desktop Protocol (RDP). This means you can use the standard Remote Desktop Client (MSTSC) on Windows, or other RDP clients on macOS and mobile devices, to get a full desktop experience from your Linux server.
It acts as a bridge, accepting RDP connections and managing the connection to your Linux desktop session (like XFCE, GNOME, or KDE).
What are the key features of xRDP?
The primary benefit of xRDP is providing a stable, graphical remote session to your Linux server, which is especially useful for users who prefer a GUI over a command-line-only interface.
- Secure: RDP transport is encrypted using TLS by default.The xRDP Linux client is a popular way to get a remote desktop session to your Linux Server. However, some users may not want to use tools like Xsession to pull graphical applications directly from the command line. The procedure will explain how to install and configure xRDP, so you’re not stuck with a black screen when connecting.
- Cross-Platform: Connect from Windows, macOS, iOS, or Android using standard RDP clients.
- Session Reconnection: You can disconnect from a session and reconnect to it later, preserving your open applications (with the right configuration).
- Clipboard & File Transfer: Easily transfer clipboard content (text, files) between your local computer and the remote server.
- xrdp provides a graphical login to remote machines using Microsoft Remote Desktop Protocol (RDP). xrdp accepts connections from various RDP clients: FreeRDP, rdesktop, Neutri, noRDP, and Microsoft Remote Desktop Client (for Windows, Mac OS, iOS, and Android).
RDP transport is encrypted using TLS by default.
xRDP Features
You get several cool features when you install xRDP; you can connect to any Linux computer from anywhere and reconnect to a pre-existing session; this is surprisingly difficult to do in Linux because of how the kernel handles user sessions.
You can transfer files, clipboard content, and audio between the host and the guest. All you need is port 3389 open, and you are good to go.
How to install the xRDP server
On Ubuntu-based Linux distributions, xRDP is now included in the default repos; all you need to do is type:
sudo apt install xrdp -yIf you use Redhat or Centos, you first need to enable EPEL packages before installing:
sudo yum install epel-release -ysudo yum install xrdp -yOn Red Hat and CentOS version 8, replace yum in dnf
Once installed, you will have the following directory structure:
xrdp
├── common ······ common code
├── docs ········ documentation
├── fontdump ···· font dump for Windows
├── genkeymap ··· keymap generator
├── instfiles ··· installable data file
├── keygen ······ xrdp RSA key pair generator
├── libpainter ·· painter library
├── librfxcodec · RFX codec library
├── libxrdp ····· core RDP protocol implementation
├── m4 ·········· Autoconf macros
├── mc ·········· media center module
├── neutrinordp · RDP client module for proxying RDP connections using NeutrinoRDP
├── pkgconfig ··· pkg-config configuration
├── sesman ······ session manager for xrdp
├── tcutils ····· QT based utility program for thin clients
├── tests ······· tests for the code
├── vnc ········· VNC client module for xrdp
├── vrplayer ···· QT player redirecting video/audio to clients over xrdpvr channel
├── xrdp ········ main server code
├── xrdpapi ····· virtual channel API
├── xrdpvr ······ API for playing media over RDP
└── xup ········· X11rdp and xorgxrdp client moduleCredit: https://github.com/neutrinolabs/xrdp
Troubleshooting Older versions of Ubuntu / Red Hat
This is a summary of a support job I did for a customer.
Scenario: The customer was stuck using Ubuntu 14 for a production database with two users worldwide. They would get a black screen or a blank session each time they logged in.
Project details: xRDP Ubuntu is Remote Desktop Protocol (RDP) client for Ubuntu, the Unity desktop for Ubuntu 14.04 is now obsolete and is being replaced by GNOME. GNOME is available in versions 15 and above. Unity has been used in Ubuntu for approx. 2012.
Unity was dropped as it has several compatibility issues with Ubuntu plugins, including problems with authenticating an x RDP Connection. xRDP can be configured to listen on port 3389 (Remote Desktop Protocol (RDP) just like the Microsoft Windows remote desktop protocol.
You will need the following:
- SSH terminal access to the server
- Sudo root access
Step 1 – Confirm which version of Linux you are running
Make an SSH connection to the Ubuntu Server Putty or your favorite terminal.
Confirm the version of Ubuntu that is running by typing:
lsb_release -aConfirm the version of the Ubuntu desktop that is running by typing:
dpkg -l|grep unityOr, if you are not sure which version you are running, type the following:
dpkg -l|egrep -i "(kde|gnome|lxde|xfce|mint|unity|fluxbox|openbox)" | grep -v libraryStep 2 – Installing xRDP on Ubuntu 14.04
The next step is to install the xRDP client onto Ubuntu. Open a terminal session and type:
sudo apt-get install xrdp -yThe installation will only take a few seconds to complete; make a note of these important file locations:
${XRDP_BIN_DIR}/xrdp
${XRDP_CFG_DIR}/xrdp.ini
${XRDP_LOG_DIR}/xrdp.log
${XRDP_PID_DIR}/xrdp.pidStep 3 – Install alternative Desktop Environment (XFCE)
Open terminal and type:
sudo apt-get update -y
sudo apt-get install xfce4 -yStep 4 – Configure xRDP to use XFCE
This will force xRDP to use the XFCE desktop instead of the packaged UNITY desktop.
This change will only affect the xRDP desktop experience. You will see a different wallpaper on the AWS console but the same Unity server.
This change is persistent and will remain in place if the server reboots
echo xfce4-session ~/.xsession
sudo service xrdp restartStep 5 – Access Ubuntu with RDP
Make sure you have the Ubuntu server hostname or IP address to hand. To get this, you can type
On the console, type:
hostname -I
ip addr showFrom your Windows Desktop Machine or local desktop, Open Remote Desktop Connection. You can order mstsc from the command line or the start menu
mstsc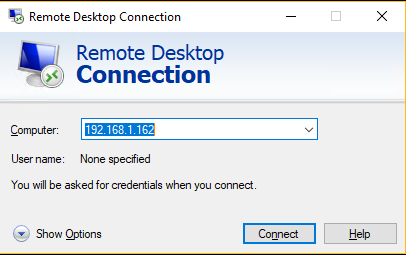
You will be prompted to connect to the server vis xRDP
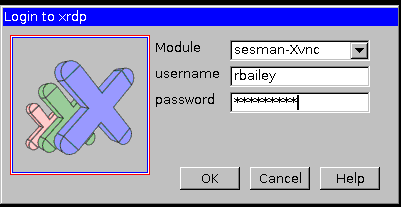
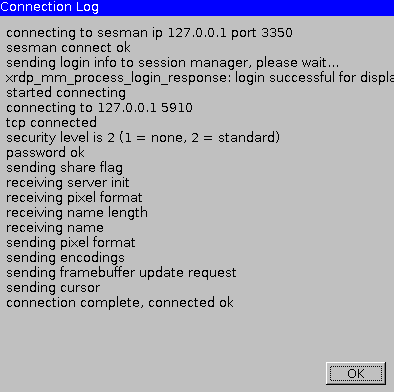
A connection log will pop up. This will tell you the process of the XDRP login and any errors you may have. The most common mistake is password failure.
Step 6 – Configure console/admin sessions on xRDP
**IMPORTANT**
Every time you log into an xRDP session the server will create you a new logon session ID. This can be frustrating if you are disconnected, the server will, by default, connect you to a new session. To allow true admin or console xRDP access you need to do the following.
Edit the xrdp.ini
sudo gedit /etc/xrdp/xrdp.iniEdit lines
Port =-1 change to port=ask-1
Restart the xRDP service
sudo service xrdp restart

or

sudo systemctl restart xrdpYou can check the status of the service with
sudo systemctl status xrdpPlease Note that If you are connected via xRDP, you will be disconnected
Open the Remote desktop and reconnect to the server.
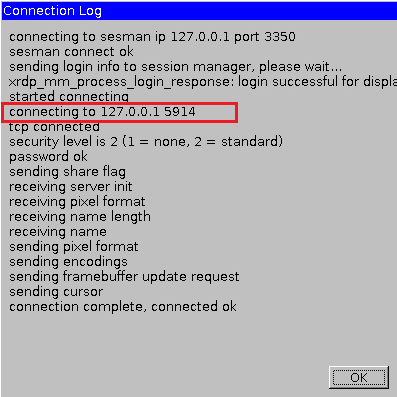
On the connection log, make a note of the port highlighted below. In my example, it’s 5914; it will most likely differ on your AWS config.
Disconnect from that session.
Now, reopen the Remote desktop and connect to xRDP
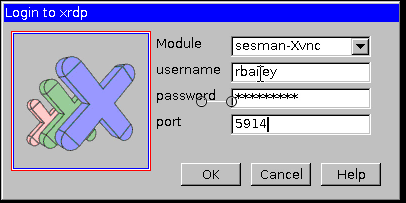
This time enter the port number when connecting.
You will now be able to log straight back into any saved work.
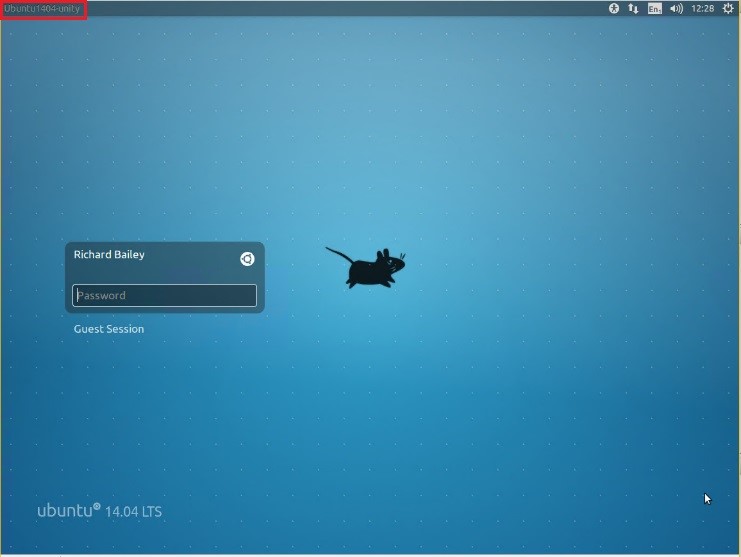
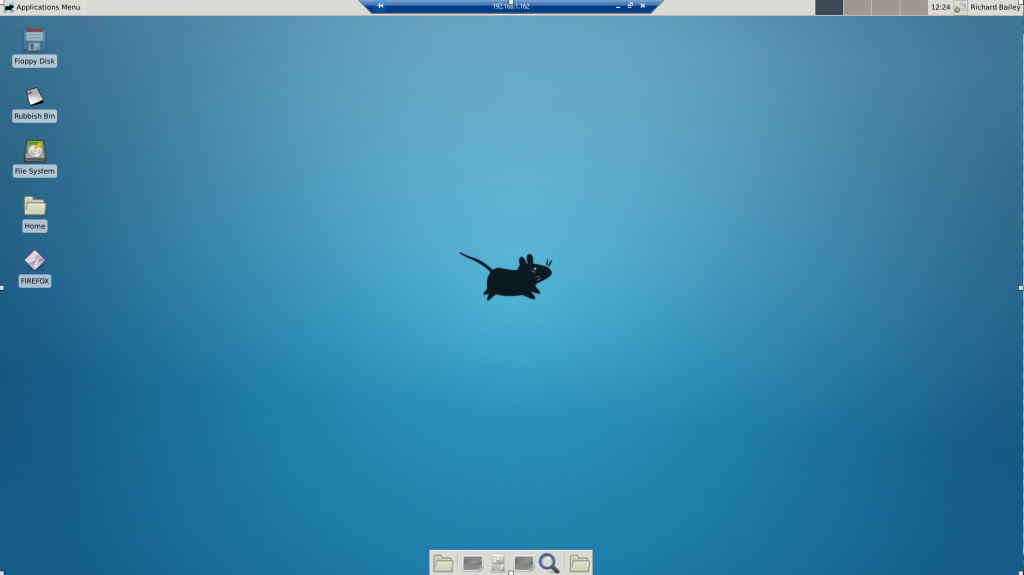
How will it look from the Ubuntu console?
Login in screen wallpaper will change, but it will still be Unity underneath:

Post log in on the console
That’s it. You now know how to install xRDP on Ubuntu 14.04. Did you know you can also install it on a newer version of Ubuntu? Check out our new guide here.
Thanks for taking the time to read this article. if you have any questions or feedback, please write in the comment section below.
Leave a Reply