
New to Kubernetes? No problem. This step-by-step tutorial will guide you through creating your first Kubernetes cluster on Google Cloud Platform (GCP) using the convenient Google Cloud Shell. You’ll learn how to deploy services, scale your applications effortlessly, and even automate bulk deployments—all without leaving your browser

Creating a Regional Kubernetes Cluster on GCP: A Step-by-Step Guide
Step 1: Launch Google Cloud Shell
- Access the Google Cloud Console.
- Click on the Cloud Shell icon (>_ icon) at the top-right corner of the console
Step 2: Configure Your Project and Region
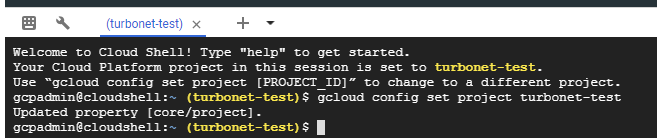
To start with, ensure CloudShell is properly linked to your project. In this tutorial, our project is named turbonet-test. Run the following command in CloudShell:
gcloud config set project YOUR_PROJECT_NAME  # Replace YOUR_PROJECT_NAME with your actual project ID
gcloud config set compute/region YOUR_REGION  # Replace YOUR_REGION with your desired region (e.g., europe-west1)
For Example:
Step 3: Update gcloud Components (Optional)
To ensure you’re using the latest components, issue:
gcloud components updateIn case you encounter a warning, you might need administrative privileges. In such cases, execute the command with sudo.
Step 4: Create the Regional Kubernetes Cluster
Let’s now create our regional cluster with the following specifications:
- Nodes: 2
- Disk Size: 15GB (standard disk)
- Autoscaling: Enabled (ranging between a minimum of 1 node and a maximum of 10 nodes)
- Auto-repair: Enabled
Run the following command to initiate the cluster creation:
gcloud container clusters create YOUR_CLUSTER_NAME \
  --num-nodes 2 \
  --region YOUR_REGION \
  --disk-size=15GB \
  --disk-type=pd-standard \
  --enable-autoscaling \
  --min-nodes 1 \
  --max-nodes 4 \
--enable-autorepair- Replace
YOUR_CLUSTER_NAMEwith your desired cluster name. - Adjust
num-nodes,disk-size,min-nodes, andmax-nodesas needed.
Allow a few minutes for the cluster to be set up.

Step 5: Verify the Cluster Creation
- Once you see the message “cluster created,” navigate to the Kubernetes Engine section in the GCP console.
- You should see your newly created cluster listed.
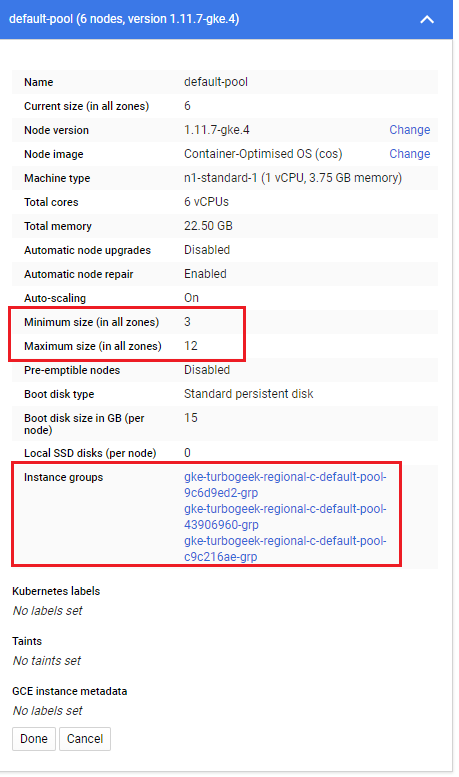
- Important Note: Regional clusters will automatically create additional nodes in different zones for high availability. Click on your cluster name to confirm the node distribution across zones.
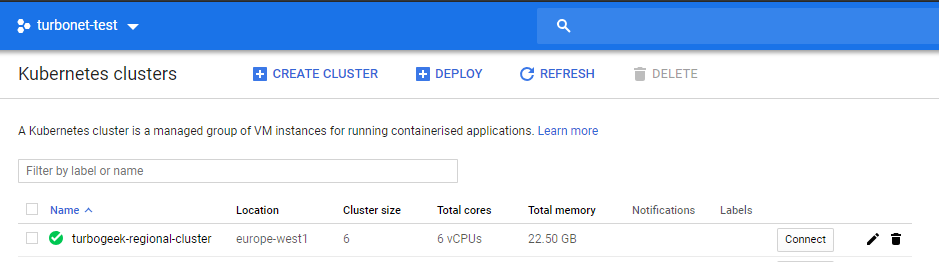
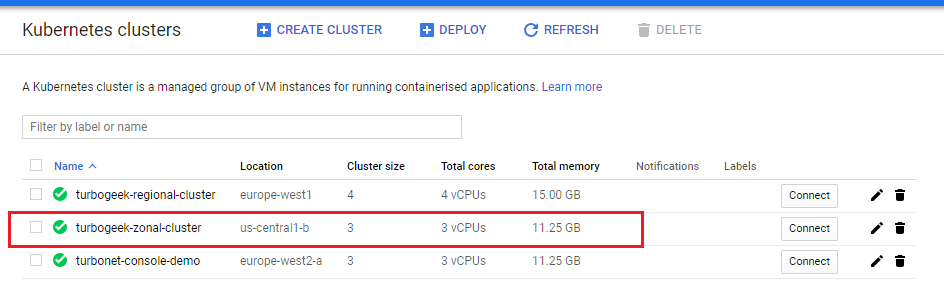
verifying in the web console – note the cluster size
You can see the cluster size is 6. We created 2 nodes, but as this is a regional cluster, additional nodes were automatically created in a different availability zone. This can be confirmed by clicking on the cluster name

Understanding Cluster Creation and Management in GCP
Regional Cluster:
Upon inspection, you’ll notice the cluster size stands at 6, even though we initiated it with 2 nodes. This expansion is due to the regional nature of our cluster, which autonomously provisions extra nodes across diverse availability zones for resilience. You can validate this by:
- Clicking on the cluster name.
- Observing the label: “configured for multiple regions”.
For quick access to gcloud commands on creating workloads and exposing services, please refer to the conclusion of this article.
Single Zone Cluster:
Let’s shift gears to construct a single zone cluster, which closely mirrors the previous approach but with distinctive attributes.
Our cluster will encompass:
- A solitary zone:
us-central1-b. - Utilization of preemptive compute resources.
- No monitoring or logging services.
To accomplish this, run:
gcloud container clusters create turbogeek-zonal-cluster --zone us-central1-b --preemptible --machine-type n1-standard-1 --no-enable-cloud-monitoring --no-enable-cloud-logging
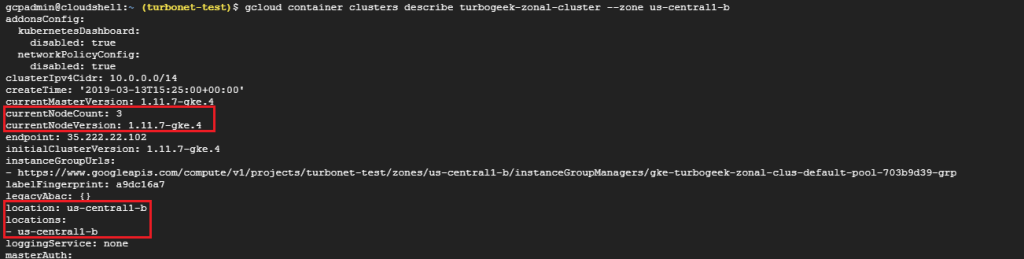
This will unfurl a comprehensive overview of the cluster. Notable facets include:
- Described zone.
- Web console perspective.
Interestingly, we deliberately deactivated logging earlier. However, cluster configurations are mutable. To reactivate logging:
gcloud container clusters describe turbogeek-zonal-cluster --zone us-central1-bThis will display a huge amount of info about cluster. I have highlighted some key elements below:
You can also check the web console to look at our new cluster and gather information about it
Earlier, we deliberately disabled logging. You can update a Kubernetes cluster configuration via the command line
The command for enabling logging is:
gcloud container clusters update turbogeek-zonal-cluster --zone us-central1-b --logging-service="logging.googleapis.com"After a few minutes, your zone cluster will update

How to manage Kubernetes cluster with gcloud?
Firstly, when managing via gcloud command line, you need to update the kubeconfig file. This is what drives Kubernetes clusters.
We will be working with turbogeek-regional-cluster in this example.
The command for this is:
gcloud container clusters get-credentials turbogeek-regional-cluster --region europe-west1 --project turbonet-test
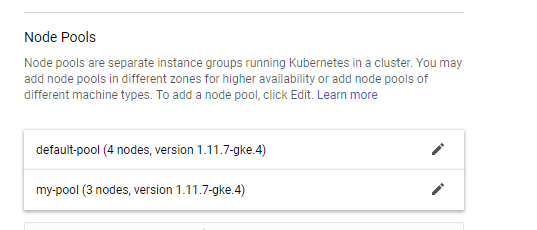
How to create an additional node pool?
Now we have configured get-credentials type the following to view your existing cluster node pools
gcloud container node-pools list --cluster turbogeek-regional-cluster --region europe-west1
To create a new node pool type:
gcloud container node-pools create my-pool --num-nodes=1 --cluster turbogeek-regional-cluster --region europe-west1
Now you can add your new node pool to an existing cluster
The command for this is:
gcloud container clusters resize turbogeek-regional-clusterr --region europe-west1 --node-pool my-pool --size 1
Come back next time when we shall use kubectl to create deployments and expose services
Leave a Reply