
Quick Answer
- Download the Windows Server 2022 ISO and create a new VM in VMware with at least 1 GB RAM and 15 GB disk
- Boot the VM from the ISO and select “Windows Server 2022 Server Core” during installation
- Complete the text-mode setup and set the Administrator password
- Install VMware Tools via the
DISMcommand or the VMware Tools installer - Configure networking via
sconfigand enable remote management via PowerShell remoting
What is Windows Nano Server?
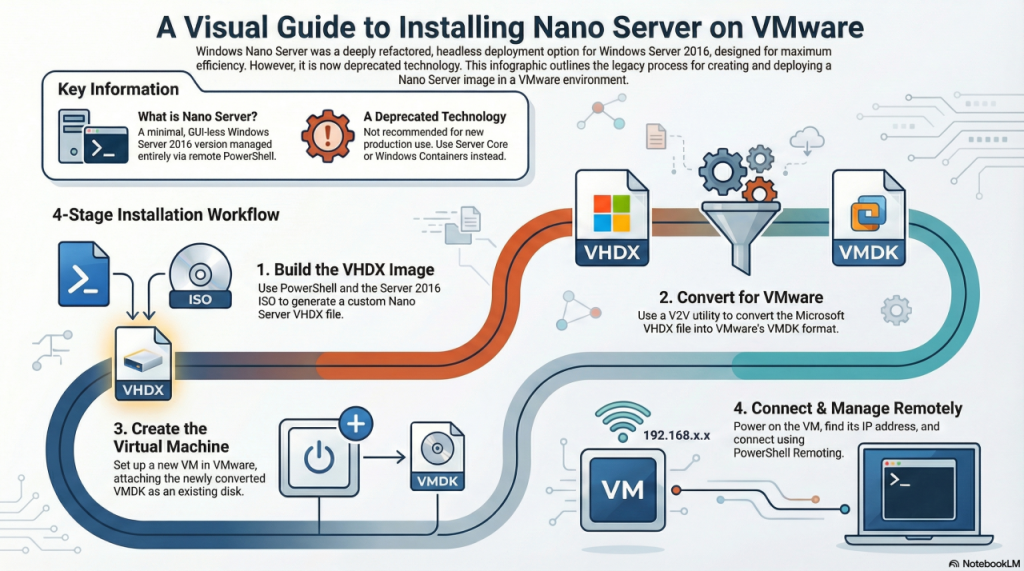
Windows Nano Server is a deeply refactored, headless installation option for Windows Server 2016. Designed for cloud-native applications, it runs with a minimal footprint, consuming significantly less disk space and memory than Server Core.
However, it is crucial to understand that Microsoft has deprecated Nano Server as a standalone host operating system. Post-2016, Nano Server exists solely as a base image for Windows Containers.
All management is performed remotely, primarily via PowerShell.
Nano Server was optimized for two primary scenarios:
- As a lightweight host for cloud-native applications and services.
- As a host for virtual machines and containers.
Important Update: Nano Server is a Deprecated Technology
Microsoft deprecated Nano Server as a general-purpose operating system after Windows Server 2016. Its technology was repurposed, and it now exists primarily as a base image for Windows Containers.
For new deployments requiring a minimal footprint, Microsoft recommends:
- Windows Server Core: The standard minimal-interface installation option for current Windows Server versions.
- Windows Containers: Using container platforms like Docker to deploy applications in isolated, lightweight environments.
This guide is provided for educational or legacy purposes. It is not recommended for new production deployments.
Installation Prerequisites
- Required: Windows Server 2016 installation media (ISO).
- A Windows 10 or Windows Server machine to build the image.
- PowerShell 5.1 or higher (with administrator rights).
- VMware Workstation, VMware Player, or ESXi.
- A VHDX-to-VMDK conversion utility. We recommend the free StarWind V2V Converter.
Installation Guide
Step 1: Mount Windows Server 2016 Media
Mount the Windows Server 2016 ISO file to your computer. On modern Windows systems, you can typically do this by double-clicking the ISO. Note the drive letter assigned to it (e.g., D:).
Step 2: Copy Nano Server Files Locally
- Navigate to the mounted ISO drive.
- Open the
NanoServerfolder. - Copy the entire
NanoServerImageGeneratorfolder to a local directory on your machine. For this guide, we will useC:\Temp\.
Step 3: Open PowerShell and Set Execution Policy
- Open PowerShell with administrative privileges (right-click > “Run as administrator”).
- Set the execution policy for the current session to allow the import script to run. When prompted, select Yes (
Y).
Set-ExecutionPolicy -ScopeProcess -ExecutionPolicy BypassStep 4: Import the Nano Server PowerShell Module
- In your administrator PowerShell session, navigate to the directory where you copied the generator files.
cd C:\Temp\NanoServerImageGenerator- Import the PowerShell module
Import-Module .\NanoServerImageGenerator.psm1Step 5: Create the Nano Server VHDX Image
- Run the following command in the same PowerShell window. This command will create a Standard Edition Nano Server image configured as a virtualization host.
- Replace
-MediaPath D:\with the actual drive letter of your mounted Server 2016 ISO.The command includes packages for Compute (Hyper-V), Storage, and Clustering. You can add others as needed (e.g.,-Package Microsoft-NanoServer-IIS-Package).
- Replace
New-NanoServerImage -Edition Standard `
                    -DeploymentType Host `
                    -MediaPath D:\ `
                    -BasePath 'C:\Temp\Base' `
                    -TargetPath 'C:\Temp\Nano01.vhdx' `
                    -ComputerName 'Nano01' `
-Package Microsoft-NanoServer-Compute-Package, Microsoft-NanoServer-Storage-Package, Microsoft-NanoServer-FailoverCluster-Package- You will be prompted to enter and confirm a password for the local Administrator account. Store this password securely, as it is the only way to access the server.
- The process will now build the image, which may take several minutes. Upon completion, a
Nano01.vhdxfile will be located in yourC:\Temp\directory.
Step 6: Convert the VHDX to a VMDK Image
You must convert the Microsoft-native .vhdx file to VMware’s .vmdk format.
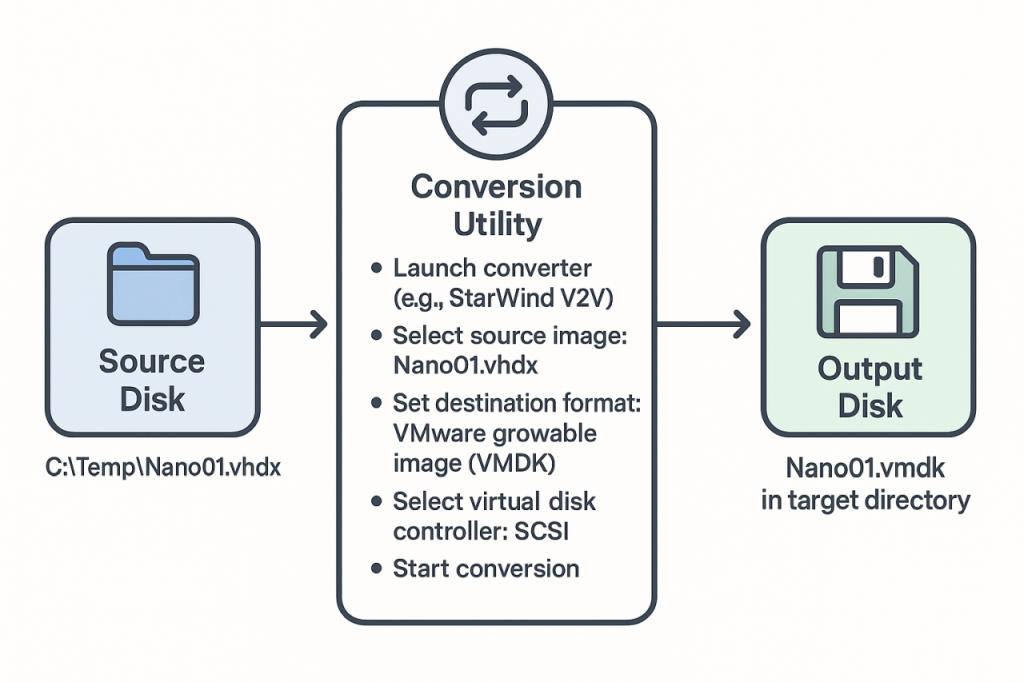
- Install and open your chosen conversion utility (e.g., StarWind V2V Converter).
- Select the source image as the
.vhdxfile you created (C:\Temp\Nano01.vhdx). - For the destination, choose VMware growable image (VMDK).
- When prompted for the virtual disk controller, select SCSI.
- Complete the conversion process. You will now have a
Nano01.vmdkfile in your target directory.
Step 7: Create the VMware Virtual Machine
- Open VMware Workstation/Player.
- Select File > New Virtual Machine.
- Choose Custom (advanced) and proceed.
- Hardware compatibility: Use the default and proceed.
- Guest Operating System: Select I will install the operating system later.
- For the OS type, select Microsoft Windows and the version Windows Server 2016.
- Name the virtual machine (e.g.,
Nano01) and choose a storage location for the VM files. - Firmware Type: Select UEFI.
- Processors & Memory: Assign resources as needed (1 vCPU and 1 GB of RAM is a good starting point).
- Network Type: Use Bridged to allow the VM to get an IP from your router, making it easier to connect to.
- I/O Controller: Select LSI Logic SAS (this is the default SCSI controller).
- Virtual Disk Type: Select SCSI.
- Disk: On the “Select a Disk” screen, choose Use an existing virtual disk.
- Select Existing Disk: Browse to and select the
Nano01.vmdkfile you converted in the previous step. - Click Finish. If prompted to convert the existing virtual disk to a newer format, click Convert.
Step 8: Connect To Your Nano Server
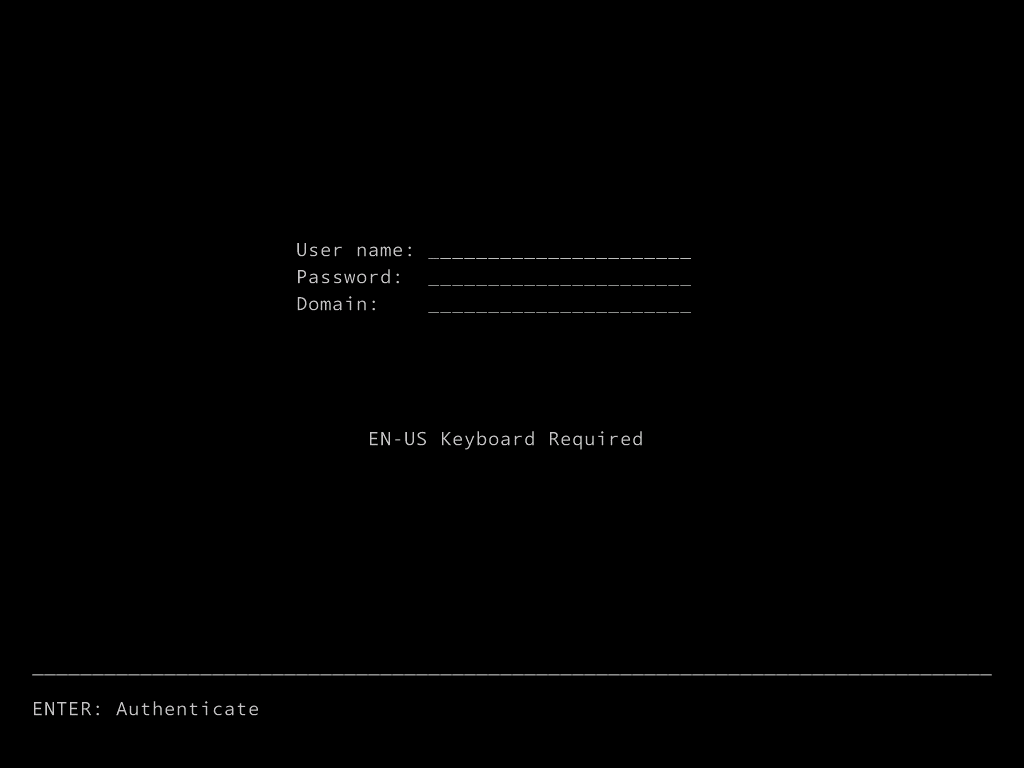
Your Nano Server has no GUI. You must manage it remotely.
- Power on the virtual machine in VMware. You will see a black console with a login prompt, but you cannot log in here.
- Find the IP Address. The easiest way is to check the DHCP client list on your network’s router or DHCP server. Look for the hostname
Nano01. - Connect via PowerShell Remoting. On your management computer, open a new PowerShell window and follow these steps.
- First, add the Nano Server’s IP address to your machine’s
TrustedHostslist. Replace192.168.1.55with your Nano Server’s actual IP address.
- First, add the Nano Server’s IP address to your machine’s
Set-Item WSMan:\localhost\Client\TrustedHosts -Value "192.168.1.55" -Force- Now, start a remote PowerShell session. You will be prompted for the administrator password you created during the image build process
Enter-PSSession -ComputerName "192.168.1.55" -Credential Administrator- You are now connected! The PowerShell prompt will change to
[192.168.1.55]: PS C:\>, indicating you are running commands directly on the Nano Server. You can now manage it as you would any other Windows Server from the command line.
Thats it, thanks for reading about Nano Server. Check out our other Windows Server based procedures here.
Leave a Reply