
Window Server 2025 is here. You can download a preview from Microsoft right now. Click here to register for the latest iso image, and then come back and follow this procedure to learn how to download, install, and configure Windows Server 2025. I will be using Hyper-V to create a virtual server running Windows Server 2025.
Quick Answer
- Register in the Windows Server Insider Program and download the Windows Server 2025 ISO
- Create a VM or prepare bare-metal hardware (minimum 512 MB RAM, 32 GB disk for Server Core)
- Boot from the ISO and select the edition (Standard or Datacenter, Desktop Experience or Core)
- Complete the Windows Setup wizard, set the Administrator password, and let Windows finish installation
- Run Windows Update, install VMware Tools or Hyper-V Integration Services, then join the domain
Step 1 – Register for the Windows Server 2025 Insiders Preview
As of May 2024, Windows Server 2025 is on pre-release.
- Click here to register for Windows Servers 2025 access.
- Register using your own Microsoft Account, an Office365 account, or AzureAD if you have one.
- Accept the terms and conditions and then download
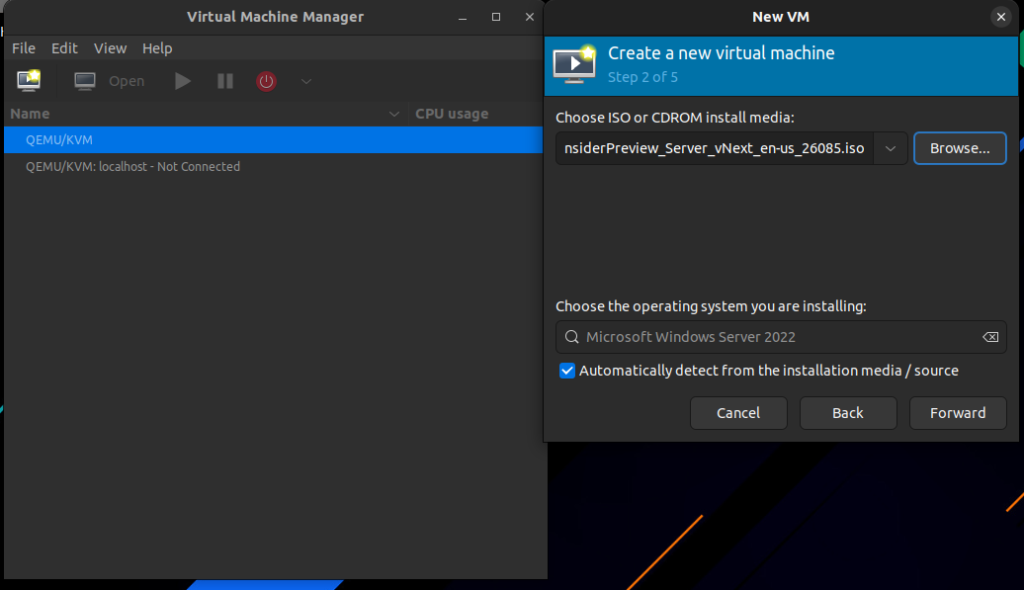
- Download the latest version – Windows Server vNext LTSC Preview – Build 26085 English
Step 2 – Create Windows Server 2025 Virtual Machine
You can use any virtual machine hypervisor you have available; it does matter if it’s Hyper-V, VMware, or OpenStack. Im going to be using QEMU Virtualization on Ubuntu.
- Create a new Virtual Machine and mount the ISO image
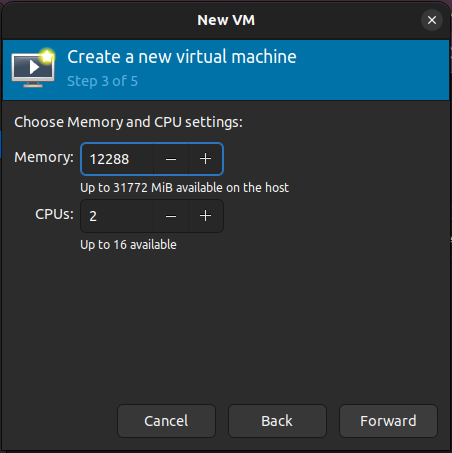
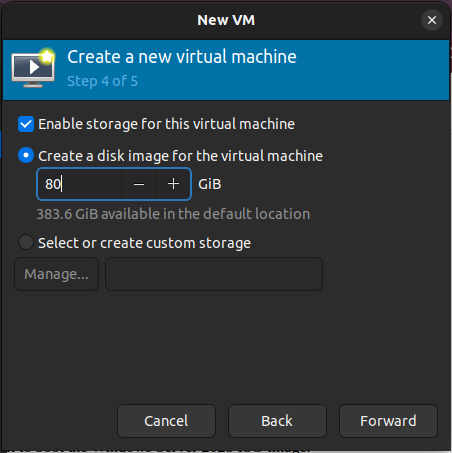
- I have given my virtual machine 12GB of RAM, 2vCPU, and 80GB of storage
- Start the Virtual Machine and wait for it to boot the Windows Server 2025 ISO image.
Step 3 – Configure the Windows Server 2025 Installation
Now follow the installation instructions
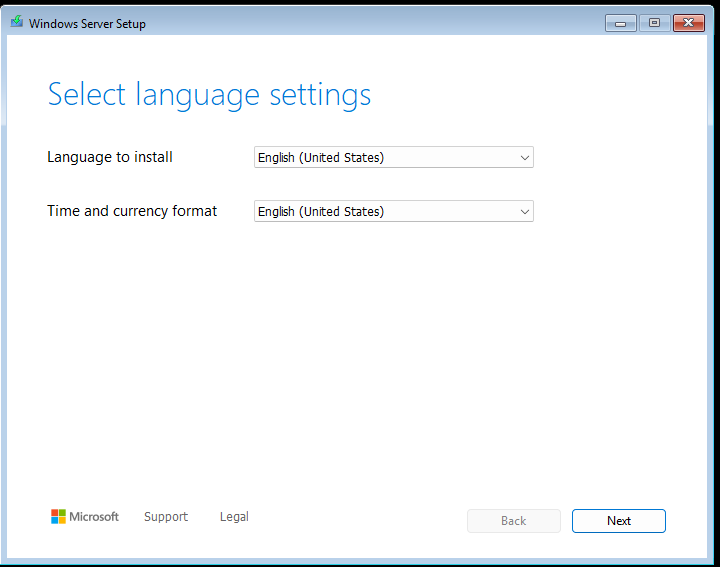
- Set the language and date/time
- Set the Keyboard layout

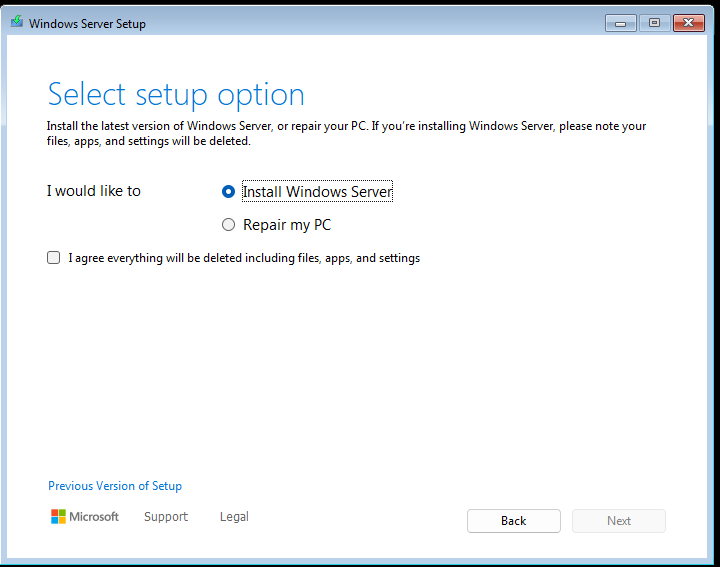
- Select Install Windows Server.
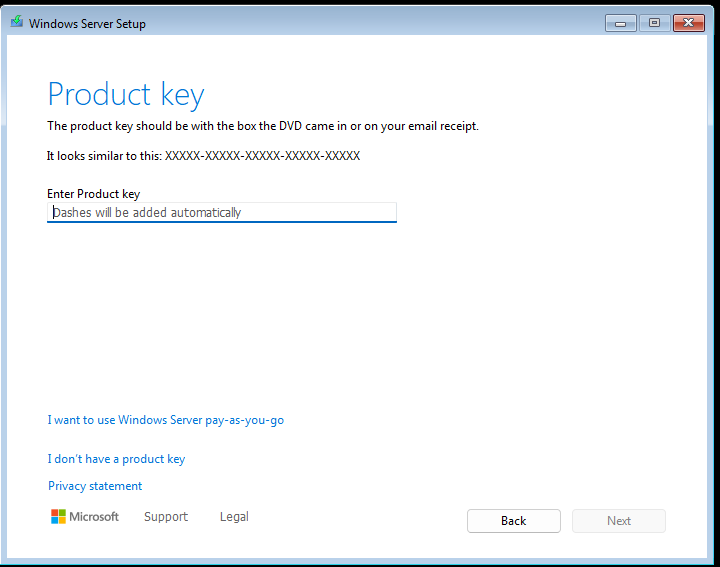
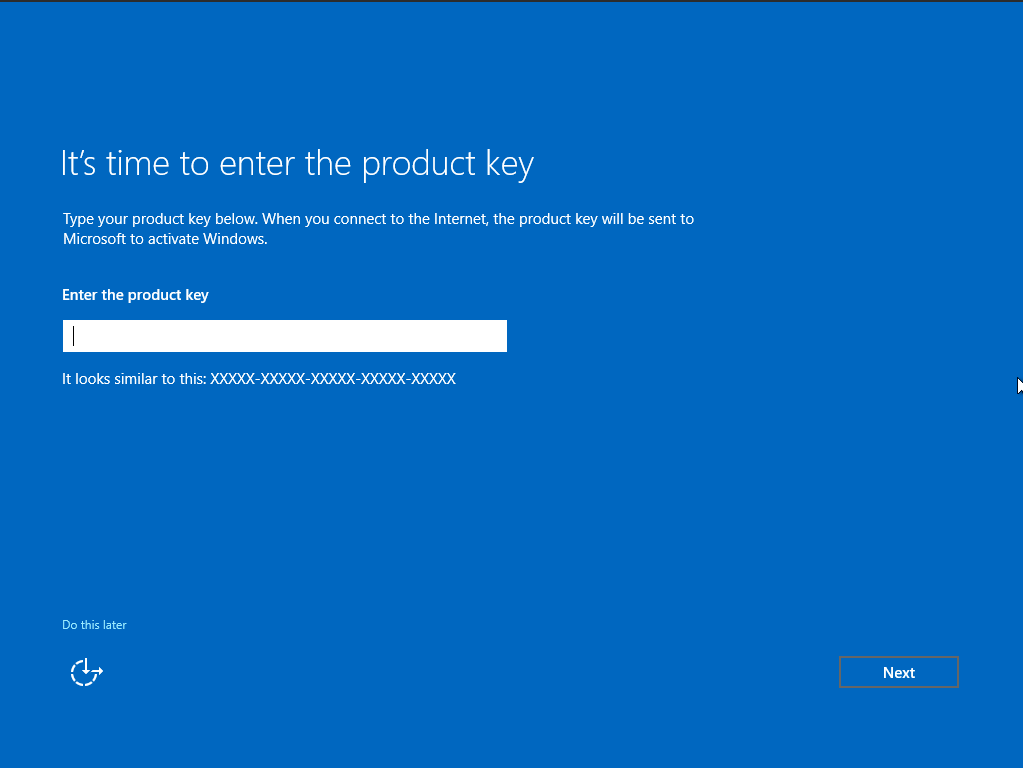
- If, like me, you don’t have a product key, just click “I don’t have a product key.” This will give you a 180-day trial licence.
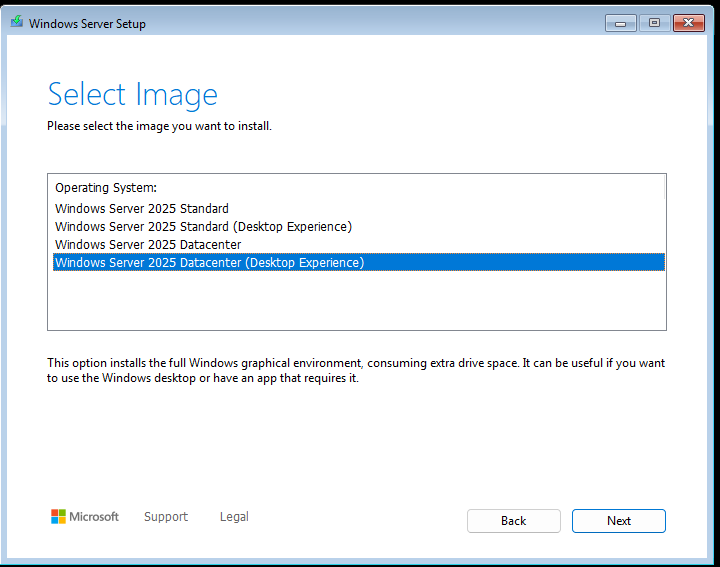
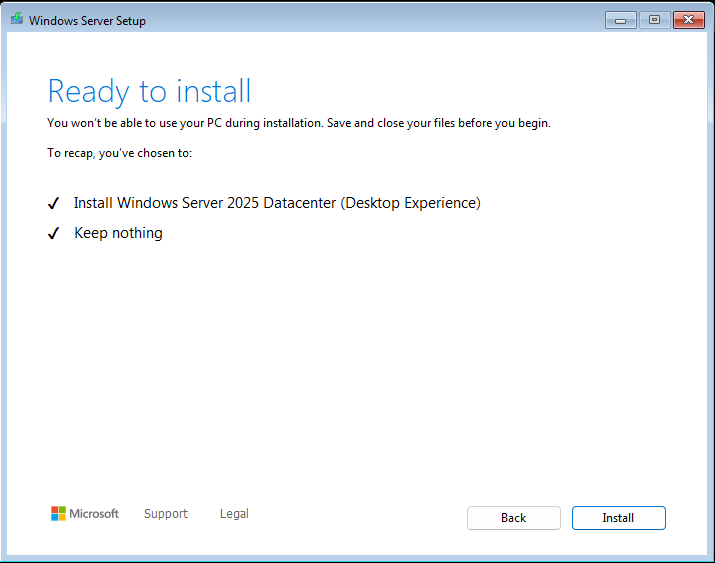
- Now choose the version you want to install. In this example, I will install Windows Server 2025 Datacenter Desktop Experience.
- Accept the terms and conditions

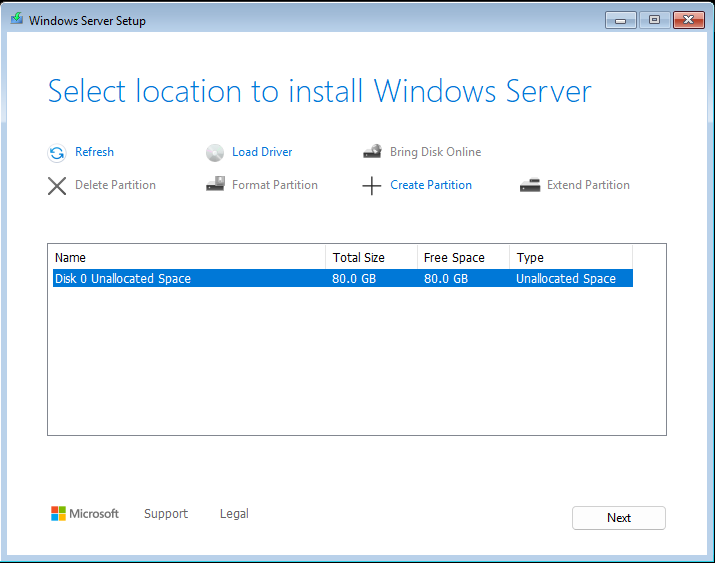
- Select the virtual disk you created when first creating your virtual machine
- Now click Install
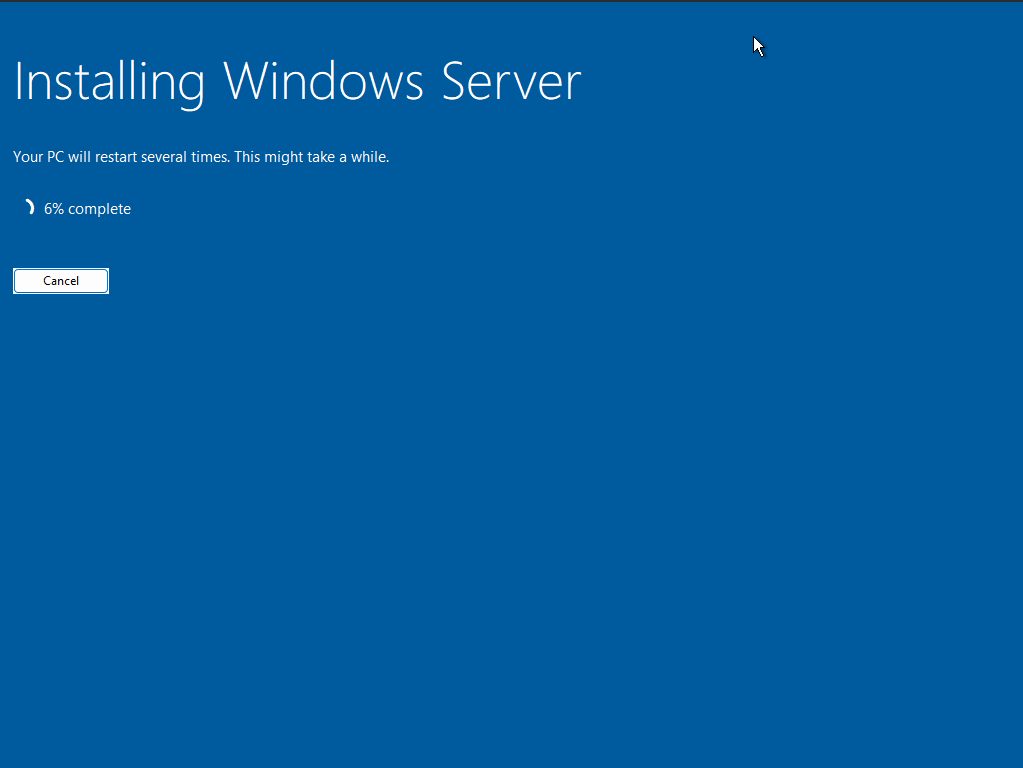
- Sit back and wait for it to install – it won’t take that long.
Step 4 – Post-Installation Configuration of Windows Server 2025
Upon completion, you can configure the server as follows.
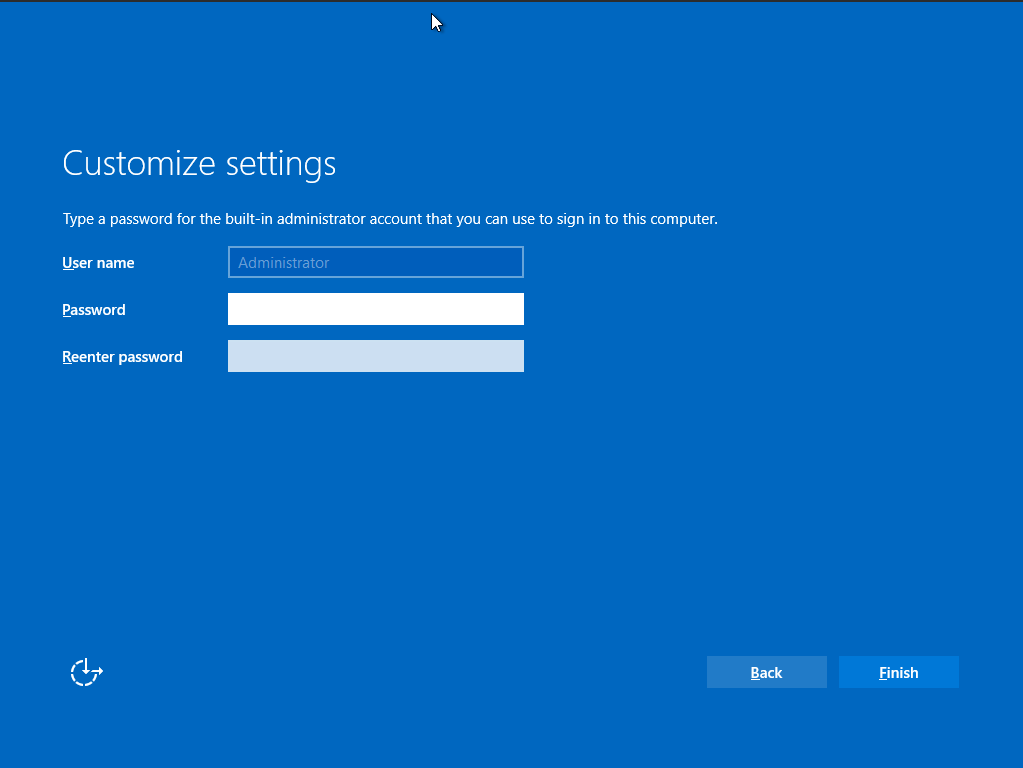
- Select “Do this later” on the Windows Product Key
- Next, create your Administrator account, give it a password, and click finish
- Now log into Windows Server 2025 using your Administrator Account
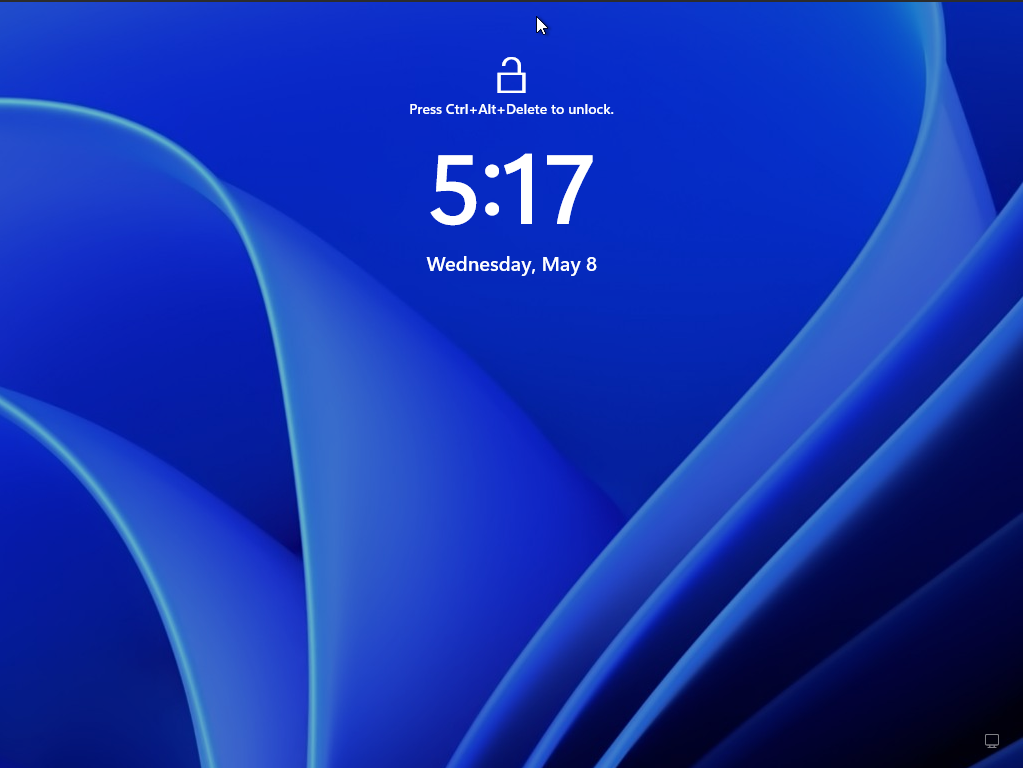
- Welcome to Windows Server 2025
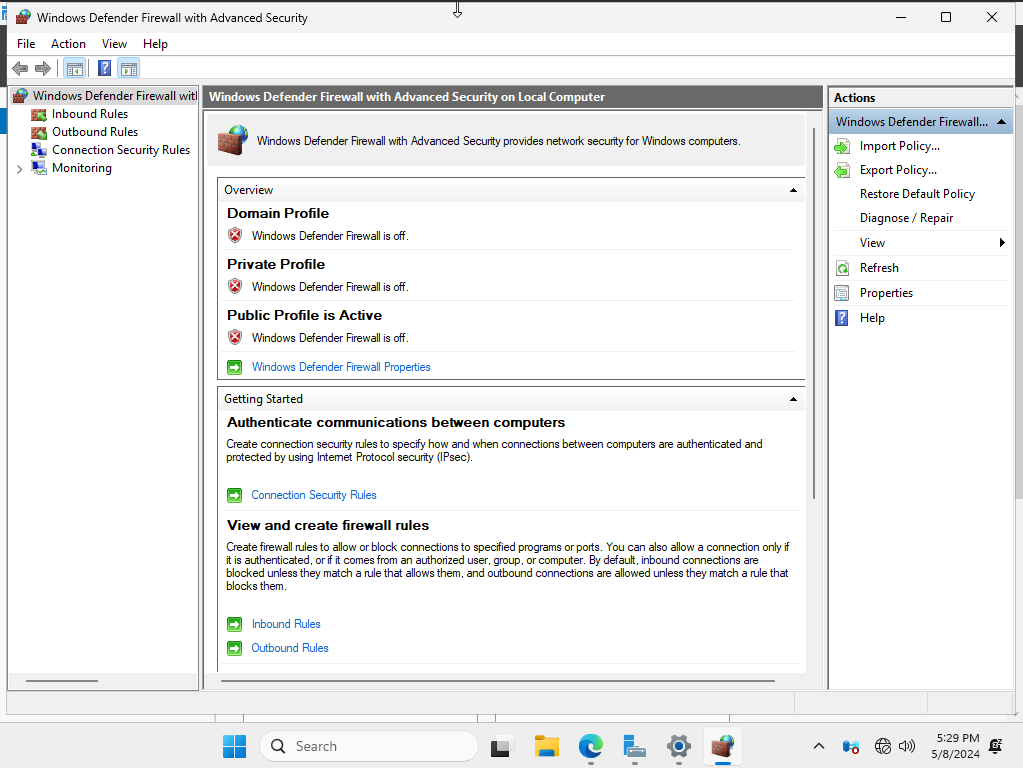
Step 5 – Open the Firewall to allow external network access
- For the purposes of this demo, I will simply disable the Windows Firewall. This is fine in this environment because I have a hardware firewall elsewhere on my network. Do not do this in production.
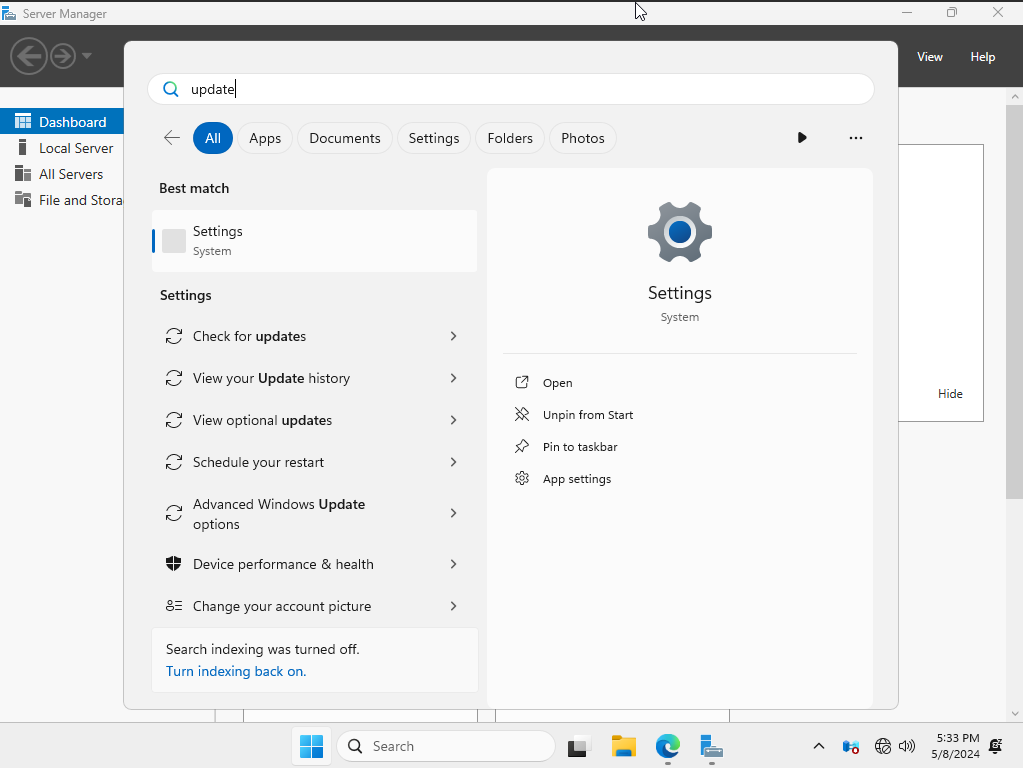
Step 6 – Run Windows Update
It is always best practice to run Windows Update to make sure that you are protected.
Start > Type “Update” > Click “Check for Updates”
Thanks for taking the time to read this article. if you have any questions or feedback, please write in the comment section below.
Leave a Reply