
TL;DR
- MediaWiki is the open-source engine behind Wikipedia — solid choice for documentation wikis at any scale.
- On AlmaLinux: Apache + MariaDB + PHP + MediaWiki source — the classic LAMP stack, all from package repos.
- Lock down: use HTTPS, restrict editing to authenticated users, configure backups for both DB and uploads.
- If you don’t need wiki-grade features, modern alternatives (Outline, BookStack, GitBook) are simpler to operate.
What is running a MediaWiki site on AlmaLinux?
MediaWiki is the open-source wiki engine maintained by the Wikimedia Foundation — the same software that runs Wikipedia, Wiktionary and dozens of other large knowledge bases. It’s PHP, requires a relational DB (MariaDB/MySQL or PostgreSQL), and scales from a single VM to globally-distributed clusters.
AlmaLinux is a free, RHEL-compatible Linux distribution — a natural choice for a self-hosted MediaWiki because it tracks RHEL’s long support windows and security backports. The packages you need (httpd, mariadb, php, php-mysqlnd) all come from the default AppStream repo.
Prerequisites
- AlmaLinux 9 (or RHEL 9 / Rocky 9 — same instructions).
- Root or sudo access.
- Domain name pointing at the server (for HTTPS) or static IP for internal use.
- Around 2 GB RAM minimum; 4 GB+ for anything resembling production.
How to use this guide
The sections below walk through the practical commands and options. After the main content you’ll find a Verification block (sanity-check it actually worked), a Troubleshooting block (common error messages and what to do), and Related reading for follow-on topics.

MediaWiki is a powerful and versatile open-source platform known for powering some of the world’s largest collaborative websites, including Wikipedia. This comprehensive guide will provide a detailed procedure for creating your own MediaWiki site, covering installation, configuration, data population, and optimization strategies to make it a valuable resource.
Part 1: Installation
This Procedure uses Alma Linux. Alma is very similar to Red Hat based Operating Systems Like RHEL, CentOS, Rocky Linux and Fedora.
I will be using Alma Linux release 9.5 (Teal Serval)
Before diving into the installation process, ensure you have the necessary prerequisites. It’s important to update your system and install prerequisite OS packages before installing MediaWiki to ensure a properly configured environment
Step 1 – Update AlmaLinux and Install Required Packages
First, update your system’s package lists and upgrade existing packages. You can use the following commands:
sudo dnf update -yNext, install the necessary packages, such as the Apache web server and the MariaDB database server. On AlmaLinux, you can use the following command:
sudo dnf install httpd mariadb mariadb-server php php-intl php-mbstring php-xml php-apcu php-curl php-mysqlnd -yYou now need to install PHP8.1
sudo dnf install epel-release -y
sudo dnf install https://rpms.remirepo.net/enterprise/remi-release-9.rpm -y
sudo dnf module enable php:remi-8.1 -y
sudo dnf install php
You can simplify the installation process, especially on operating systems other than Linux, by using a software bundle like XAMPP. XAMPP provides an easy way to install and configure all the important packages, including the Apache web server, PHP, and MariaDB, with a single download. It is available for Linux, Windows, Mac, and Solaris.
Once you have these prerequisites in place and have updated your system, follow these steps to install MediaWiki:
Step 2 – Start Services
Start and enable the Apache and MariaDB services to ensure they run automatically:
sudo systemctl enable --now httpd
sudo systemctl enable --now mariadb
Step 3 – Create Database
Create a database and user for MediaWiki with appropriate permissions:
sudo mysql -u root -p

CREATE DATABASE mediawiki_db CHARACTER SET utf8mb4 COLLATE utf8mb4_unicode_ci;
CREATE USER 'mediawiki_user'@'localhost' IDENTIFIED BY 'your_password';
GRANT ALL PRIVILEGES ON mediawiki_db.* TO 'mediawiki_user'@'localhost';
FLUSH PRIVILEGES;
EXIT;
Step 4 – Download MediaWiki
Download the latest stable release of MediaWiki from the official website:
wget https://releases.wikimedia.org/mediawiki/1.43/mediawiki-1.43.0.tar.gzStep 5 – Extract and Move
Extract the downloaded archive and move it to the Apache document root:
tar -xvzf mediawiki-1.43.0.tar.gz
sudo mv mediawiki-1.43.0 /var/www/html/mediawiki
Step 6 – Set Ownership
Set appropriate ownership and permissions for the MediaWiki directory:
sudo chown -R apache:apache /var/www/html/mediawiki
sudo chmod -R 755 /var/www/html/mediawiki
sudo setenforce 0
Part 2 : Configuration
Now, navigate to your MediaWiki installation in a web browser (e.g., http://your_server_ip/mediawiki). This will initiate the installation script. Follow the on-screen instructions, providing the database details and wiki configuration settings.
Note: If you cannot access your site. Make sure your firewall is allowing traffic on port 80. Either add the rule, or disable the firewall if testing this out.

Once the installation is complete, a LocalSettings.php file will be generated. This file contains various configuration settings for your MediaWiki site. You can further customize your wiki by modifying this file.
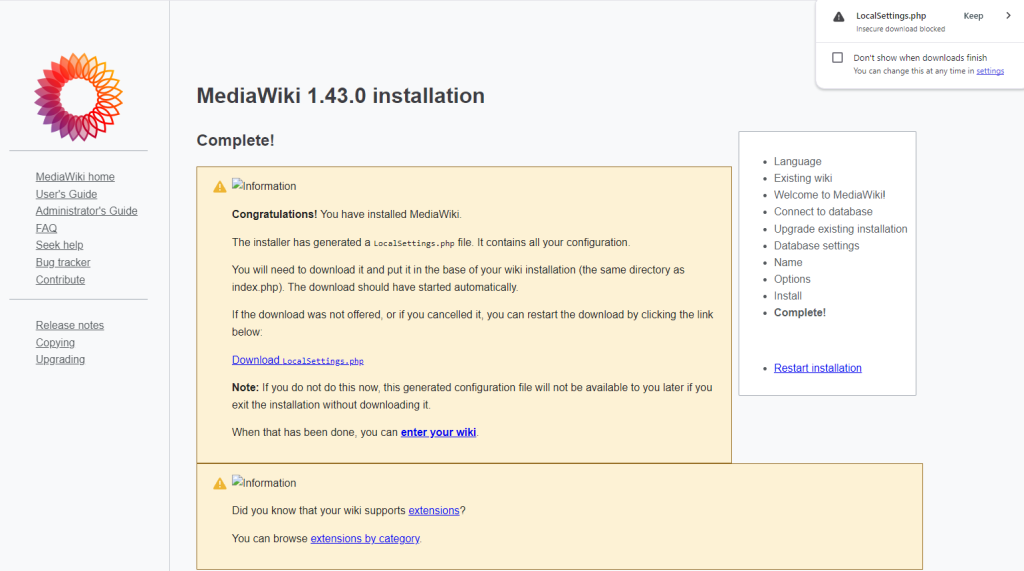
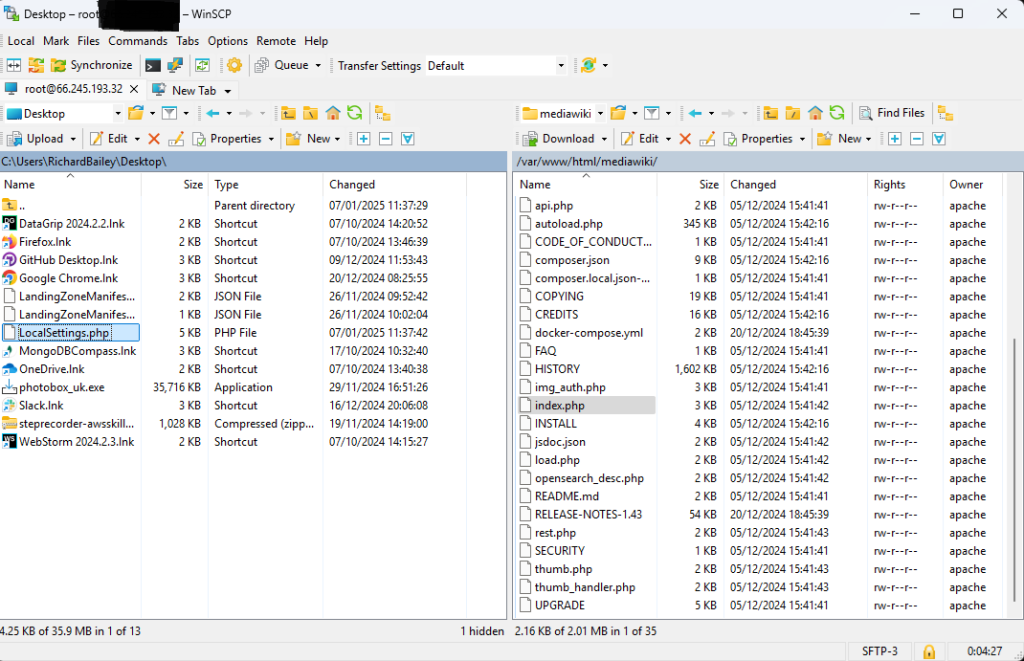
IMPORTANT: Use an FTP Tool to copy the LocalSettings.Php to the root of your mediawiki installation (The same folder as index.php)
User Permissions
MediaWiki offers a robust user permission system, allowing you to control access and editing privileges. You can manage user groups and their rights by accessing the Special:UserRights page. Here you can:
- Add or remove users from groups.
- Modify the permissions assigned to each group.
For instance, you can grant administrator rights to trusted users, allowing them to perform tasks like deleting pages, blocking users, and protecting pages. You can also create new user groups and define their permissions by editing the $wgGroupPermissions array in LocalSettings.php.
To assign specific permissions for a user on a particular page, navigate to that page, click “Edit,” and then select “Assign Permissions.”
When using MediaWiki within an organization, it’s common to restrict anonymous editing and limit access to certain content based on user roles and responsibilities1.
Appearance
MediaWiki provides flexibility in customizing the appearance of your site. You can change the default skin by modifying the $wgDefaultSkin variable in LocalSettings.php. For example, to change the default skin to “Modern,” use the following line in LocalSettings.php:
$wgDefaultSkin = "modern";You can also customize the CSS by editing the MediaWiki:Common.css page and add custom JavaScript by editing the MediaWiki:Common.js page7. This allows you to tailor the visual style and interactive elements of your wiki.
Extensions
MediaWiki supports extensions that add functionality to your site. To install an extension, download it and place it in the extensions directory. Then, include it in your LocalSettings.php file using wfLoadExtension(‘ExtensionName’);.
For example, to install the “ContactPage” extension, you would add the following line to LocalSettings.php:
wfLoadExtension( 'ContactPage' );Part 3: Making it a Great Resource
A well-organized and engaging MediaWiki site can be a valuable resource for your organization or community. Here’s how to make yours stand out:
Organizing Content
Organizing content effectively is crucial for a successful MediaWiki site. Here are some strategies:
- Categories: Use categories to group related pages and create a hierarchy for easy navigation. For example, you can create categories for different departments, projects, or topics.
- Namespaces: Use namespaces to partition your wiki into broad areas, such as “Help” or “Tutorials” This helps separate different types of content and improve organization.
- Templates: Use templates to standardize page layouts and automatically add categories to pages. This ensures consistency and reduces manual effort.
Encouraging User Participation
To encourage user participation and foster a thriving community:
- Promote your wiki: Use social media, blog posts, and other channels to promote your MediaWiki site. Share the link on relevant platforms and communities.
- Create a welcoming community: Foster a friendly and supportive environment for new users. Encourage collaboration and knowledge sharing.
- Use discussion pages: Enable discussion pages for collaborative editing and knowledge sharing. This allows users to discuss content and provide feedback.
- Implement user-friendly features: Use extensions like VisualEditor to simplify editing and make it more accessible. This lowers the barrier to entry for new users.
- Promote the site: Utilize social media platforms and consider using HTML snippets to promote your MediaWiki site.
- Address barriers: Be mindful of potential barriers to participation, such as documentation clarity and community inclusivity. Ensure that the documentation is clear and concise, and that the community is welcoming and inclusive to all users.
It’s important to consider the specific needs and preferences of your target audience when designing your MediaWiki site. For example, if you’re creating a wiki for a distributed community, you might need to provide more guidance and support to encourage participation.
Verification
Sanity-check the change actually worked:
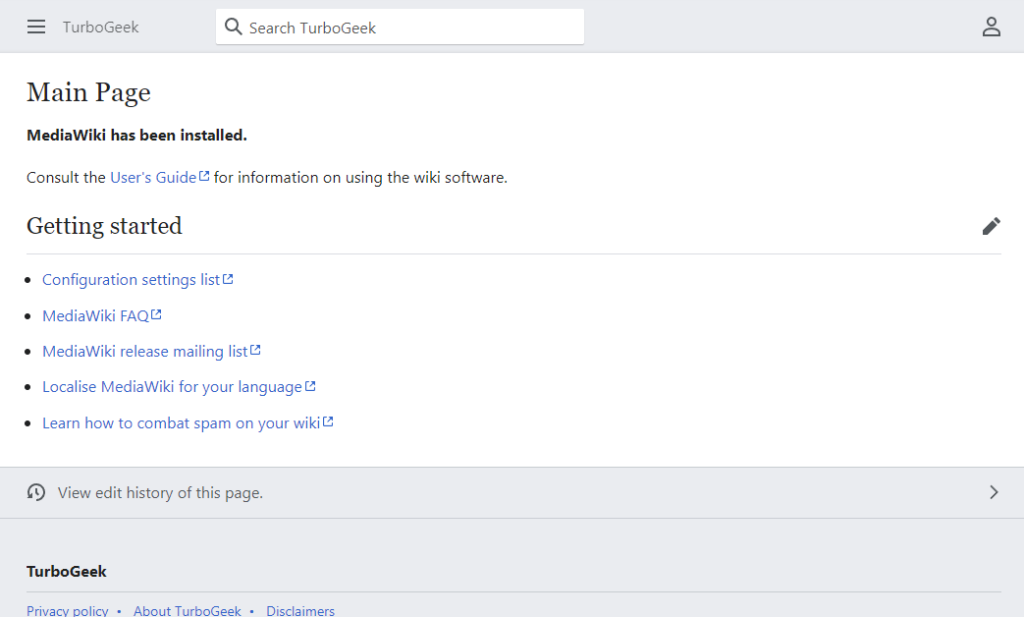
systemctl status httpd mariadb php-fpm— all three should be active.- Browse to the domain — MediaWiki main page renders without PHP errors.
- Log in as the wiki admin and edit a page — confirms write path works end-to-end.
Troubleshooting
HTTP 500 Internal Server Error after install — Apache logs first: tail /var/log/httpd/error_log. Usually missing PHP module — install php-xml, php-intl.
Database connection refused — MariaDB user / DB / privileges mismatch. mysql -u root and re-run GRANT ALL ON wiki.* TO 'wikiuser'@'localhost'.
Uploads fail with ‘sorry, this file type is not allowed’ — Set $wgEnableUploads = true; in LocalSettings.php and add the desired MIME type to $wgFileExtensions.
Authoritative sources
References: MediaWiki — Installation guide, AlmaLinux wiki.
Leave a Reply