
TL;DR
- Vim / vi:
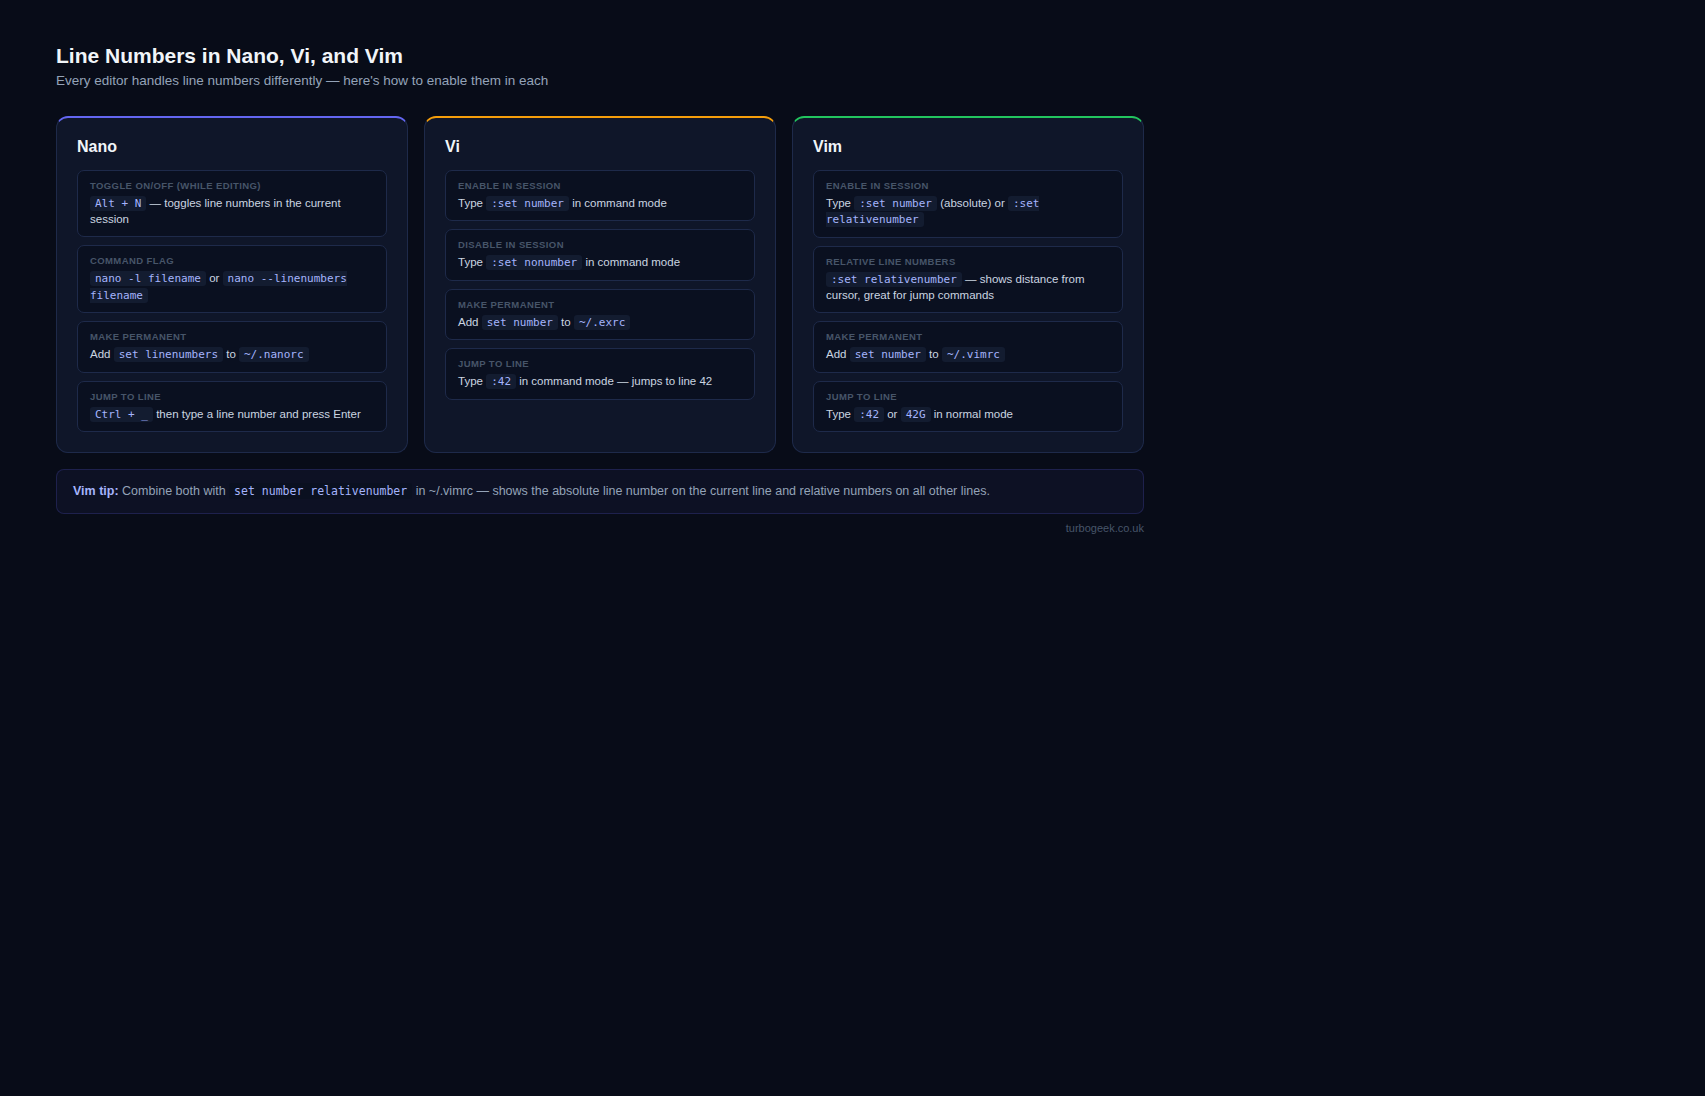
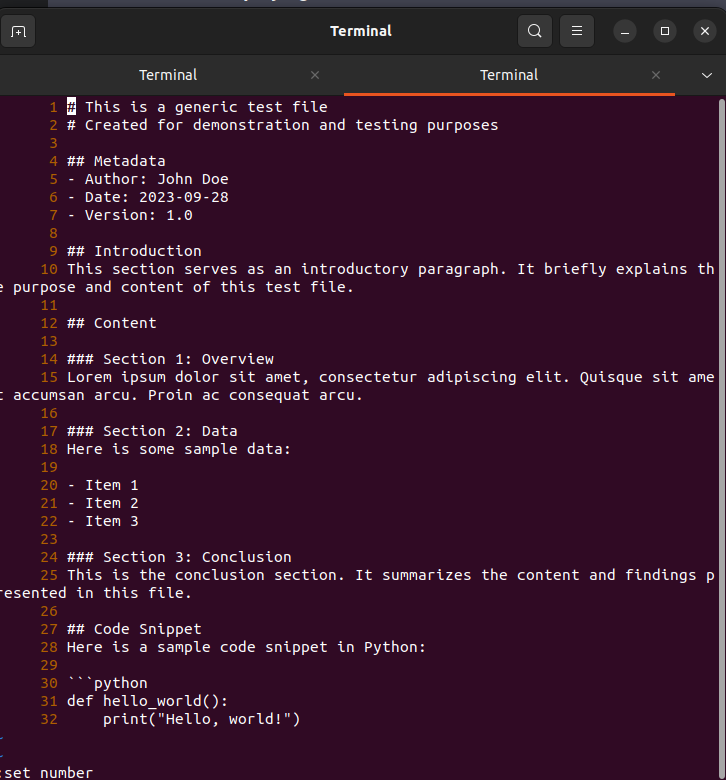
:set numberfor absolute,:set relativenumberfor relative. - Nano: launch with
nano -l file, orset linenumbersin~/.nanorcfor permanent. - Persist vim settings via
~/.vimrcwithset numberon its own line. - Relative numbers (vim) make jump-by-N motions like
10jtrivial to count visually.
What is displaying line numbers in nano, vi and vim?
Line numbers in a text editor are a UX detail that quietly compounds: stack traces tell you the line, your shell error messages do too, and code review comments will reference them. Modern IDEs show them by default; classic Linux editors do not — but every one of nano, vi and vim has a one-line setting to enable them.
Vim adds a useful twist with relative line numbers — every line shows its distance from the cursor instead of its absolute number. This makes Vim’s count-prefix motions (10j = jump 10 lines down) feel automatic, because the number you need is right there in the gutter.
Prerequisites
- Linux, macOS or WSL2 with one or more of nano, vi, vim installed (default on essentially every system).
- Write access to your home directory if you want the setting to persist.
Source check — May 9, 2026
This article was checked against the current GNU nano manual and the Vim options documentation. Nano documents -l/--linenumbers and set linenumbers; Vim documents the number and relativenumber options.
How to use this guide
The sections below walk through the practical commands and options. After the main content you’ll find a Verification block (sanity-check it actually worked), a Troubleshooting block (common error messages and what to do), and Related reading for follow-on topics.
Displaying line numbers in text editors like Nano, Vi, and Vim can be a crucial feature for developers, system administrators, and technical writers. These text editors are available on Linux. It aids in navigation and makes it easier to reference specific lines of code or text. Below is a detailed procedure for enabling line numbers in each of these text editors.
Key Takeaways
- Nano: Press
Alt + Shift + 3(or#) for instant toggle; edit~/.nanorcfor permanent change. - Vi/Vim: Use the command
:set numberin Command Mode; edit~/.vimrcfor persistence. - Quick Check: In Nano,
Ctrl + Cshows your current line position without enabling a full sidebar. - Efficiency: Line numbers are essential for debugging code and following system logs accurately.
NANO
Displaying Line Numbers in Nano
Quick Guide:
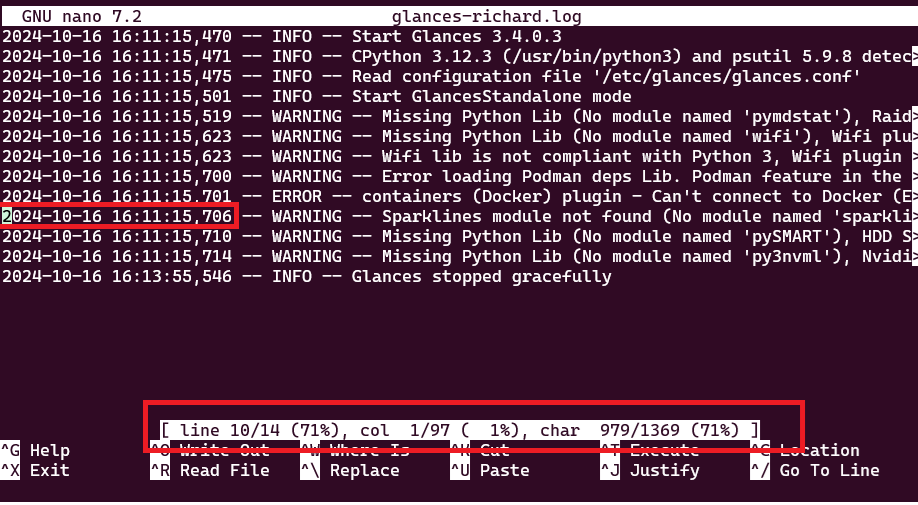
To display line numbers in Nano, press Alt + Shift + # while the editor is open. This acts as a toggle to instantly show or hide the line count on the left margin. If you simply need to know your current location, pressing Ctrl + C will display the current line and column position in the status bar at the bottom.
Detailed Explanation:
- Open the Nano Editor: Launch your terminal and type
nanofollowed by the name of the file you wish to edit. For example:
nano example.txt- Access the Nano Menu: Once the editor is open, you’ll notice a menu at the bottom of the screen. This menu contains various commands prefixed by the caret symbol (
^), which represents theCtrlkey. - Enable Line Numbers: To display line numbers, press
Alt+Shift+#. This will toggle line numbers on or off. - Save Changes: To save any changes you’ve made to the file, press
Ctrl+O, then pressEnter. - Exit Nano: To exit the Nano editor, press
Ctrl+X.
Top Tip for Nano
Did you know you can quickly view which line you are on in Nano by pressing CRTL+C anywhere in your file? For example:
Want to make setlinenumbers persistent?
1.Edit .nanorc
You can use Nano itself to edit this configuration file. Open your terminal and type:
nano ~/.nanorc This will open the nanorc file in your home directory (represented by ~). If the file doesn’t exist, Nano will create it for you.
2. Add the line:
In the Nano editor, add the following line:
set linenumbersSave and exit (Ctrl + O, Enter, Ctrl + X).
VI
Displaying Line Numbers in Vi
- Open the Vi Editor: In your terminal, type
vifollowed by the name of the file you want to edit. For instance:
vi example.txt- Enter Command Mode: By default, Vi starts in “Normal” mode. To enter “Command” mode, press
Esc. - Enable Line Numbers: In “Command” mode, type
:set numberand pressEnter. This will display line numbers along the left-hand side of the editor. - Save and Exit: To save changes and exit Vi, type
:wqand pressEnter.
VIM
Displaying Line Numbers in Vim
- Launch Vim: Open your terminal and type
vimfollowed by the name of the file you wish to edit. For example:
vim example.txt- Switch to Command Mode: Vim starts in “Normal” mode. Press
Escto switch to “Command” mode. - Activate Line Numbers: In “Command” mode, type
:set numberand pressEnter. This will enable line numbers. - Persistent Line Numbers: If you want to make this setting permanent, you can add the
set numbercommand to your Vim configuration file. To do this, open your.vimrcfile by typingvim ~/.vimrcand add the lineset number. - Save and Close: To save your changes and exit Vim, type
:wqand pressEnter.
Deeper Dive. Want to know more?
Absolute vs. Relative Line Numbers
While standard line numbers are helpful, many developers prefer Relative Line Numbers in Vim. This feature shows the distance from your current cursor position, making it incredibly easy to perform “jumps” (e.g., typing 10j to move down exactly 10 lines).
- To enable relative numbers: Type
:set relativenumber - The Hybrid Approach: Many experts use both
:set numberand:set relativenumbersimultaneously. This shows the absolute number of your current line but relative numbers for everything else.
Troubleshooting Configuration Conflicts
Sometimes, your changes to ~/.vimrc or ~/.nanorc might not appear to work. This usually happens because of system-wide overrides.
- Check Global Configs: If your local file is ignored, check
/etc/vimrcor/etc/nanorc.
- Permission Check: Ensure your user owns the config file. You can verify file ownership and permissions using the
ls -lcommand.
For those looking to streamline their workflow further, customizing your bash profile can complement your editor settings for a truly optimized CLI experience.
Thanks for taking the time to read this article. if you have any questions or feedback, please write in the comment section below.
Verification
Sanity-check the change actually worked:
- Open any file with
vim fileand run:set number— numbers appear in the left gutter. nano -l file— numbered gutter on launch.- Re-open after editing your
~/.vimrc/~/.nanorc— numbers persist without re-issuing the command.
Troubleshooting
Setting doesn’t persist between sessions — Check the file location: vim reads ~/.vimrc, nano reads ~/.nanorc. Some distros use /etc/nanorc system-wide.
Numbers misaligned with terminal width — Wide files plus low-res terminal — vim shows numbers in 4 columns by default; reduce the file content width or widen the terminal.
Pasting code keeps line numbers — Use :set paste before pasting in vim; set autoindent can also mangle paste indentation.
Authoritative sources
References: Vim options documentation, GNU nano manual.
Need a Linux VPS to try this on?
I host my own lab work on Atlantic.Net Cloud — straightforward Linux VPS pricing, hourly billing, and snapshots that make it easy to break things and roll back. Their dedicated and HIPAA-compliant hosting tiers are worth a look if you outgrow the cloud plans.
Disclosure: This is an affiliate/referral link. If you sign up I may earn credit at no extra cost to you. I work as a freelance writer for Atlantic.Net and use their services personally — I wouldn’t link them otherwise.
Leave a Reply