
If you want the broad distro comparison first, start with How to Install Glances on Linux. This page is specifically for CentOS Stream.
If you are on RHEL, Rocky Linux, or AlmaLinux, use the dedicated enterprise-family guide instead: How to Install Glances on RHEL 9/8, Rocky Linux and AlmaLinux.
Quick Answer
- Enable EPEL (CentOS Stream usually has it by default):
sudo dnf install epel-release -y - Install Glances:
sudo dnf install glances -y - Verify:
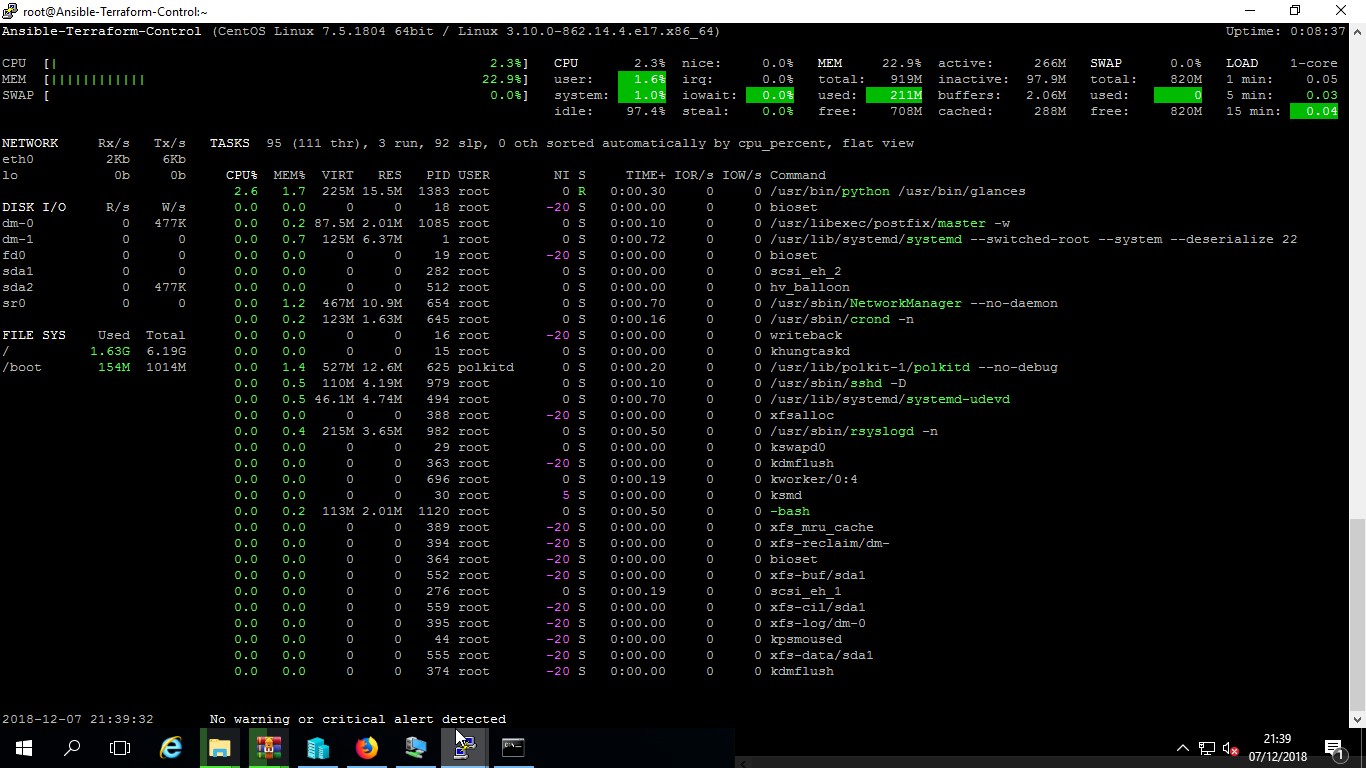
glances --version - Launch:
glances(pressqto quit) - For a newer version use pip:
pip3 install glances
Why CentOS Stream deserves its own page
CentOS Stream sits ahead of RHEL in the release flow, so package timing and repository behaviour can differ from the more conservative RHEL, Rocky, and AlmaLinux path. The installation commands are similar, but the platform intent is not identical.
Method 1: Install Glances with DNF and EPEL
Step 1: Enable EPEL
For CentOS Stream 9:
sudo dnf install https://dl.fedoraproject.org/pub/epel/epel-release-latest-9.noarch.rpm -yFor CentOS Stream 8:
sudo dnf install https://dl.fedoraproject.org/pub/epel/epel-release-latest-8.noarch.rpm -yStep 2: Install Glances
sudo dnf install glances -yStep 3: Verify the install
glances --versionMethod 2: Install Glances with pip
If you want a newer release than the repository provides, use Python tooling instead:
sudo dnf install python3 python3-pip -y
sudo pip3 install "glances[all]"
How to start Glances on CentOS Stream
Terminal mode
glancesWeb interface
glances -wOpen the default web port if needed:
sudo firewall-cmd --add-port=61208/tcp --permanent
sudo firewall-cmd --reload
Then browse to:
http://<your_server_ip>:61208When should you use the other RHEL-family page instead?
If your environment is built on supported enterprise clones where stability matters more than the rolling Stream model, use the RHEL/Rocky/AlmaLinux guide instead of this one. That is the better page for standard enterprise installs.
Related Glances guides
- How to Install Glances on Linux
- How to Install Glances on RHEL 9/8, Rocky Linux and AlmaLinux
- How to Install Glances on Ubuntu
- How to Install Glances on Legacy RHEL and CentOS (5, 6, 7)
This page should rank for CentOS Stream-specific Glances installs. If you do not need Stream-specific coverage long term, this is the first page in the cluster I would consider setting to noindex later.