
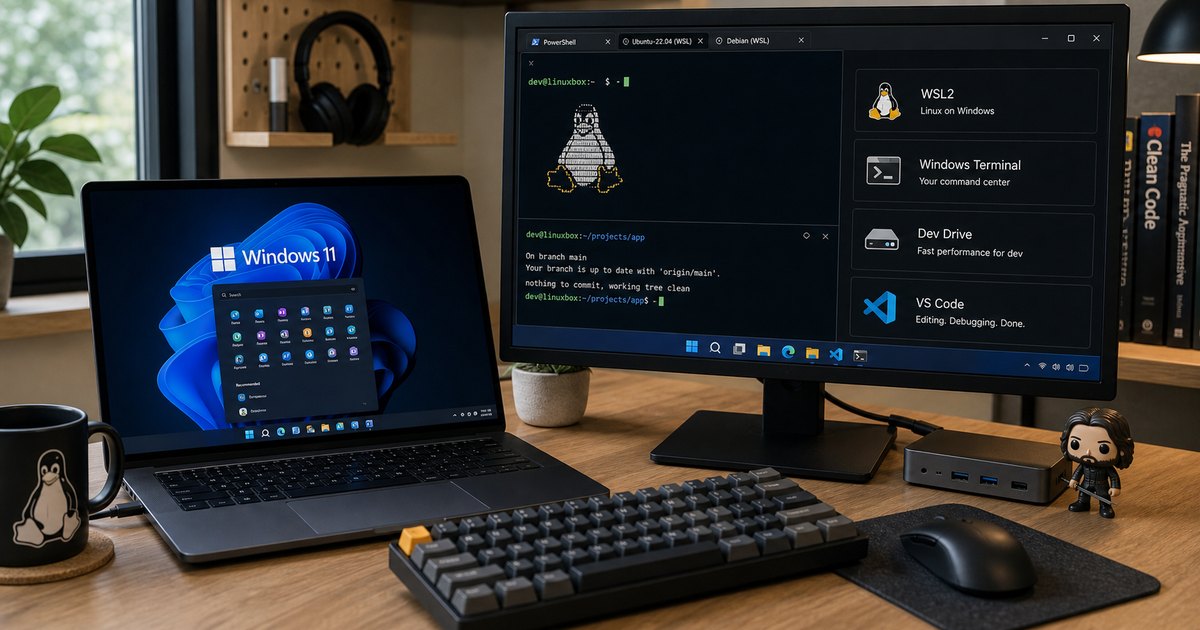
You’ve been handed a Windows machine — or bought one — and you’re a developer who lives in Terminal, uses brew, and thinks cmd.exe is a joke. Here’s the thing: Windows 11 + WSL2 is a genuinely good development environment. You just need to know where to find your tools.
TL;DR — Switching to Windows as a Developer
- The Mental Model — WSL2 = real Linux kernel; your code runs there, Windows is just the UI
- WSL2 — Install, configure, and understand the file system split
- Windows Terminal — Your new iTerm2/Alacritty; configure it once and forget it
- winget — Your new brew; same intent, different syntax
- Git — Same tool, two quirks: line endings and credential manager
- VS Code — Identical to Mac/Linux; one extension connects it to WSL2
- What Windows Does Better — Hot take: a few genuine wins over macOS
Just arrived on Windows? Start with The Mental Model Shift — it is the one concept that makes everything else click.
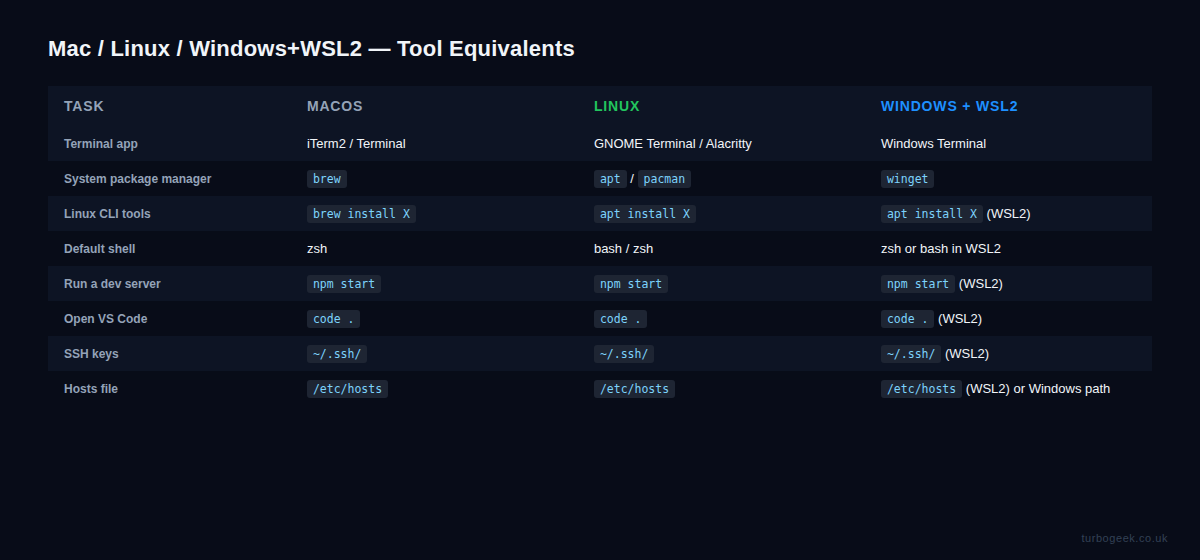
| Task | macOS | Linux | Windows + WSL2 |
|---|---|---|---|
| Terminal app | iTerm2 / Terminal | GNOME Terminal / Alacritty | Windows Terminal |
| System package manager | brew | apt / pacman | winget |
| Linux CLI tools | brew install X | apt install X | apt install X (WSL2) |
| Default shell | zsh | bash / zsh | zsh or bash in WSL2 |
| Run a dev server | npm start | npm start | npm start (WSL2) |
| Open VS Code | code . | code . | code . (WSL2) |
| SSH keys | ~/.ssh/ | ~/.ssh/ | ~/.ssh/ (WSL2) |
| Hosts file | /etc/hosts | /etc/hosts | /etc/hosts (WSL2) or C:\Windows\System32\drivers\etc\hosts |
1. The Mental Model Shift
The key insight: WSL2 runs a real Linux kernel in a lightweight VM. This is not a compatibility layer — that was WSL1. When you run node, python, or docker inside WSL2, you are running them on Linux.
Windows is the display layer. You interact with it for GUI apps (VS Code, browser, Slack) but your code lives and runs in Linux. The file system has two sides:
- Linux side:
/home/username/— fast I/O, use this for all projects - Windows side:
/mnt/c/Users/...— accessible from WSL2 but slow I/O — avoid for project files
Once this model is clear, the question for every tool becomes: “Does this run on the Windows side or the Linux side?” For dev tools: Linux side. For GUI apps: Windows side.
2. WSL2: Your New Terminal Home
Install WSL2 from PowerShell or Windows Terminal (run as admin):
wsl --installThis installs the Virtual Machine Platform, WSL2, and Ubuntu by default. After the required restart, open Ubuntu from the Start menu and set your username and password — these are separate from your Windows account.
Once inside, update immediately:
sudo apt update && sudo apt upgrade -yIf you use Oh My Zsh on your Mac or Linux machine, install it now — WSL2 is Ubuntu, so the exact same process applies:
The single most important performance rule: keep all project files in ~/ inside WSL2 — not in /mnt/c/. File I/O on the Windows-side mount is significantly slower. Your Linux home is accessible from Windows Explorer at \\wsl$\Ubuntu\home\username if you ever need to drag files in.
3. Windows Terminal: Your New iTerm2
Windows Terminal is your iTerm2 or Alacritty replacement. Install it via winget:
winget install Microsoft.WindowsTerminalIt detects your WSL2 distros automatically — Ubuntu (WSL2) appears as a profile out of the box. Set it as the default profile, and set the starting directory to //wsl$/Ubuntu/home/username so every new tab opens in your Linux home rather than C:\.
Cascadia Code ships with Windows Terminal and works well for powerline prompts. One difference from iTerm2: there are no native split panes — use tmux inside WSL2 if you need them, or use VS Code’s integrated terminal instead. Settings are stored as JSON, so you can back them up the same way you would dotfiles.
4. winget: Your New brew
The mental model is identical to brew: you tell it what you want, it installs and manages it. The syntax differs slightly:
Key difference: winget installs Windows apps. For Linux CLI tools — git inside WSL2, node inside WSL2, any language runtime — use apt from inside your WSL2 terminal, exactly as you would on any Ubuntu machine.
Rule of thumb: GUI apps (Slack, Chrome, VS Code) via winget from PowerShell. CLI dev tools via apt from inside WSL2.
5. Git: Same Tool, Two Quirks
Git works identically inside WSL2. Two things to be aware of:
Line endings. Windows uses CRLF, Linux uses LF. If your code runs on a Linux server, set this inside WSL2:
git config --global core.autocrlf inputThis means: accept whatever line endings come in, but never convert LF to CRLF on checkout.
Credentials. On macOS, Git uses the keychain automatically. Inside WSL2, set up SSH keys — the exact same process as on Mac or Linux:
Everything else — branching, rebasing, stashing, hooks — works exactly as you’d expect.
6. VS Code: Identical — Just Add One Extension
If you use VS Code on Mac or Linux, your transition here is: install it, sign in, done. Settings Sync will pull all your settings, extensions, themes, and keybindings.
One additional step: install the Remote WSL extension (ms-vscode-remote.remote-wsl). Then open projects from your WSL2 terminal:
VS Code opens connected to Linux. The integrated terminal runs bash or zsh. Linters, formatters, and language servers run in Linux context. There is no practical difference from working on macOS.
One thing that does not transfer: keyboard shortcuts on Windows use Ctrl instead of Cmd. Two minutes with the keybindings editor and you’re back to muscle memory.
7. What Windows Actually Does Better
This is the hot take section. If you’ve made it this far and your setup is working, here’s what you’ll likely notice over the next few weeks:
- Hardware variety and price. The Mac range is narrow and premium. Windows machines at the same spec cost significantly less, and there is genuine choice in form factor.
- Gaming. If you game at all, this is not a competition.
- WSL2 memory limits are configurable. macOS VMs for Docker have hard memory limits. WSL2 lets you set
[wsl2] memory=16GBin.wslconfig— it uses what it needs and releases it back to Windows. - Windows Terminal is genuinely excellent. It caught up to iTerm2 faster than expected.
- GPU access from WSL2. CUDA and GPU-accelerated ML workloads work inside WSL2 via WDDM — something macOS does not support at all for NVIDIA.
Related: Windows 11 Developer Setup: The Complete Guide From a Fresh Install — the setup sequence that gets you here from a clean machine.
Related: Is Your Windows Dev Environment a Mess? Here’s How to Fix It — if your existing setup has gaps, this article diagnoses and fixes them.
Frequently Asked Questions
Do I have to use WSL2 or can I install dev tools directly on Windows?
You can, but WSL2 removes almost every compatibility headache. If you are used to a Unix environment, stay in Unix — WSL2 gives you that without leaving Windows.
Will my dotfiles work inside WSL2?
Yes. WSL2 is Ubuntu (or your distro of choice). Your .bashrc, .zshrc, SSH config, and git config all work as-is. Clone your dotfiles repo into ~/ and you’re home.
Is Docker Desktop still needed on Windows?
For most developers, yes — Docker Desktop manages the WSL2 integration and gives you the GUI. Alternatively, install Docker Engine directly inside WSL2 without Docker Desktop, which some developers prefer for performance and to avoid the licence requirements.
Leave a Reply