

Nextcloud is a free, open-source, and most widely used file share and collaboration platform that allows you to host your own private cloud for documents, photos, etc. This guide will demonstrate how to install this on your very own Ubuntu server
Quick Answer
- Install prerequisites: Apache, PHP 8.x, and MariaDB (or MySQL)
- Download Nextcloud and extract to
/var/www/html/nextcloud - Create a MariaDB database and user for Nextcloud
- Configure Apache with a virtual host pointing to the Nextcloud directory
- Complete the web-based setup wizard at
http://your-server/nextcloud
Requirements:
- Server with Ubuntu installed
- A valid domain name pointed with your server IP
Step 1 – Prepare your Server
Log into the server as root, run the following command to update your base system with the latest available packages.
apt-get update -yStep 2 – Configure Ubuntu as a LAMP Server
Nextcloud requires a LAMP stack to run. LAMP stands for Linux, Apache, MySQL and PHP.
Run the following command to install:
apt-get install apache2 mariadb-server libapache2-mod-php php php-gmp php-bcmath php-gd php-json php-mysql php-curl php-mbstring php-intl php-imagick php-xml php-zip bzip2 -yOnce all the packages are installed, edit the php.ini file and change these values.
nano /etc/php/7.4/apache2/php.iniChange the following lines:
memory_limit = 512M

date.timezone = Europe/London

Save and close the file when you are finished. Then, restart the Apache service to apply the changes:
systemctl restart apache2Step 3 – Create a Nextcloud Database
NextCloud uses MariaDB for all data storage. Lets configure MariaDB.
mysqlcreate a database and user with the following command:
create database nextclouddb;grant all on nextclouddb.* to 'nextcloud'@'localhost' identified by 'mysupersafepassword';Next, flush the privileges and exit:
flush privileges;
exit;
Step 4 – Download and Install NextCloud
NextCloud is available from the following page, at the time of writing the latest version was :
wget https://download.nextcloud.com/server/releases/nextcloud-23.0.1.tar.bz2
Now Extract Nextcloud:
tar -jxvf nextcloud-23.0.1.tar.bz2Now move folder to the Apache web root directory
mv nextcloud /var/www/html/Fix the permissions so the apache service can read the directory
chown -R www-data:www-data /var/www/html/nextcloudchmod -R 775 /var/www/html/nextcloudOnce you are done, you can proceed to configure the Apache server.
Step 5 – Configure Apache for Nextcloud
Next, you will need to create an Apache virtual host configuration file to serve Nextcloud.
You can create it with the following command:
nano /etc/apache2/sites-available/nextcloud.confAdd the following lines:
<VirtualHost *:80>
        DocumentRoot "/var/www/html/nextcloud"
        ServerName mynextcloud.turbogeek.co.uk

        ErrorLog ${APACHE_LOG_DIR}/nextcloud.error
        CustomLog ${APACHE_LOG_DIR}/nextcloud.access combined

        <Directory /var/www/html/nextcloud/>
            Require all granted
            Options FollowSymlinks MultiViews
            AllowOverride All

           <IfModule mod_dav.c>
               Dav off
           </IfModule>

        SetEnv HOME /var/www/html/nextcloud
        SetEnv HTTP_HOME /var/www/html/nextcloud
        Satisfy Any

       </Directory>

</VirtualHost>
Now enable the Apache virtual host plugin
a2ensite nextcloud.conf
a2enmod rewrite headers env dir mime setenvif ssl
systemctl reload apache2
Step 6 – Point your DNS at your Server
I use Cloudflare for my DNS, update your domain DNS to point at this server.
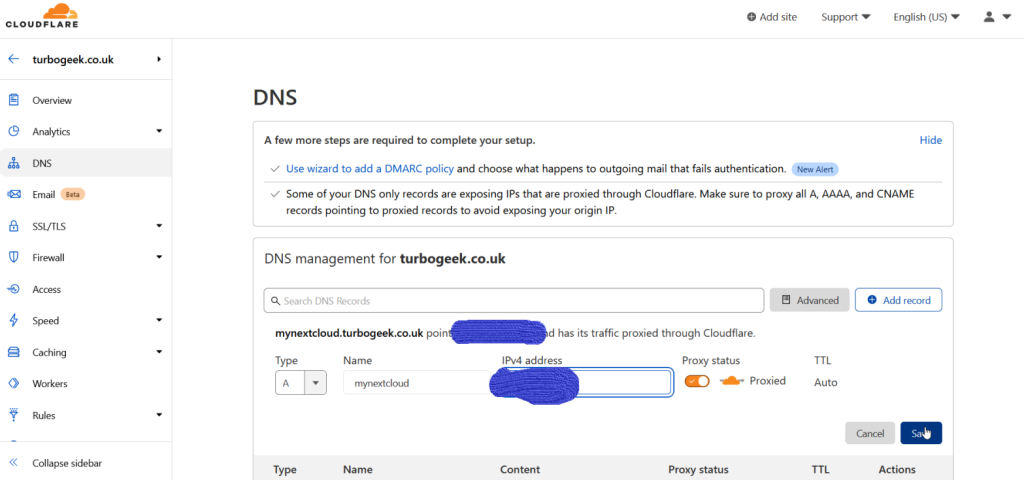
Now, open your web browser and access the Nextcloud using the URL, my example is http://mynextcloud.turbogeek.co.uk. You should see the following page:
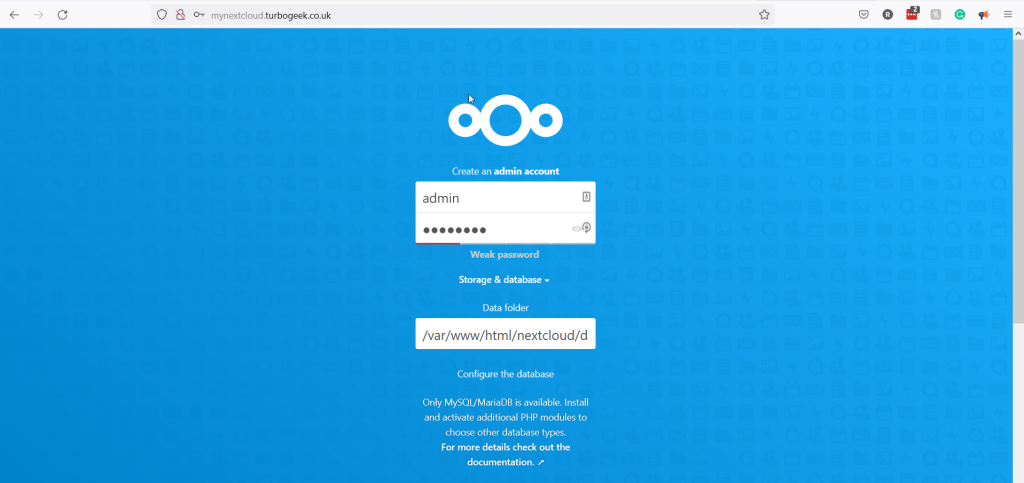
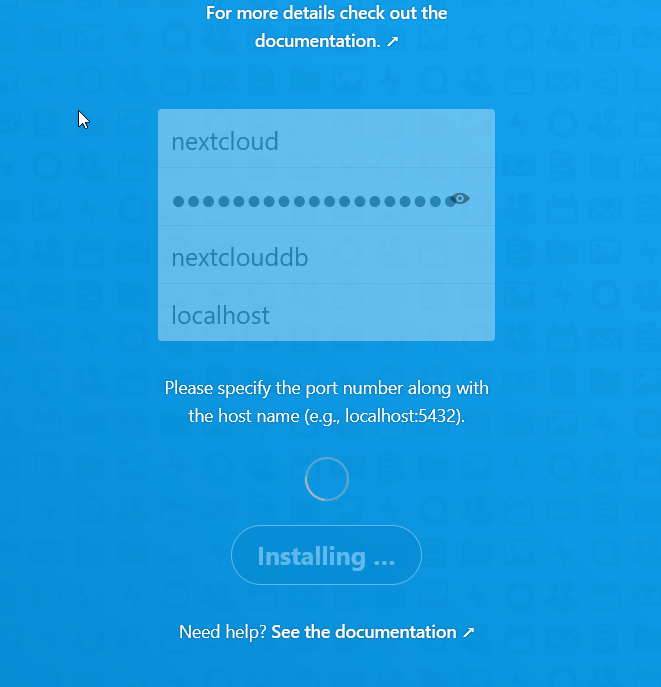
Create your own admin account password and make sure you scroll down and add the database settings we configured in step 3.
Next Steps
Next you will want to get content into Nextcloud. This can be done via Windows, Linux or Mobile. Simply download the client from the nextcloud website and can start sharing your files. https://nextcloud.com/install/#install-clients