

Safe Mode is designed to be temporary. Once you finish troubleshooting, Windows should normally return to the standard desktop on the next restart. If it does not, you usually have a Safe Boot setting, recovery issue, or boot-configuration problem that still needs attention.
If you have not entered Safe Mode yet, start with How to Boot Windows into Safe Mode (Windows 11/10 Guide). If you are already in Safe Mode and want to leave it, follow the methods below in order.
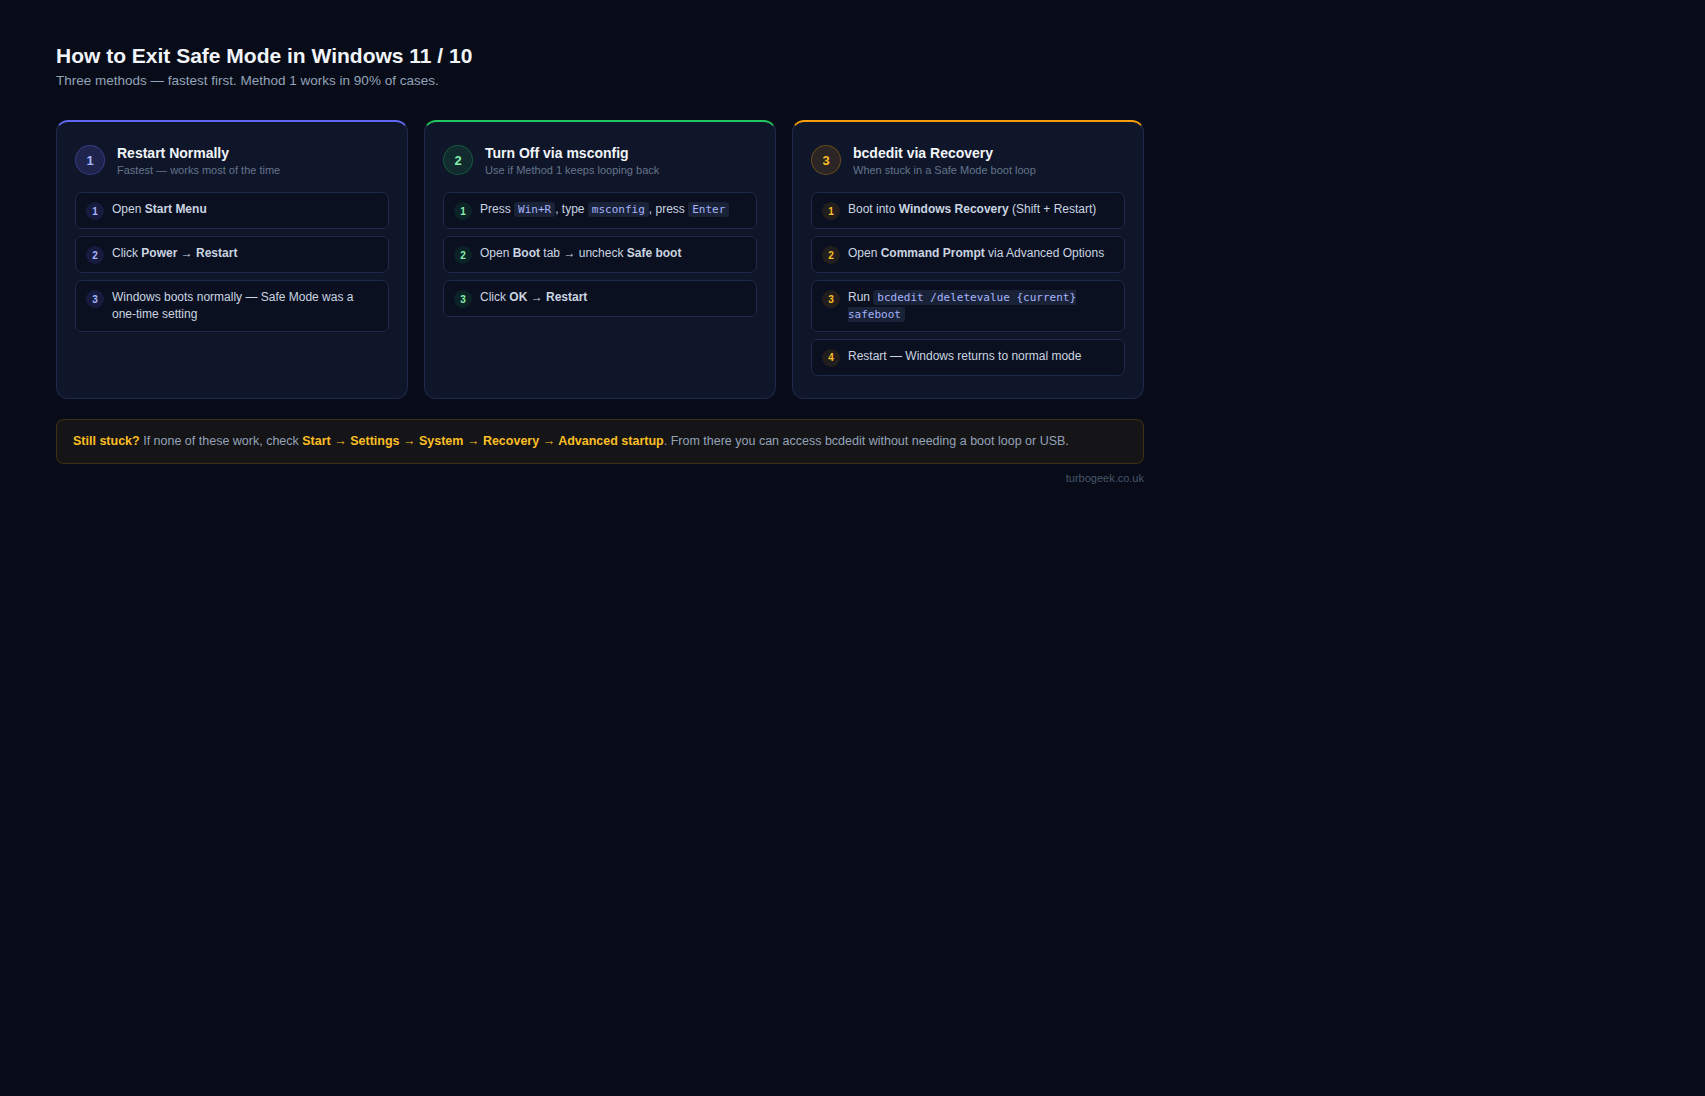
Method 1: Restart Windows normally
If you entered Safe Mode through the recovery menu with Shift + Restart, a standard restart is often enough.
- Click Start.
- Click the Power icon.
- Select Restart.
If Windows boots normally, you are done. If it reverts to Safe Mode, proceed to the next method.
Method 2: Turn off Safe Boot in msconfig
If you used msconfig to force Safe Mode, Windows will keep booting into it until you remove that setting.
- Press Windows + R.
- Type
msconfigand press Enter. - Open the Boot tab.
- Uncheck Safe boot.
- Click Apply, then OK, then restart.
This is the most common fix when a PC is “stuck in Safe Mode.”
Method 3: Use Windows Recovery Environment and bcdedit
If Windows still boots into Safe Mode, use the recovery environment:
- Hold Shift and click Restart to open recovery options.
- Select Troubleshoot > Advanced options > Command Prompt.
- Run:
bcdedit /deletevalue {current} safebootThen type exit and continue back into Windows.
What if Windows still will not return to normal mode?
- Repeat the
msconfigcheck carefully. - Use Startup Repair from the recovery environment.
- Use System Restore if the issue started after a recent driver update or software change.
- Consider resetting this PC only after the simpler recovery steps fail.
After you exit Safe Mode
If you leave Safe Mode successfully but still need to solve the original problem, continue with:
Leave a Reply