
Claude Code hooks let you run your own shell commands before and after anything Claude does. That means you can auto-format, run linters, log every change, or block risky commands entirely — without changing how you work. It’s the missing layer between “Claude did something” and “your project reacted properly.” Once you start using hooks, it’s hard to imagine going back.
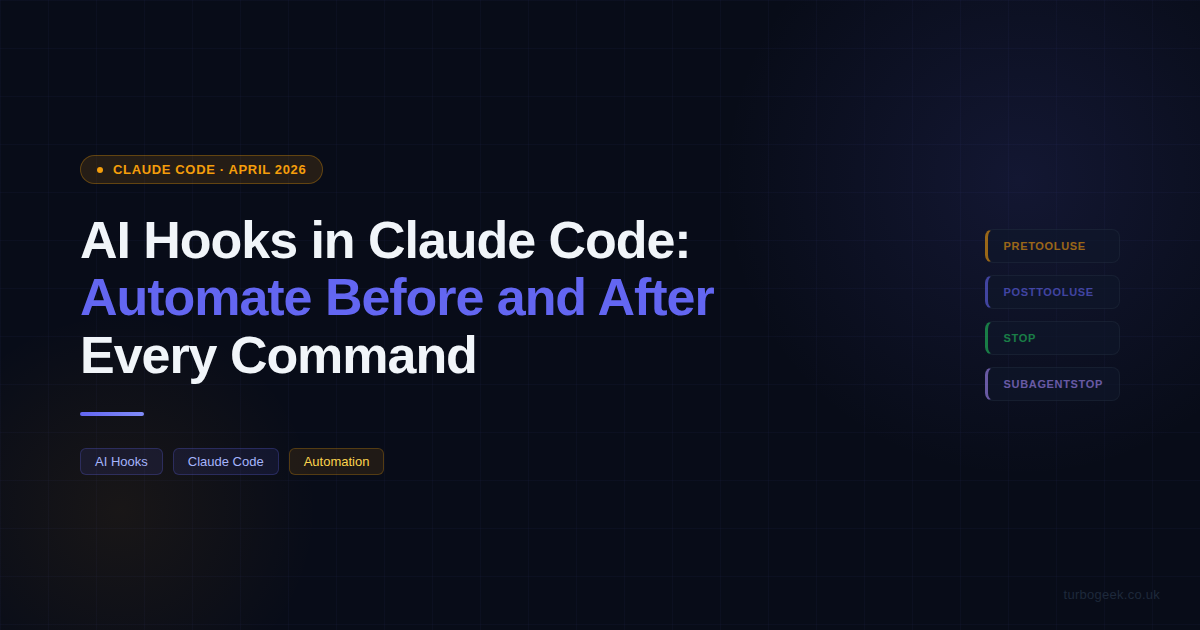
TL;DR — AI Hooks in Claude Code
- Hooks are shell commands registered in
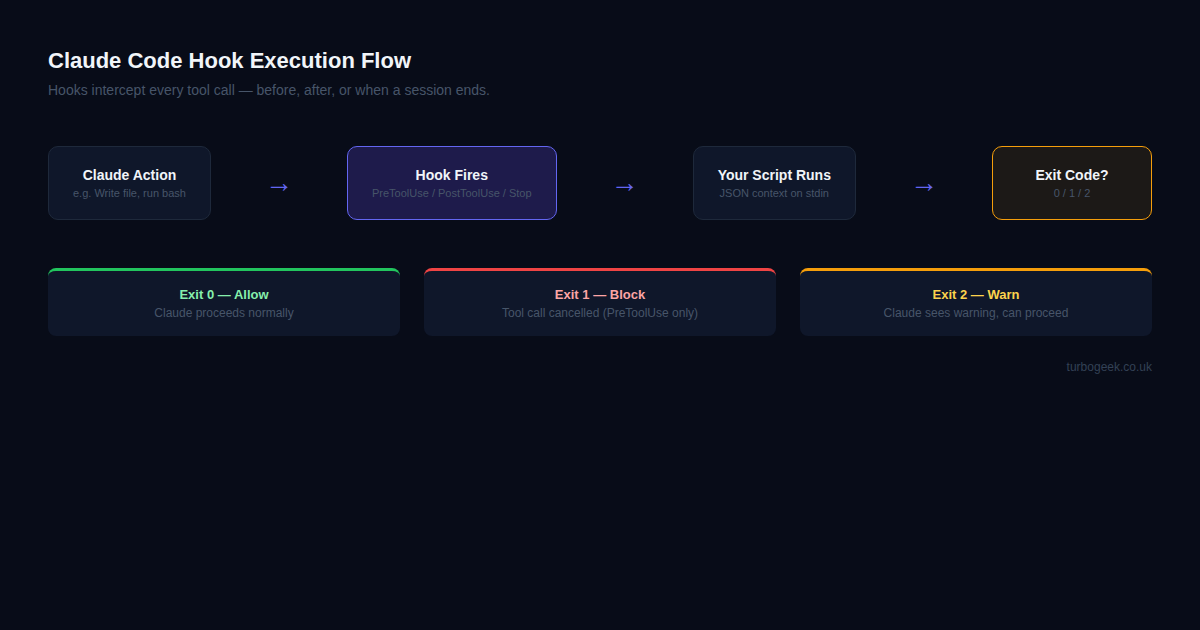
~/.claude/settings.jsonunder a"hooks"key - Four events: PreToolUse (before), PostToolUse (after), Stop (session end), SubagentStop (subagent end)
- Claude passes JSON context on stdin to your script — read it, react to it
- Exit 0 = allow, exit 1 = block (PreToolUse only), exit 2 = warn
- Use hooks to auto-format, run tests, log commands, or block dangerous operations
| Hook Event | When It Fires | Use Case |
|---|---|---|
| PreToolUse | Before any tool call | Block dangerous commands, log actions |
| PostToolUse | After any tool call | Auto-format, run tests, update docs |
| Stop | When Claude finishes a task | Send notification, commit changes |
| SubagentStop | When a subagent finishes | Checkpoint saves, branch creation |
New to hooks? Start with Writing Your First Hook below — the other sections make more sense once you’ve seen a working example.
What Claude Code Hooks Are
Hooks are shell commands you register in ~/.claude/settings.json (global) or .claude/settings.json in your project directory (scoped). They live under a top-level "hooks" key, organised by event name.
When a hook event fires, Claude Code runs your command and passes context as JSON on stdin. Your script reads that context, does whatever it needs to do, and signals back via its exit code. Think of it as middleware for Claude’s actions — the same pattern that makes Express.js middleware and Git hooks so powerful, now applied to every tool call Claude makes.
Hooks are composable. You can stack multiple hooks on the same event, target specific tools with a matcher regex, and mix global hooks with project-level overrides. They’re deliberately low-tech: just shell scripts, so anything you can run in a terminal, you can hook into Claude’s workflow.
The Four Hook Events
Claude Code exposes four lifecycle events you can attach hooks to:
PreToolUse fires before Claude calls any tool — before it writes a file, runs a bash command, or reads something. This is where you can intercept and block. If your hook exits with code 1, the tool call is cancelled entirely. Claude receives a message that the action was blocked, and can decide how to respond. This is the right hook for safety guardrails.
PostToolUse fires after a tool call completes. The context includes what tool was called and what it did. This is the hook for reactive automation — run your formatter after Claude writes a file, kick off your test suite after it edits code, or update a log after every bash command. Exit codes still apply: exit 2 sends a warning back to Claude that it can factor into its next action.
Stop fires when the main Claude agent session ends — when Claude finishes the task you gave it and returns control to you. This is ideal for “done” notifications: send a desktop ping, auto-commit the work, push a branch, or post a Slack message. It fires once per completed session.
SubagentStop fires when a dispatched subagent finishes. If you’re using Claude Code in multi-agent mode (where Claude spawns subagents to handle parallel tasks), each subagent completion triggers this event independently. Good for checkpoints: save state, create a branch, or run partial validation between subagent runs.
Writing Your First Hook
Let’s add a PostToolUse hook that runs npm run lint every time Claude writes or edits a file. Open your ~/.claude/settings.json (create it if it doesn’t exist) and add the following:
Here’s what each part does:
"PostToolUse"— the event to hook into"matcher": "Write|Edit"— only fire when Claude calls the Write or Edit tool (regex match against tool name)"type": "command"— run a shell command"command": "npm run lint --silent"— the actual command; runs in the project’s working directory- The Stop hook shows how to point to an external script — useful when your hook logic gets complex
After saving, the hook is live immediately — no restart required. Next time Claude edits a file, your linter runs automatically.
Real-World Hook Recipes
Here are five hooks I use regularly or recommend as starting points:
1. Auto-run tests after file edits
2. Log every Bash command to an audit log
Register it with: "matcher": "Bash", "command": "~/.claude/hooks/audit-bash.sh" under PostToolUse.
3. Block rm -rf entirely
Register under PreToolUse with a Bash matcher. Exit 1 blocks the tool call before it runs.
4. Desktop notification when Claude finishes
Register under Stop (no matcher needed — Stop has no tool context). Works on both Linux (notify-send) and macOS (osascript) via the fallback.
5. Auto-commit when Claude stops
Advanced Patterns
Chaining hooks. You can register multiple hooks on the same event. Claude Code runs them in order. Each hook gets the same stdin context. If any PreToolUse hook exits 1, the chain stops and the tool call is blocked. Use this to separate concerns — one hook for logging, another for validation, a third for notifications.
Environment variables in hooks. Claude Code exposes a few useful variables to hook scripts: CLAUDE_PROJECT_DIR points to the root of the current project, and CLAUDE_SESSION_ID identifies the current session. Use these to make hooks that behave differently per project without hardcoding paths.
Debugging hooks. If a hook isn’t firing or isn’t doing what you expect, set CLAUDE_DEBUG=1 before starting Claude Code:
This enables verbose output including hook execution, which command ran, and what exit code it returned. Worth pairing with stderr output in your hook scripts for fast debugging cycles.
Project vs global hooks. Global hooks in ~/.claude/settings.json apply everywhere. Project hooks in .claude/settings.json apply only in that directory. Project hooks layer on top of global ones — they don’t replace them. This lets you keep a global audit hook running everywhere while adding project-specific formatters only where they make sense.
Frequently Asked Questions
What are Claude Code hooks?
Shell commands that fire automatically before or after Claude Code performs an action, configured in ~/.claude/settings.json or a project's .claude/settings.json file.
Can hooks stop Claude from running commands?
Yes. A PreToolUse hook that exits with code 1 will block the tool call. Claude receives the block and can explain what happened.
Where are Claude Code hook settings stored?
In ~/.claude/settings.json globally, or in .claude/settings.json within a project directory for project-specific hooks.
Do hooks slow Claude Code down?
Only if your hook is slow. A quick linter or a log write adds milliseconds. If you’re running a full test suite on every keystroke, you’ll feel it. Use matchers to be selective about which tool calls trigger heavy hooks.
Can I pass data back to Claude from a hook?
Not directly via stdin/stdout. But a hook that exits 2 (warn) can surface a message that Claude sees and can react to. For richer feedback loops, write to a file and have Claude read it, or use the warn mechanism with a descriptive message on stderr.
For the complement to hooks — reusable instruction sets that load when you need them — the Claude Code Skills post covers building and using skills in depth. Together, hooks and skills give you full control of how Claude Code behaves in your environment.